
Amazon S3 (Simple Storage Service) is a scalable and secure cloud storage solution offered by Amazon Web Services (AWS). With use cases ranging from data storage to hosting, it can suit both smaller and larger organizations. Our article describes the numerous benefits it brings in light of the different applications. It also explains how to use Amazon S3 objects and buckets to upload and access your data. You’ll also learn how to mount Amazon S3 as network drive for even greater ease of use.
Table of Contents
Create Amazon S3 bucket
To learn how to use Amazon S3 for file storage, you need to get acquainted with the so-called ‘buckets’. Buckets act as containers for the objects you store. An object is a file along with the metadata that describes it.
To create a bucket, follow these steps:
Step 1: Go to the AWS Management Console and sign in to your AWS account. Select Amazon S3 from Services > Storage.
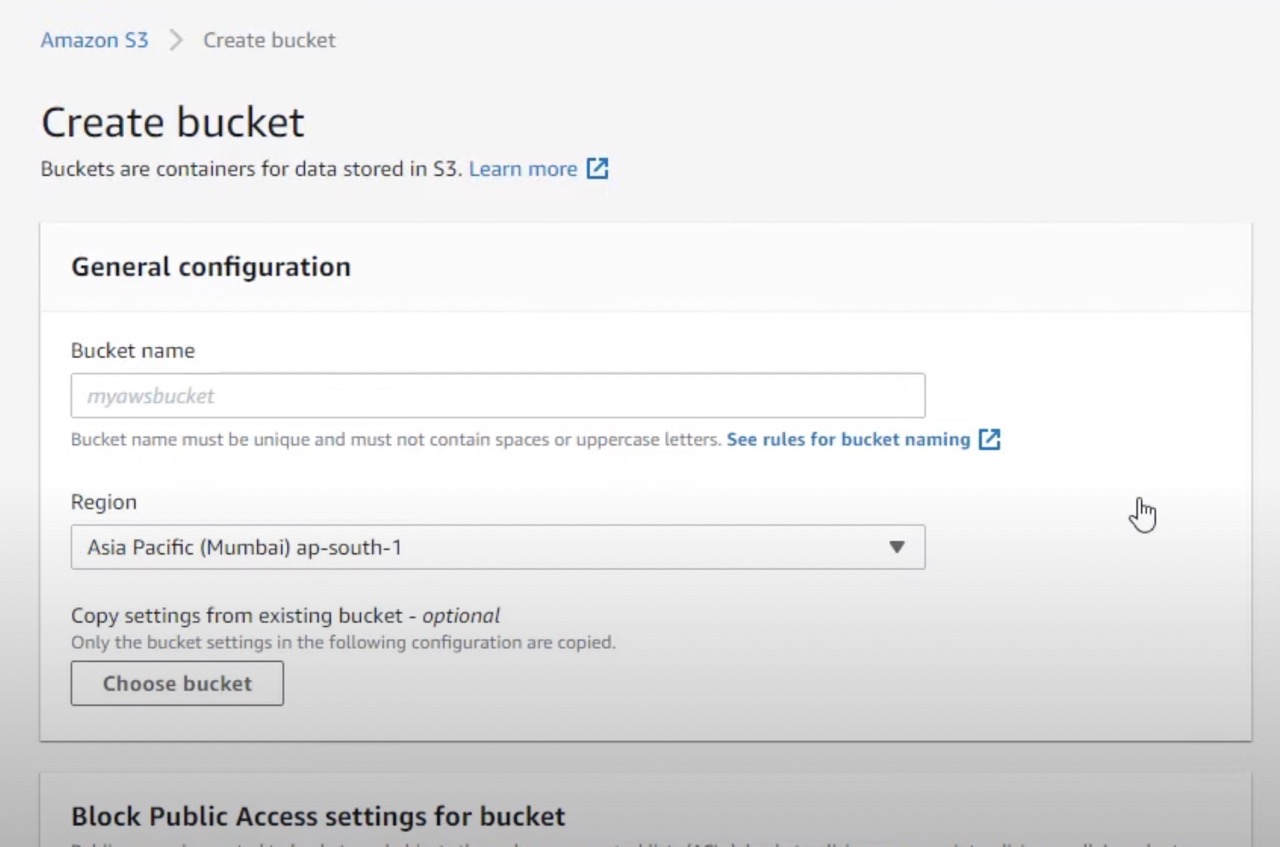
Step 2: Choose Create bucket. This will launch the Create bucket wizard.
Step 3: In Bucket name, type a unique name. Make sure it complies with the Bucket naming rules. Once you enter a name, you cannot change it.
Step 4: In Region, select where you want the bucket’s contents to be stored. Choosing AWS regions that are close to you or your audience minimizes latency and costs and helps you adhere to regulatory requirements.
Step 5: In Object Ownership, choose whether to enable or disable access control lists (ACLs). This determines who can specify access to objects. For example, with “Bucket owner enforced” ownership, access is specified using only bucket policies. You’ll find a description under each option.
Step 6: In Block Public Access settings, you can select “Block all public access” or customize the blocking settings if you do need certain public access to this bucket or its objects.

Step 7: Next, Bucket versioning is disabled by default, but you can enable it if you wish to keep multiple variants of an object in the same bucket.
Step 8: Tags are optional. You can add them now or later to track storage costs or other criteria.
Step 9: Default encryption is disabled by default. It determines whether server-side encryption is enabled for the objects to be stored in the bucket.
Step 10: Select “Create bucket”. Your new bucket will now be visible on the Amazon S3 home page.

CloudMounter – an easy way to mount your S3 bucket on Mac and Windows
To further improve data accessibility, CloudMounter lets you mount Amazon S3 as drive on your computer. This means you can access a single bucket, several buckets, or your entire Amazon S3 account from your file browser.
How to mount Amazon S3 using CloudMounter
Step 1: Download CloudMounter from the official website and install it on your computer.
Step 2: Launch the application. From the list of available connections, choose Amazon S3.
Step 3: Enter your desired name for the new connection.
Step 4: Go to the AWS Management Console > Security Credentials to copy the Amazon S3 Access Key, Secret Key, and Server endpoint. Paste them in CloudMounter.
Step 5: In “Bucket”, enter the name of the bucket you wish to access. Alternatively, you can enter its root directory. If you wish to access all of your Amazon S3 account’s contents, leave this field blank.
Step 6: Click on “Mount” at the bottom to complete the process. Your Amazon S3 bucket will now be visible in your computer’s file browser.

How Does Amazon S3 Work?
Here you will find a quick AWS S3 tutorial with step-by-step instructions on how to complete all basic tasks within a bucket. These involve uploading and downloading an object, copying it to organize into folders, as well as deleting objects and buckets.
Upload an object to a bucket
Step 1: Open the Amazon S3 console.
Step 2: Go to the Buckets list and select the name of the bucket that you wish to upload your object to.
Step 3: Choose Upload.
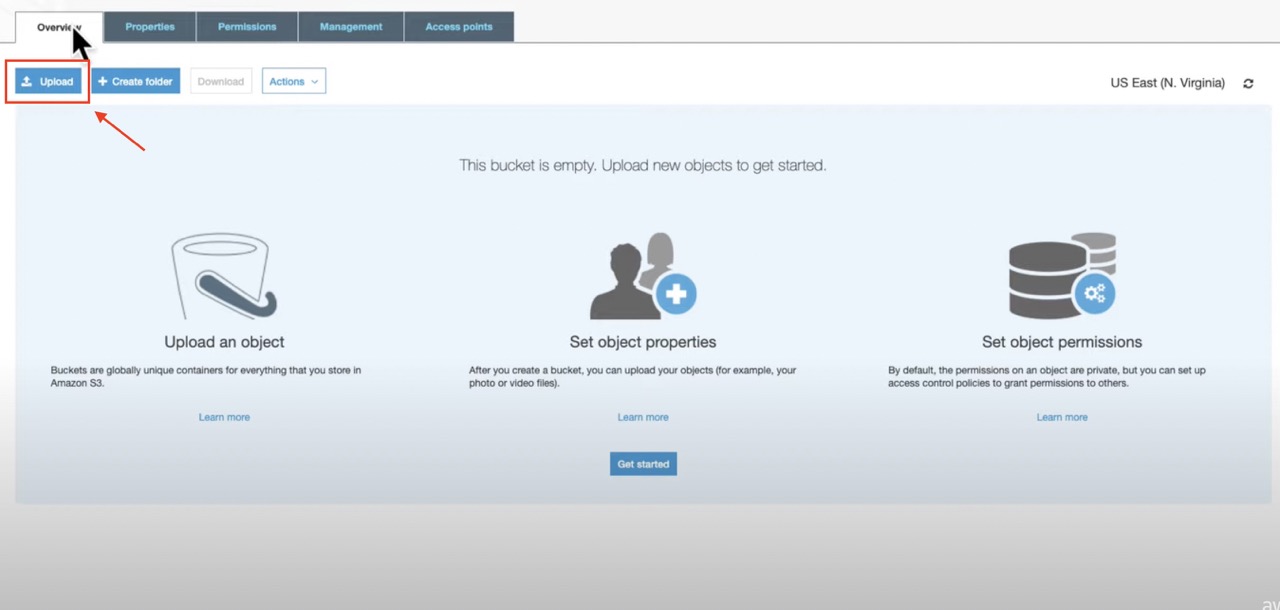
Step 4: An Upload window will open. You can either drag and drop your files and folders directly into the window, or select “Add file” or “Add folder”, click on the desired files or folders, and choose “Open”.

Step 5: If necessary, versioning can be enabled here from Destination > “Enable Bucket Versioning”.
Step 6: Choose Upload.
Download an object
Step 1: Open the Amazon S3 console.
Step 2: Go to the Buckets list and select the name of the bucket that you wish to download your object from.
Step 3: To download your object, you can either:
- Select the object, then choose “Download”. To download the object to a particular folder, choose “Download as” from the Actions menu.
- To download a specific version of the object, choose “Show versions” and choose your desired object version. Choose “Download” or “Download as” to download to a specific folder.
Copy your object to a folder
Step 1: Choose your bucket name from the Bucket list.
Step 2: Select “Create folder” and select the following:
- Enter a folder name.
- Disable the folder encryption setting.
- Click “Save”.

Step 3: Go to the Amazon S3 bucket or folder with the objects that you wish to copy.
Step 4: Select your desired objects by clicking the check box to the left of the object names.
Step 5: Choose Actions > Copy, or select “Copy” in the upper right-hand corner.

Step 6: To select a destination folder:
- Choose Browse S3.
- Choose the option button next to the folder name. If you wish to choose a subfolder within a folder, click on the folder name.
- Select “Choose destination”. Alternatively, you can use the Amazon S3 path to your destination folder and type that in the Destination box. For example, s3://bucket-name/folder-name/.
Step 7: Choose “Copy” in the bottom right.
Delete your objects and bucket
To delete a specific object or objects within your bucket:
Step 1: In the Buckets list, select the name of the bucket that contains the object you wish to delete.
Step 2: To select an object to delete, tick the check box to the left of its name.
Choose “Actions” > “Delete”. Alternatively, you can choose “Delete” in the upper right.
Step 3: If you’re required to confirm the action, type “permanently delete”.
Step 4: Choose “Delete objects” in the bottom right.
If you wish to delete an entire bucket, you need to empty the bucket first. Follow these steps:
Step 1: In the Buckets list, select the bucket you wish to empty, then click “Empty”.
Step 2: To confirm your decision, type “permanently delete” in “Empty bucket”. Note that you cannot undo this action. Once emptied, the bucket’s content cannot be restored.

Step 3: Choose “Empty” to delete all objects within the bucket.
An “Empty bucket: Status” is displayed to indicate failed and successful object deletions.
Step 4: Choose Exit to go back to your bucket list.
To delete a bucket after emptying it:
Step 1: In the Buckets list, select the respective bucket.
Step 2: Choose “Delete”.
Step 3: To confirm the action, you need to type the bucket name in Delete bucket. Note that the deletion cannot be undone. While you could create a new bucket with the same name, it’s also possible that another user may take the name in the meantime. Bucket names are unique, therefore it’s best not to delete a bucket if you plan on using it in the future.

Step 4: Select “Delete bucket”.
Amazon S3 use cases
Amazon S3 can provide a solution to various challenges. Some of the most common use cases include:
- Data storage – It provides a scalable way to store data while helping organizations manage costs, reduce latency, comply with regulatory requirements, etc.
- Backup file system – You can use Amazon S3 for backup and disaster recovery. It provides availability and durability for critical data, while also storing multiple versions of each file through Amazon S3 versioning.
- Data archiving – It offers long-term retention and digital preservation through three archive storage classes built for retrieval flexibility and cost-effectiveness.
- Analytics – You can build and store your data lakes on Amazon S3, which allows you to combine with other AWS services for big data analytics, data movement, predictive analytics and machine learning, etc.
- Application and website hosting – You can deploy, install, and manage web applications. There are different web hosting solutions such as static web hosting.
- Media hosting – Host video, image, or music uploads and downloads.
- Software delivery – Allow your customers to download your software applications.
For more information and guidance, you can visit the AWS Solutions Library where solutions are classified by industry, organization type, and technology.
AWS S3 Benefits
Amazon S3 provides a robust, high-performance storage infrastructure with a number of benefits. Some of the key advantages of the service include:
- Scalability – Amazon S3 allows you to scale your storage resources up or down depending on your organization’s needs. As opposed to other storage providers’ fixed solutions, this provides superior flexibility.
- Low cost – It’s a budget-friendly solution because of the way that Amazon S3 pricing is structured. You’re only charged for the amount of data you use, instead of the data you store. Based on your access pattern, you can select different AWS S3 storage classes for frequently accessed data, archive data, etc. You can even set an S3 Lifecycle policy for your data where it will automatically transfer to a different storage class if necessary.
- Availability and durability – It provides high data availability through zones or regions. Also, objects are stored on multiple devices across a minimum of three Availability Zones in an AWS Region in order to ensure optimum data protection. This results in a 99.999999999% durability from site-level failures, errors, and threats.
- Security – Amazon S3’s encryption features and access management tools protect your data from unauthorized access. Access is granted with a combination of features such as AWS Identity and Access Management (IAM); Access Control Lists (ACLs); bucket policies, etc. Data is protected using Amazon S3 server-side encryption, (AES-256).
- Easy management – Amazon S3 has a flat, non-hierarchical structure for easy storage management. You can monitor and control your costs using bucket tags, analyze storage use, perform class analysis to improve your S3 Lifecycle policies, etc.
Conclusion
Amazon S3 is a scalable, secure, and cost-effective AWS cloud storage resource. Organizations of different sizes use it for everything from data storage and archiving to web hosting. With our AWS tutorials for beginners above, you’re now able to create, access, and delete your objects and buckets. By mounting Amazon S3 as a local drive with CloudMounter, you will gain swift access to your data directly from your computer.
FAQ
Amazon S3 bucket is a cloud storage solution that’s relatively simple in terms of the feature set, yet strong in scalability, performance, and security. It’s aimed at businesses of various sizes and industries, allowing them to store their data and access it quickly and reliably around the globe.
This solution has various use cases. For example, it works for data storage, backup, and recovery. It’s also great for archiving due to the cost-effective storage classes. In addition, you can use Amazon S3 for web hosting (including static websites), application and media hosting.
Amazon S3 is accessed and managed through a web interface. For easier access though, you can use a tool such as CloudMounter to mount S3 as a local hard drive on your PC or Mac. This way, you can access all your buckets and objects straight from your file browser. It’s especially convenient if you’re using multiple cloud services at the same time.
You could, depending on your particular needs. Both are cloud computing solutions with various benefits. S3 users praise the service for its scalability, durability, pay-as-you-go model, as well as its comptibilty with other AWS services. It does, however, use the object storage principle, i.e. a flat environment. On the other hand, users upload Google Drive files into a hierarchical file storage system. They appreciate its user-friendliness and smaller learning curve, easy public sharing, etc.
AWS Storage Gateway provides a virtual on-premises file server. It allows you to store and retrieve Amazon S3 objects using standard file storage protocols.


