So, some of my friends think i’m paranoid. You never know these days who’s trying to steal your information… governments, hackers, little brothers… they all seem to want a piece of the action. Want to stop them dead in their tracks? First an aside, disable the automatic account login on first boot. If someone has access to your machine you’re screwed. Anyway, here’s a quick tutorial on created an encrypted password protected area for your files.
Now, for the actual tip.
We will be creating an empty .dmg (disk image) file that you can password protect and store important data in (ie. Bank Info, Passwords, Videos of a certain nature that your wife won’t enjoy… ahem!, I digress).
Step 1: Open up the disk utility program.
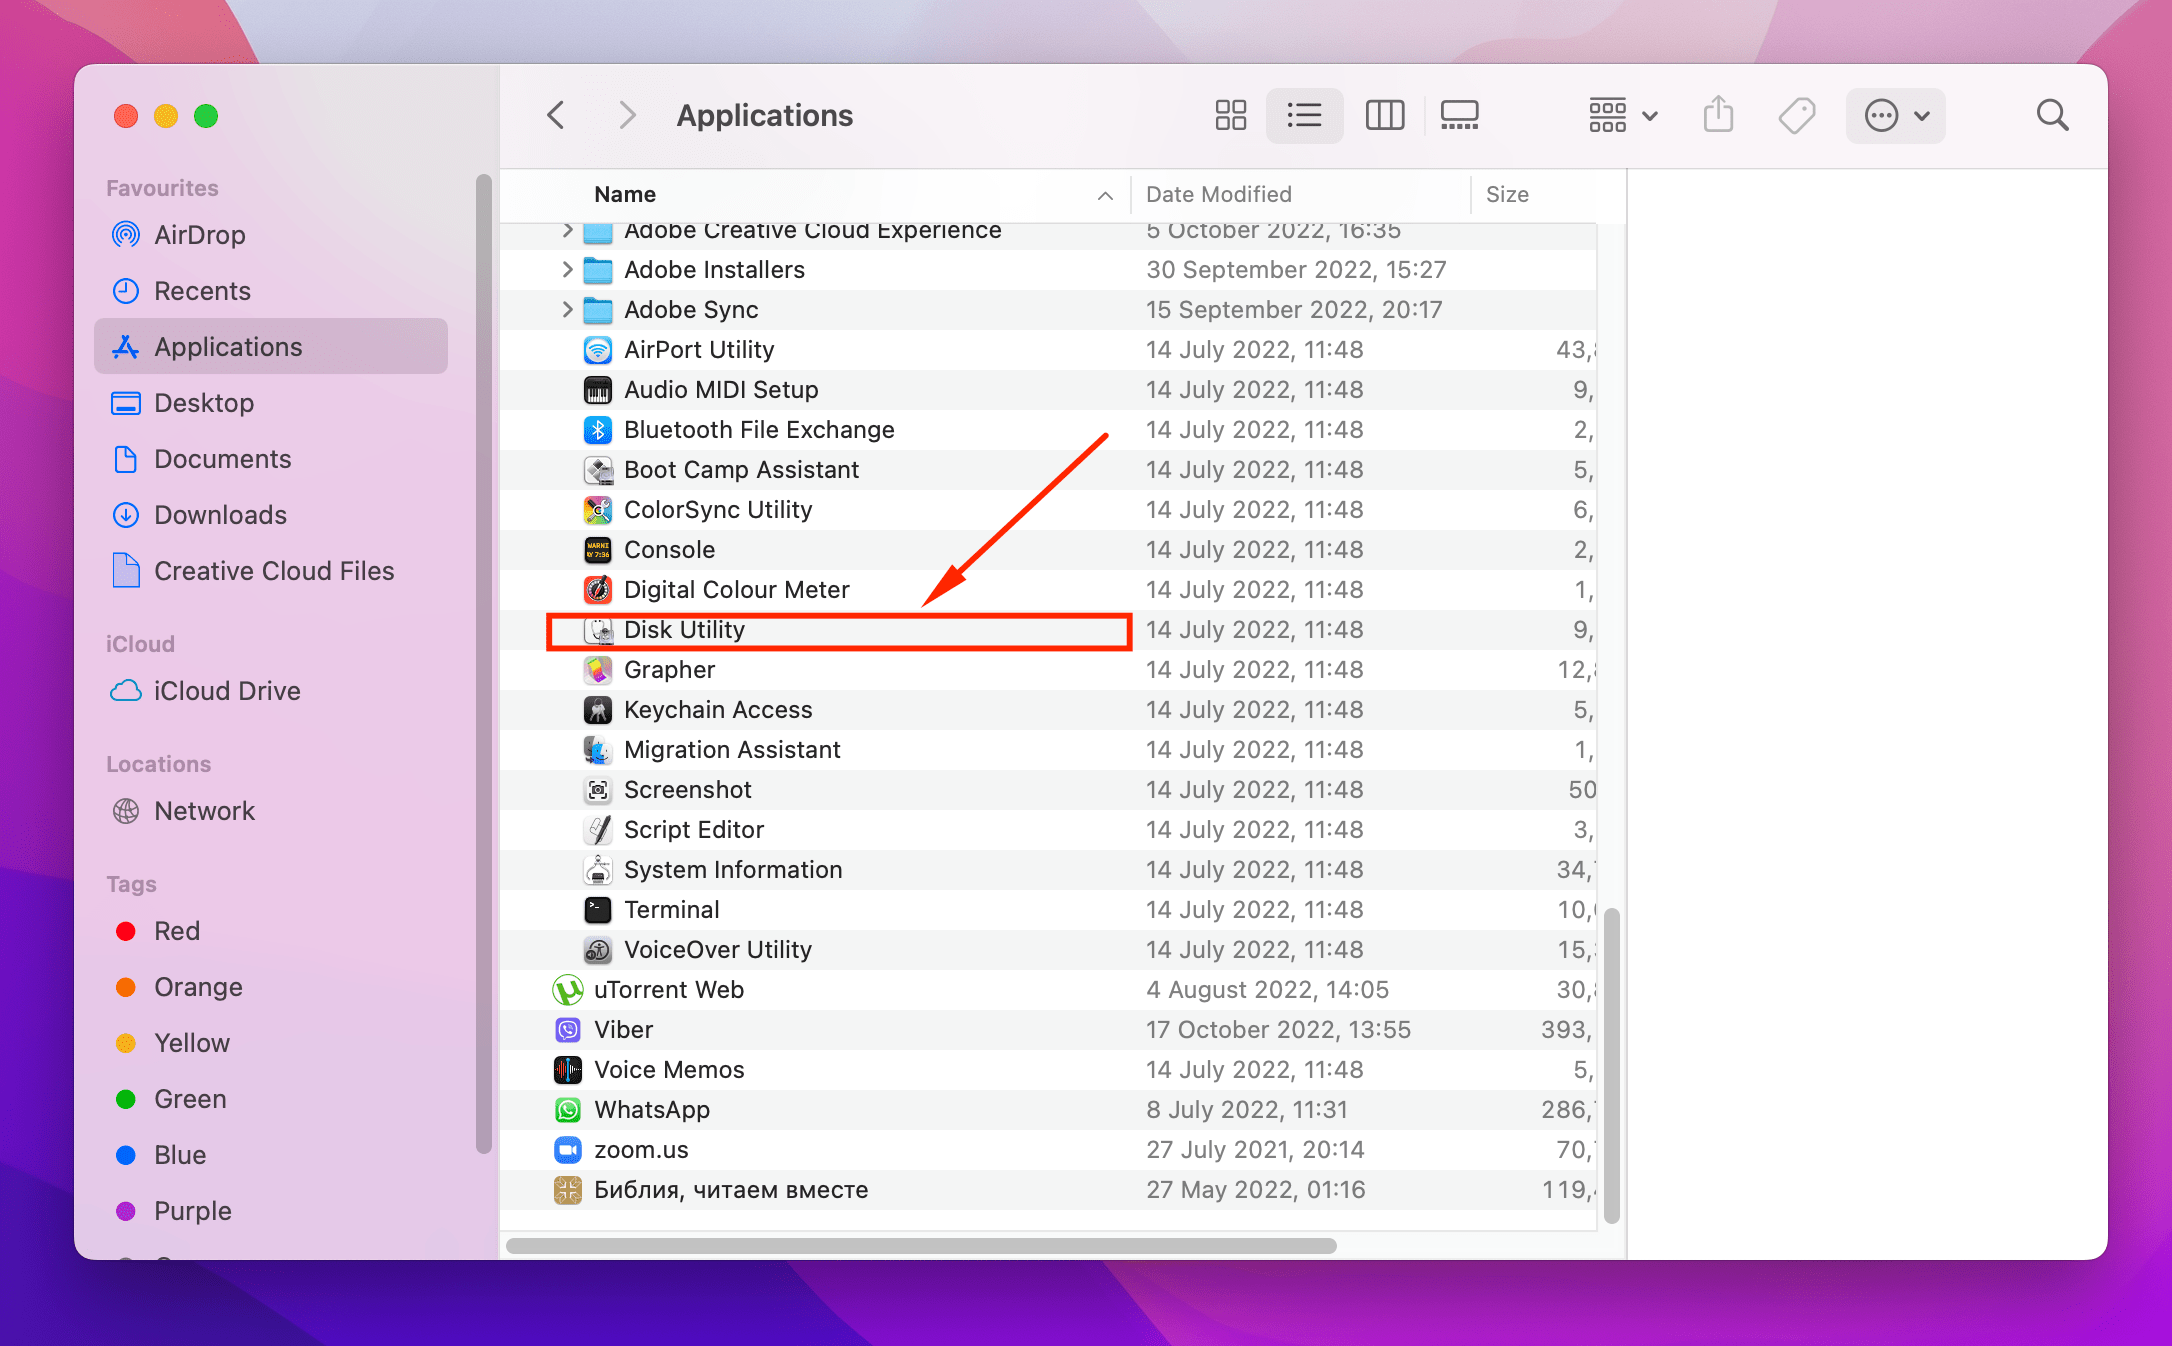
- It will be in Applications/Utilities.
- Or, you could use spotlight. Push Apple+Spacebar. You should see a blue search box in the top right corner of your screen.
- If you used the spotlight method just type in disk utility and it should find the
application for you. Use the arrow keys to go to the right application and push enter.
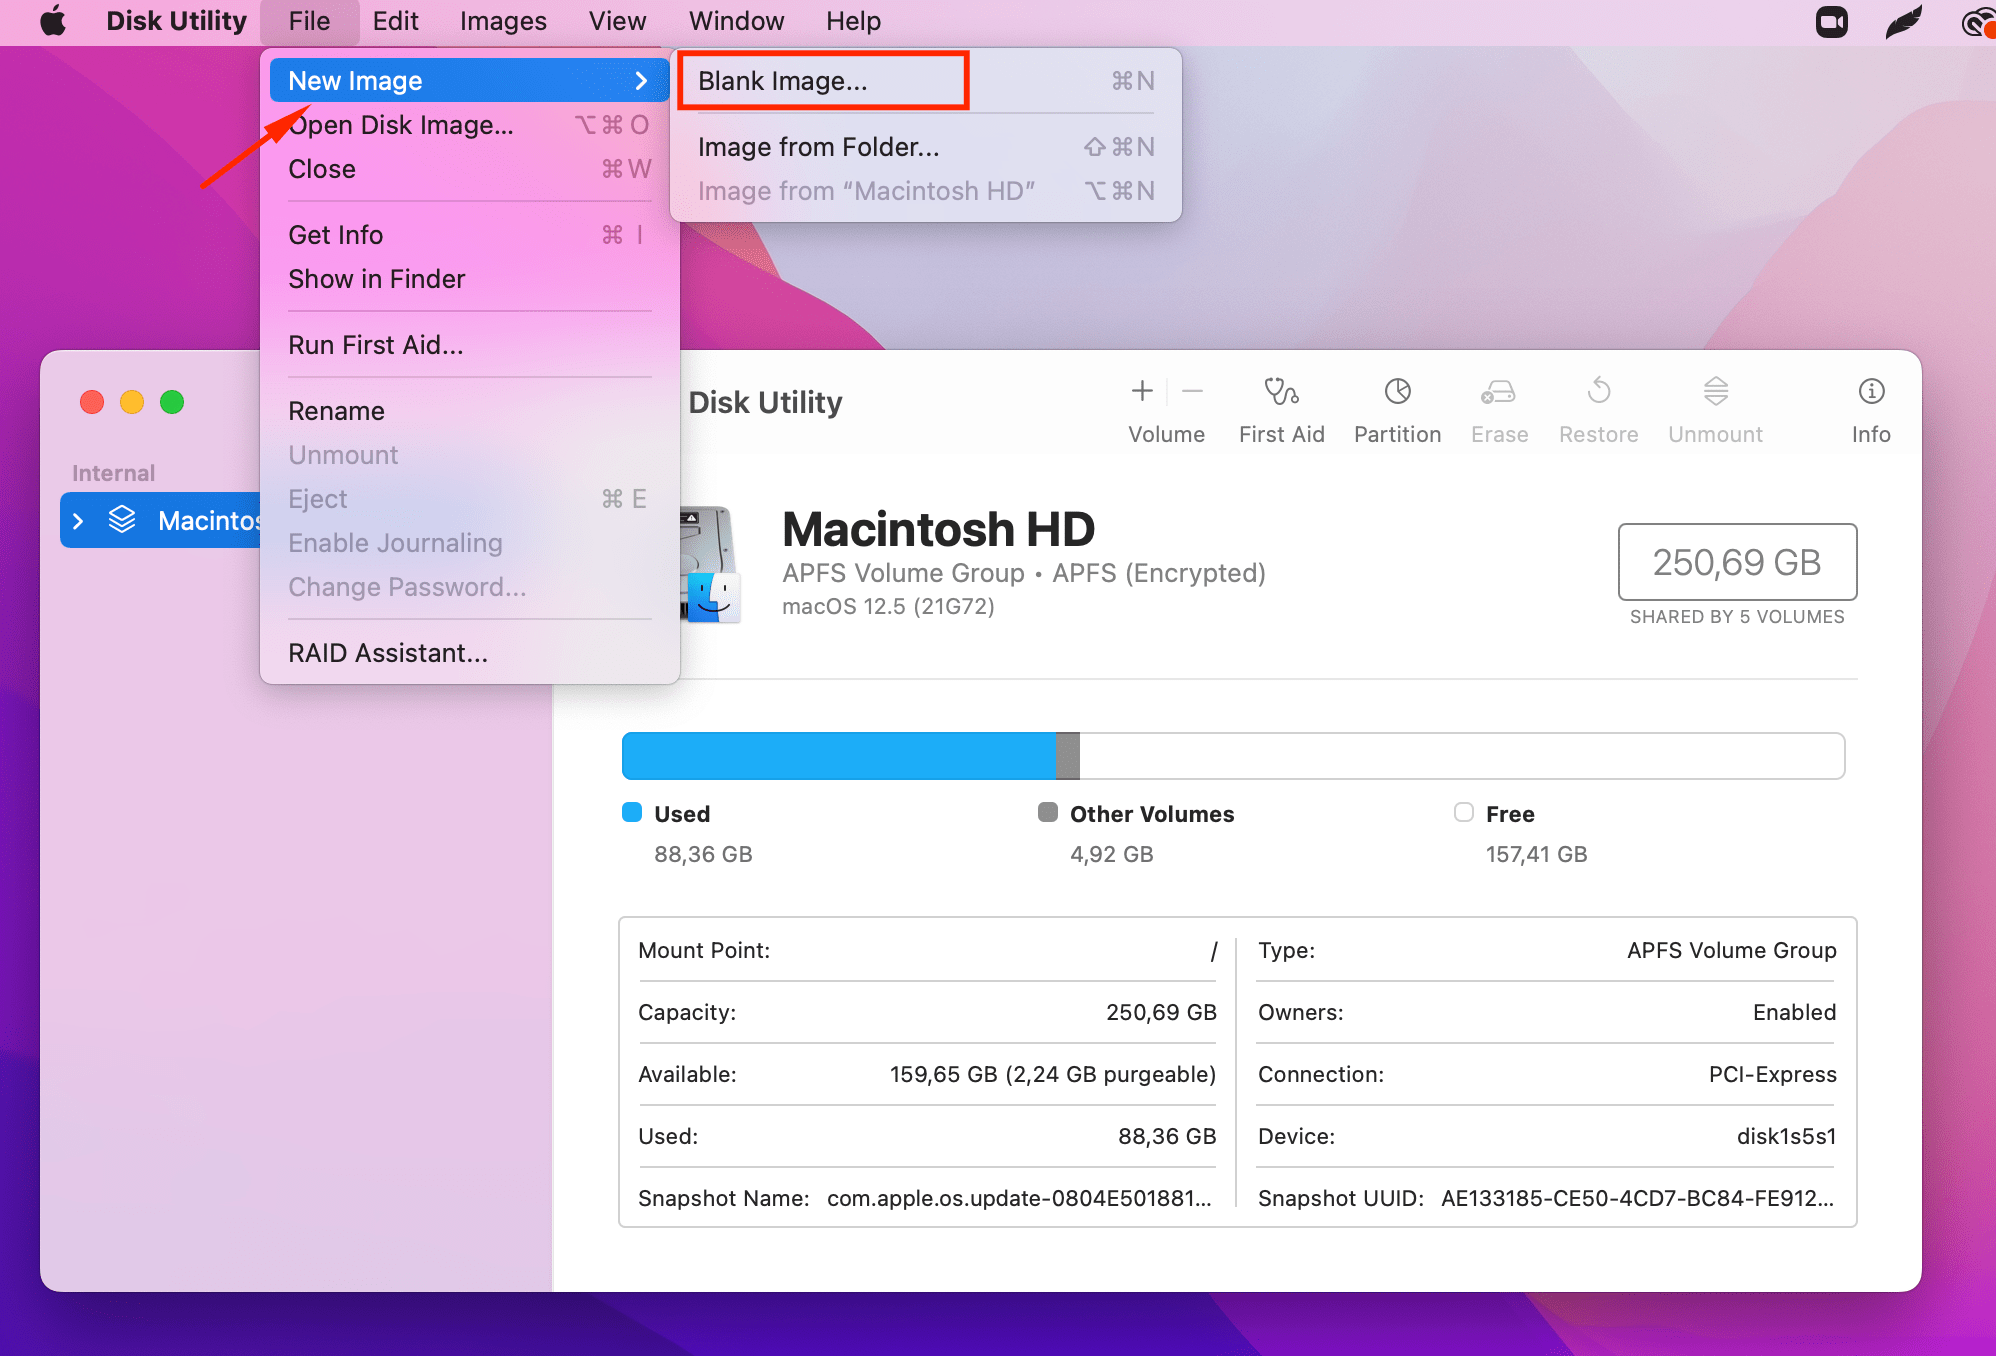
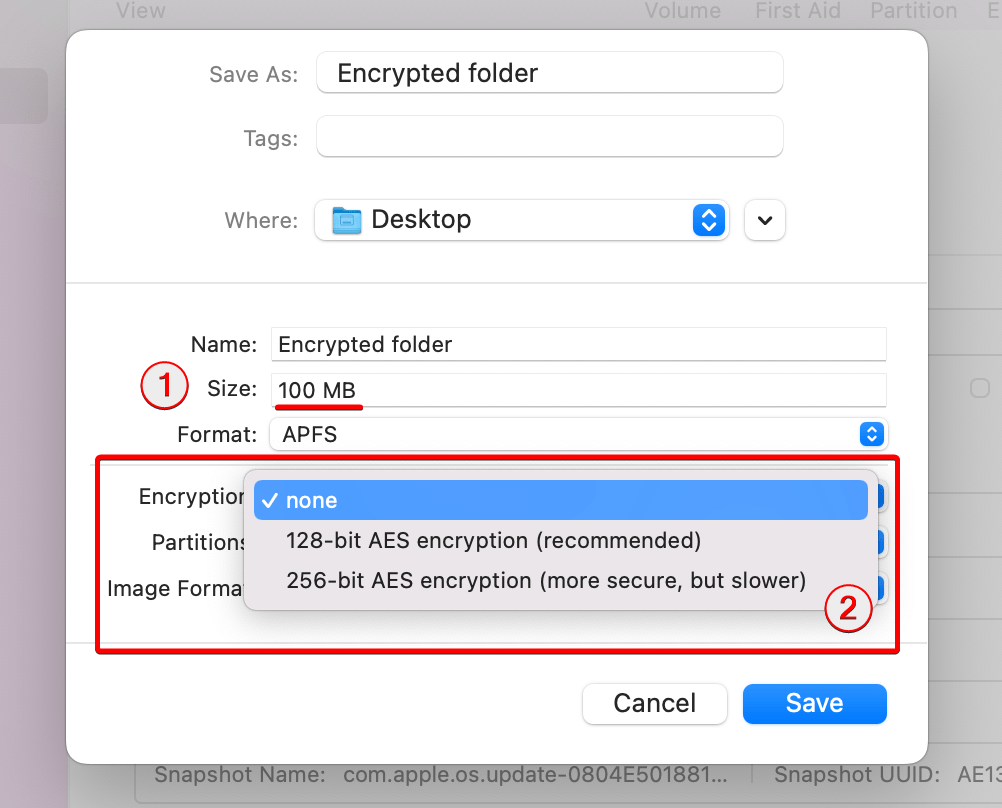
Step 2:Click on the “New Image” icon in the top toolbar.
Step 3:In the save as box write the name you want it to have, and then pick the location of where you want to save it.
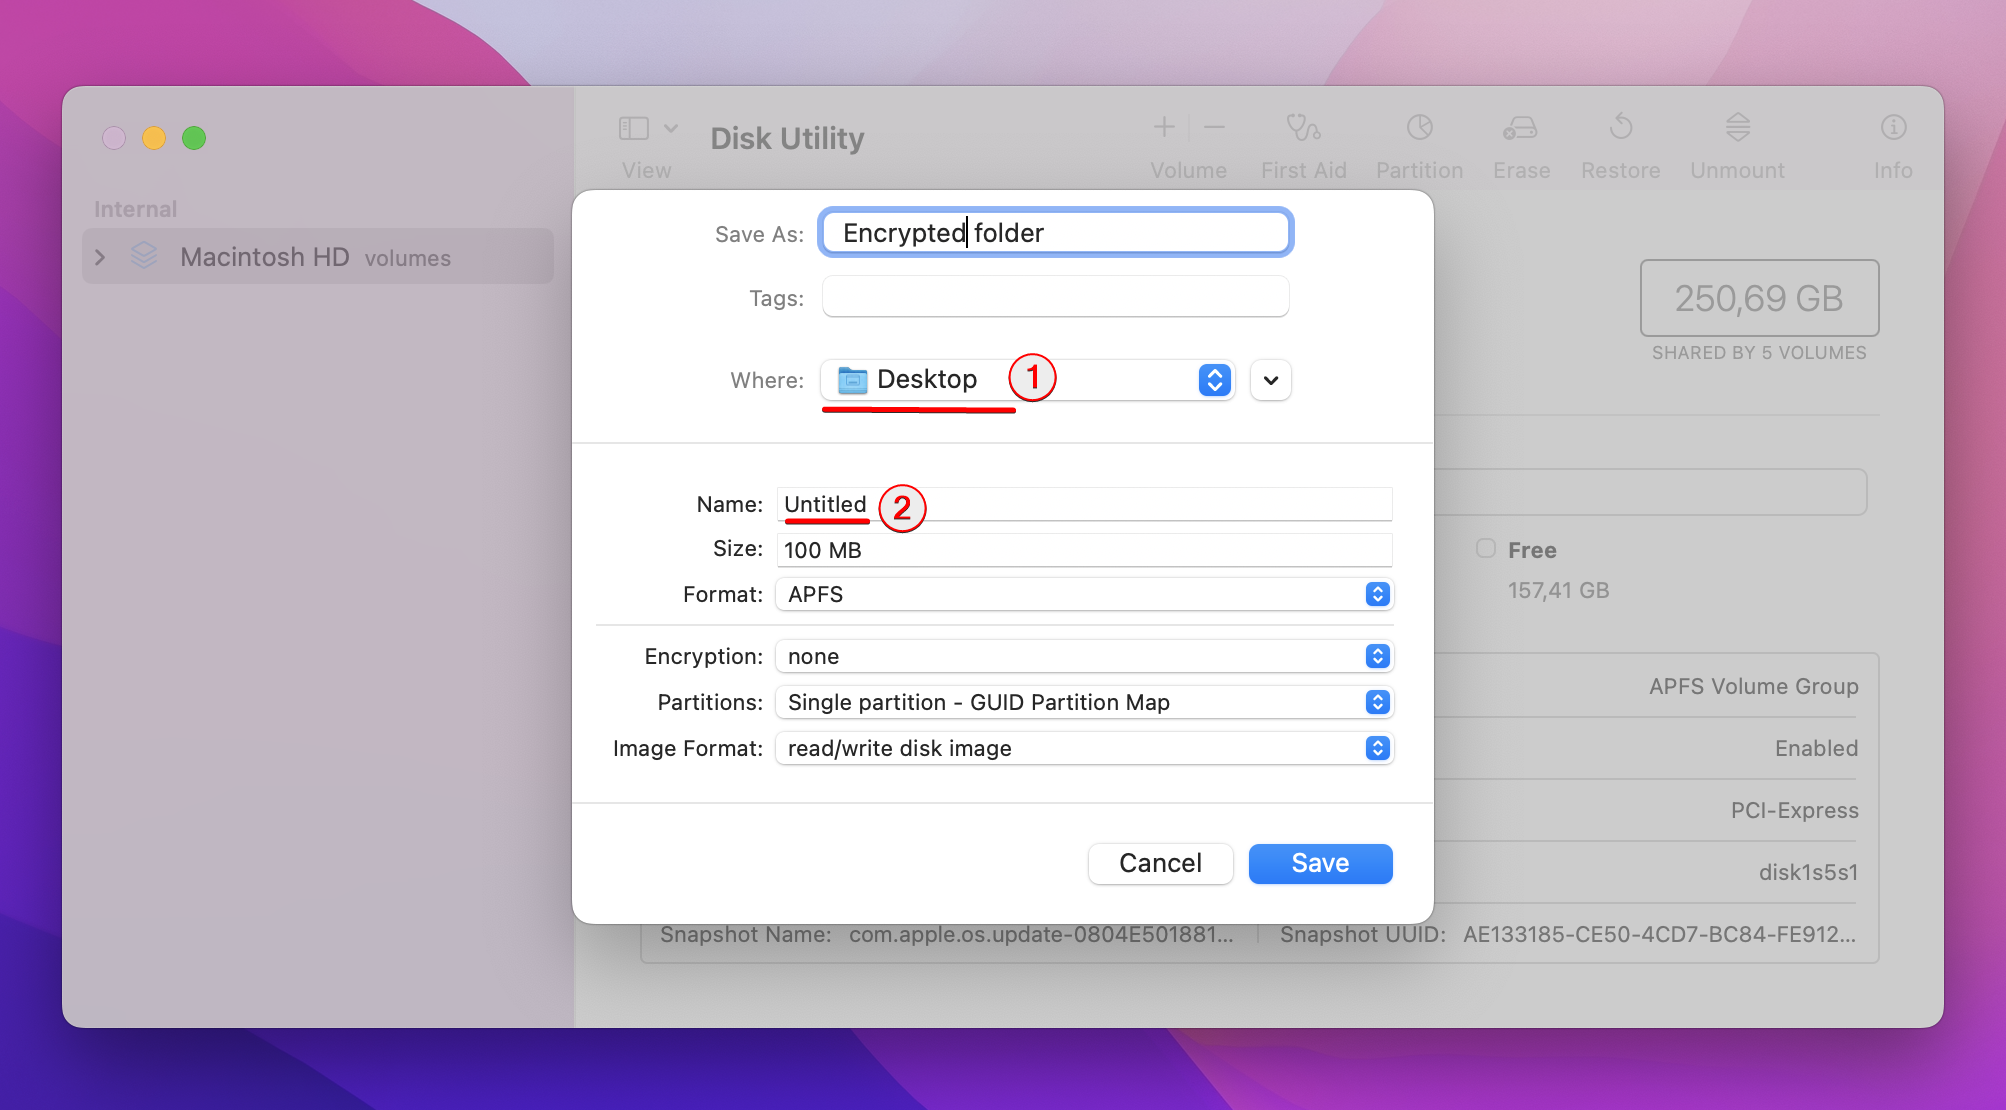
Step 4:Select the size and encryption method. Generally speaking you want to have a size big enough to store all the information you need. So pick something rather large. Now you want to encrypt that image so that if anyone gains access to your machine they will be unable to steal the information that is present inside. Pick the AES encryption method.
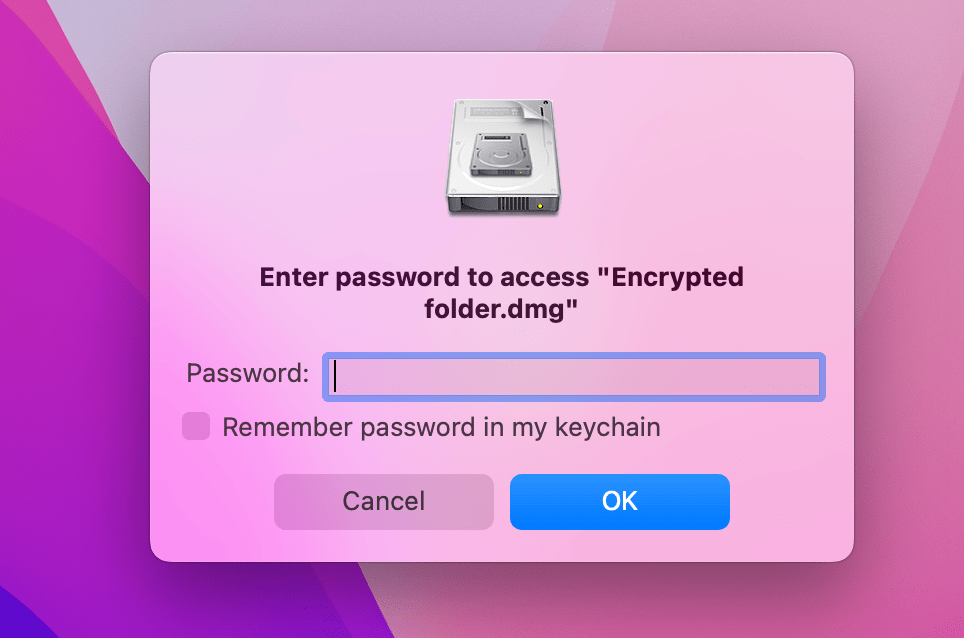
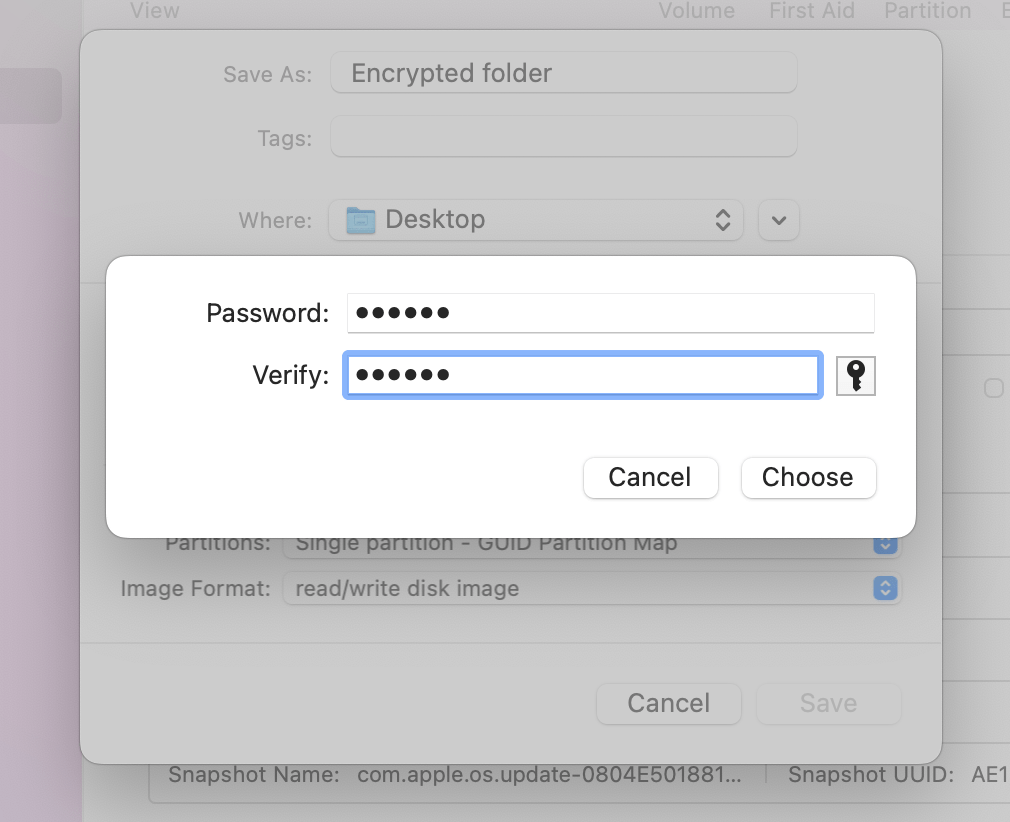
Step 5:You will be prompted to enter a password, and to verify the exact same password. Enter what every you want. Make sure its something no one will guess to easily.
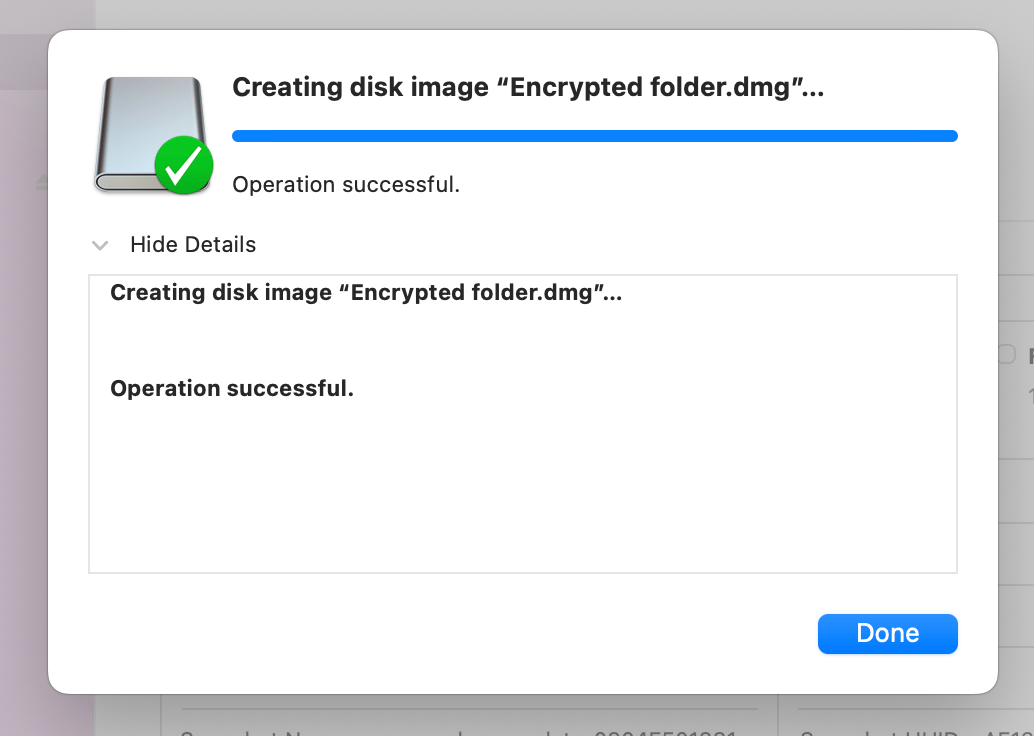
Step 6:Click Save.
Step 7:Uncheck remember password. The last thing you want is someone mounting this image and having the password already entered for them. It kind of defeats the purpose of this whole tutorial if you leave it checked.
Step 8:Click Done.
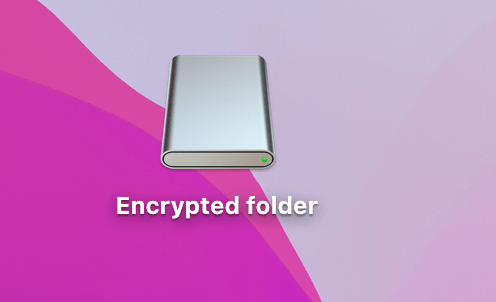
Step 9:Now the easy part. On your desktop you will see a white mounted image, or Icon with the name you selected. Treat it like a folder and put some files into it.
Step 10:When you are done you will want to “eject” the folder. Ctrl+Click, or right click if you are using a two button mouse, and select eject. This will remove the white folder from your desktop. All the information that you placed into that white mounted folder is now stored in the location that you originally selected, in the file name you chose.

Step 11:To re-open the disk image you need to double click that file, it’ll be something that ends in .dmg. You will be prompted for a password and if it is correct, it will put that white image folder back on your desktop.