
Having your data in more than one location is one of the best things that you can do when it comes to the important files on our Mac. Think of it as having an extra key for your vehicle or making a physical copy of an important document.
In this article, we’re going to talk about why you would want to clone your hard drive, and then we will walk through the steps on how to clone a hard drive on a Mac.
Table of Contents
Why Do You Need a Mac Hard Drive Clone?
Creating a clone of your Mac hard drive allows you to backup all of your data to another location which helps prevent data loss in the event of component failure.
Hard drives are much more reliable these days now that they’re solid-state and no longer mechanical, this has allowed for no moving parts which have drastically increased reliability.
However, they can still fail and it’s a good idea to have a copy of your data on an external device.
Some of the most common reasons you want to back up your data would be:
- You emptied your trash bin and are missing a file that you want to recover.
- Erased a partition or formatted a storage device.
- You made a mistake and want to go back and recover the data.
- The hard drive has experienced physical damage.
- The storage device was stolen.
- A file that you’re working with is now corrupted and you want to get a previous working version.
From personal experience, I was using my Mac and while the actual hard drive didn’t fail, there was a software issue that caused some files to not appear. It turned out that they were actually there, but my computer was experiencing a glitch.
If I wouldn’t have had a clone of my data, I might have lost everything. I never thought that data loss or software issues could happen to me, but they did.
It’s best to be prepared and it’s super easy to do! Let’s talk about backup hard drives and what we’re looking for when it comes to cloning the data on our Mac.
What Are the Requirements for a Backup Hard Drive?
Your backup hard drive will have to be greater than the current amount of storage that your Mac is using for the Mac disk cloning to work.
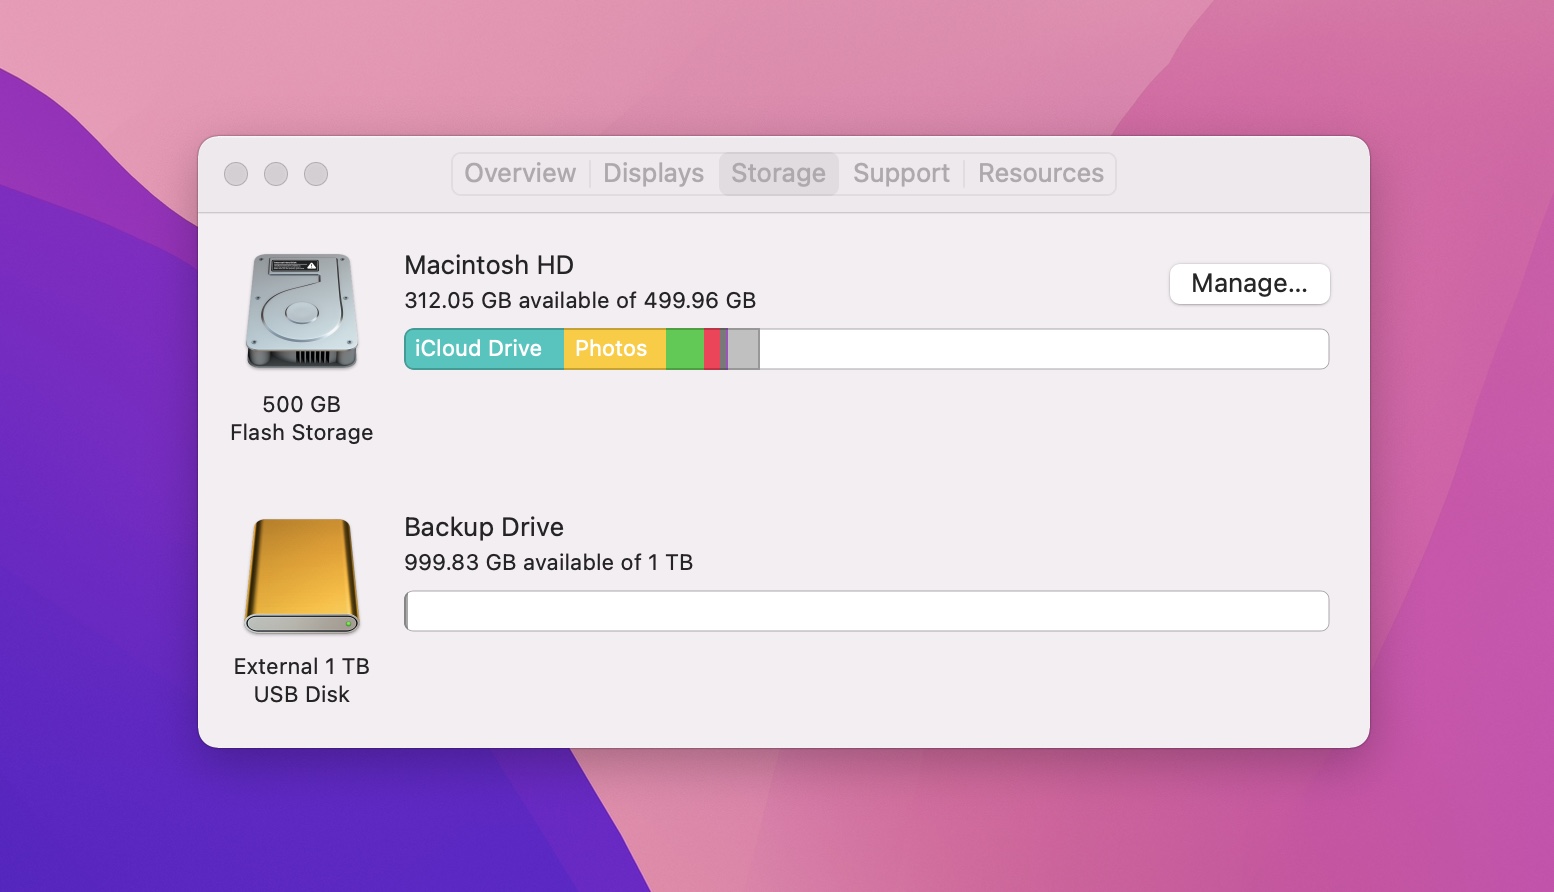
For example, my Mac has an internal hard drive of 512GBs, and currently, I’m using 306GB of that. My external hard drive is 1TB which is 1,000GBs. I’m also using a mechanical hard drive for this example. I would, however, recommend an SSD hard drive, as they are worth the extra cost.
That is plenty enough storage to clone all of the data on my computer right now and later down the road, I will still have plenty of extra space available to me.
External hard drives can be purchased at pretty reasonable prices these days and you can’t put a price on your data if you ask me!
I would start backing up and cloning my data as soon as possible and routinely plug in the external drive to create backups whenever possible.
Now, let’s talk about how to clone our hard drives and back up our data.
How to Clone a Mac Hard Disk Using Disk Drill
Not only is Disk Drill the best way possible to recover your data on your Mac should you lose it, but it’s the best way to clone a Mac hard drive.
I like using Disk Drill due to its modern interface and it’s very easy to understand as you will see when we clone our hard drive in the steps below.
Step 1First, we need to download and install Disk Drill. Downloading Disk Drill is free and using the Byte-to-byte backup feature that we’re going to walk through is free as well, you don’t have to purchase a license to use it!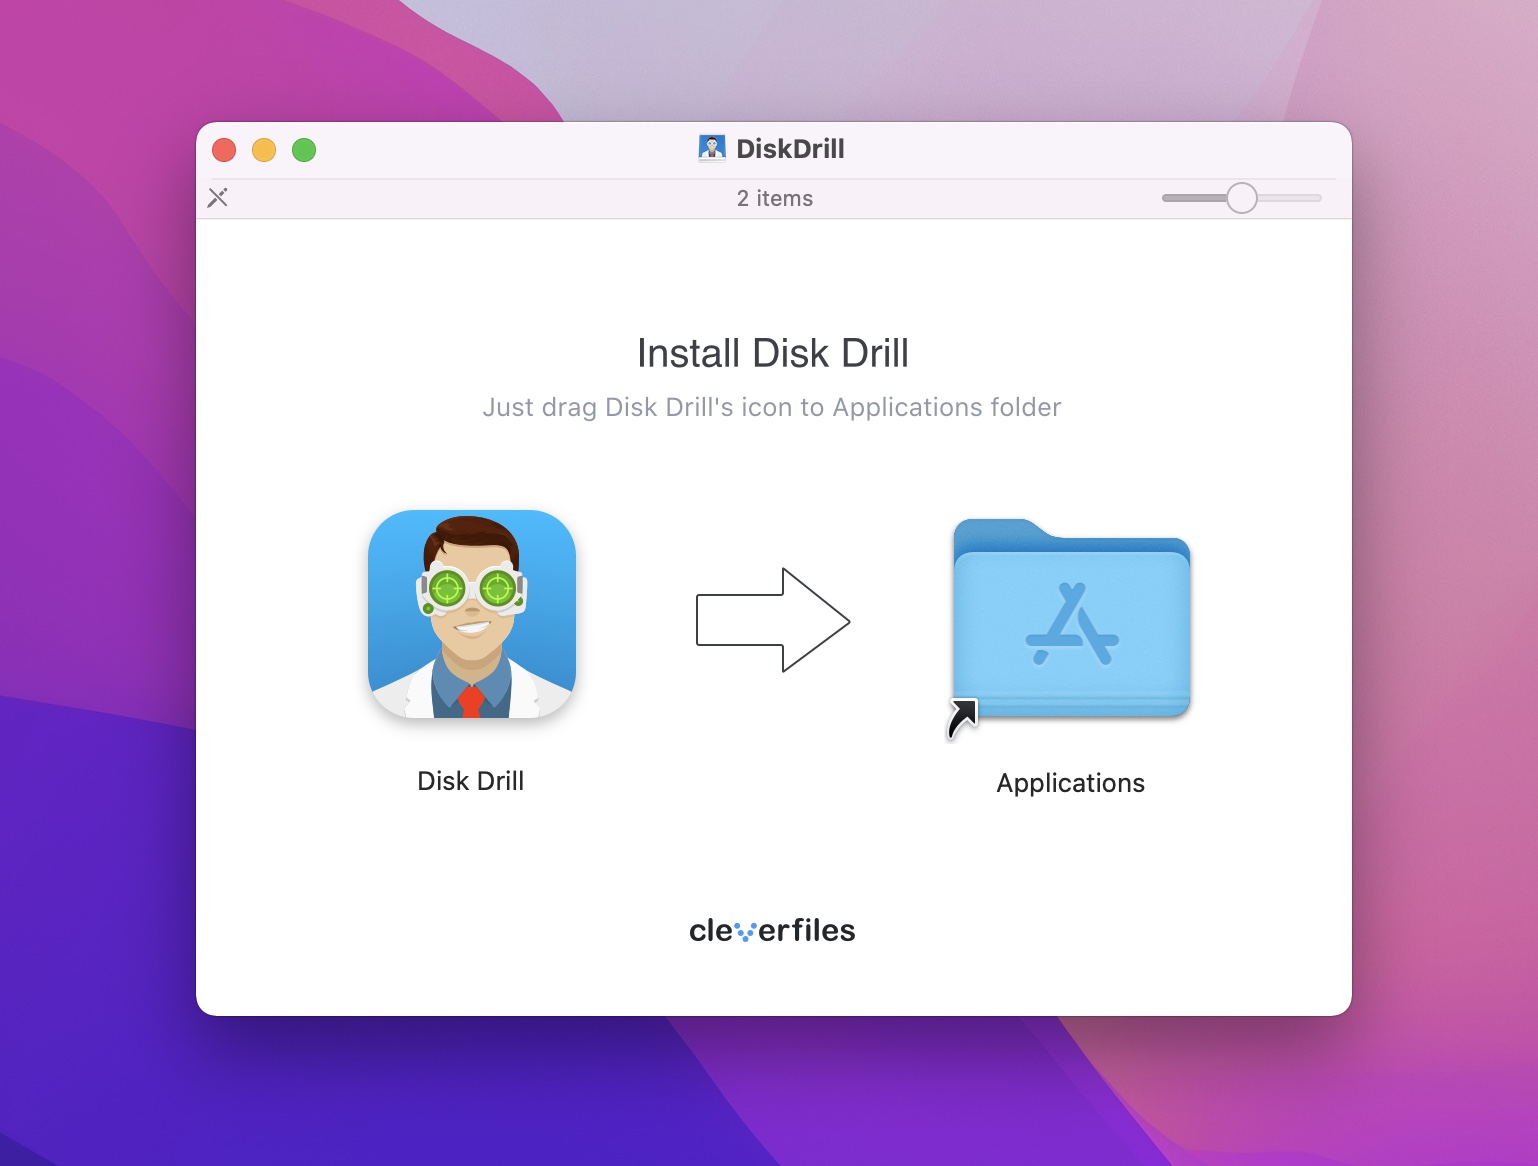
Step 2Once you’ve downloaded and installed Disk Drill, launch the app and connect an external hard drive. Your hard drive storage space should be larger than the hard drive on your Mac or at least greater than the amount of space that you’re currently using.
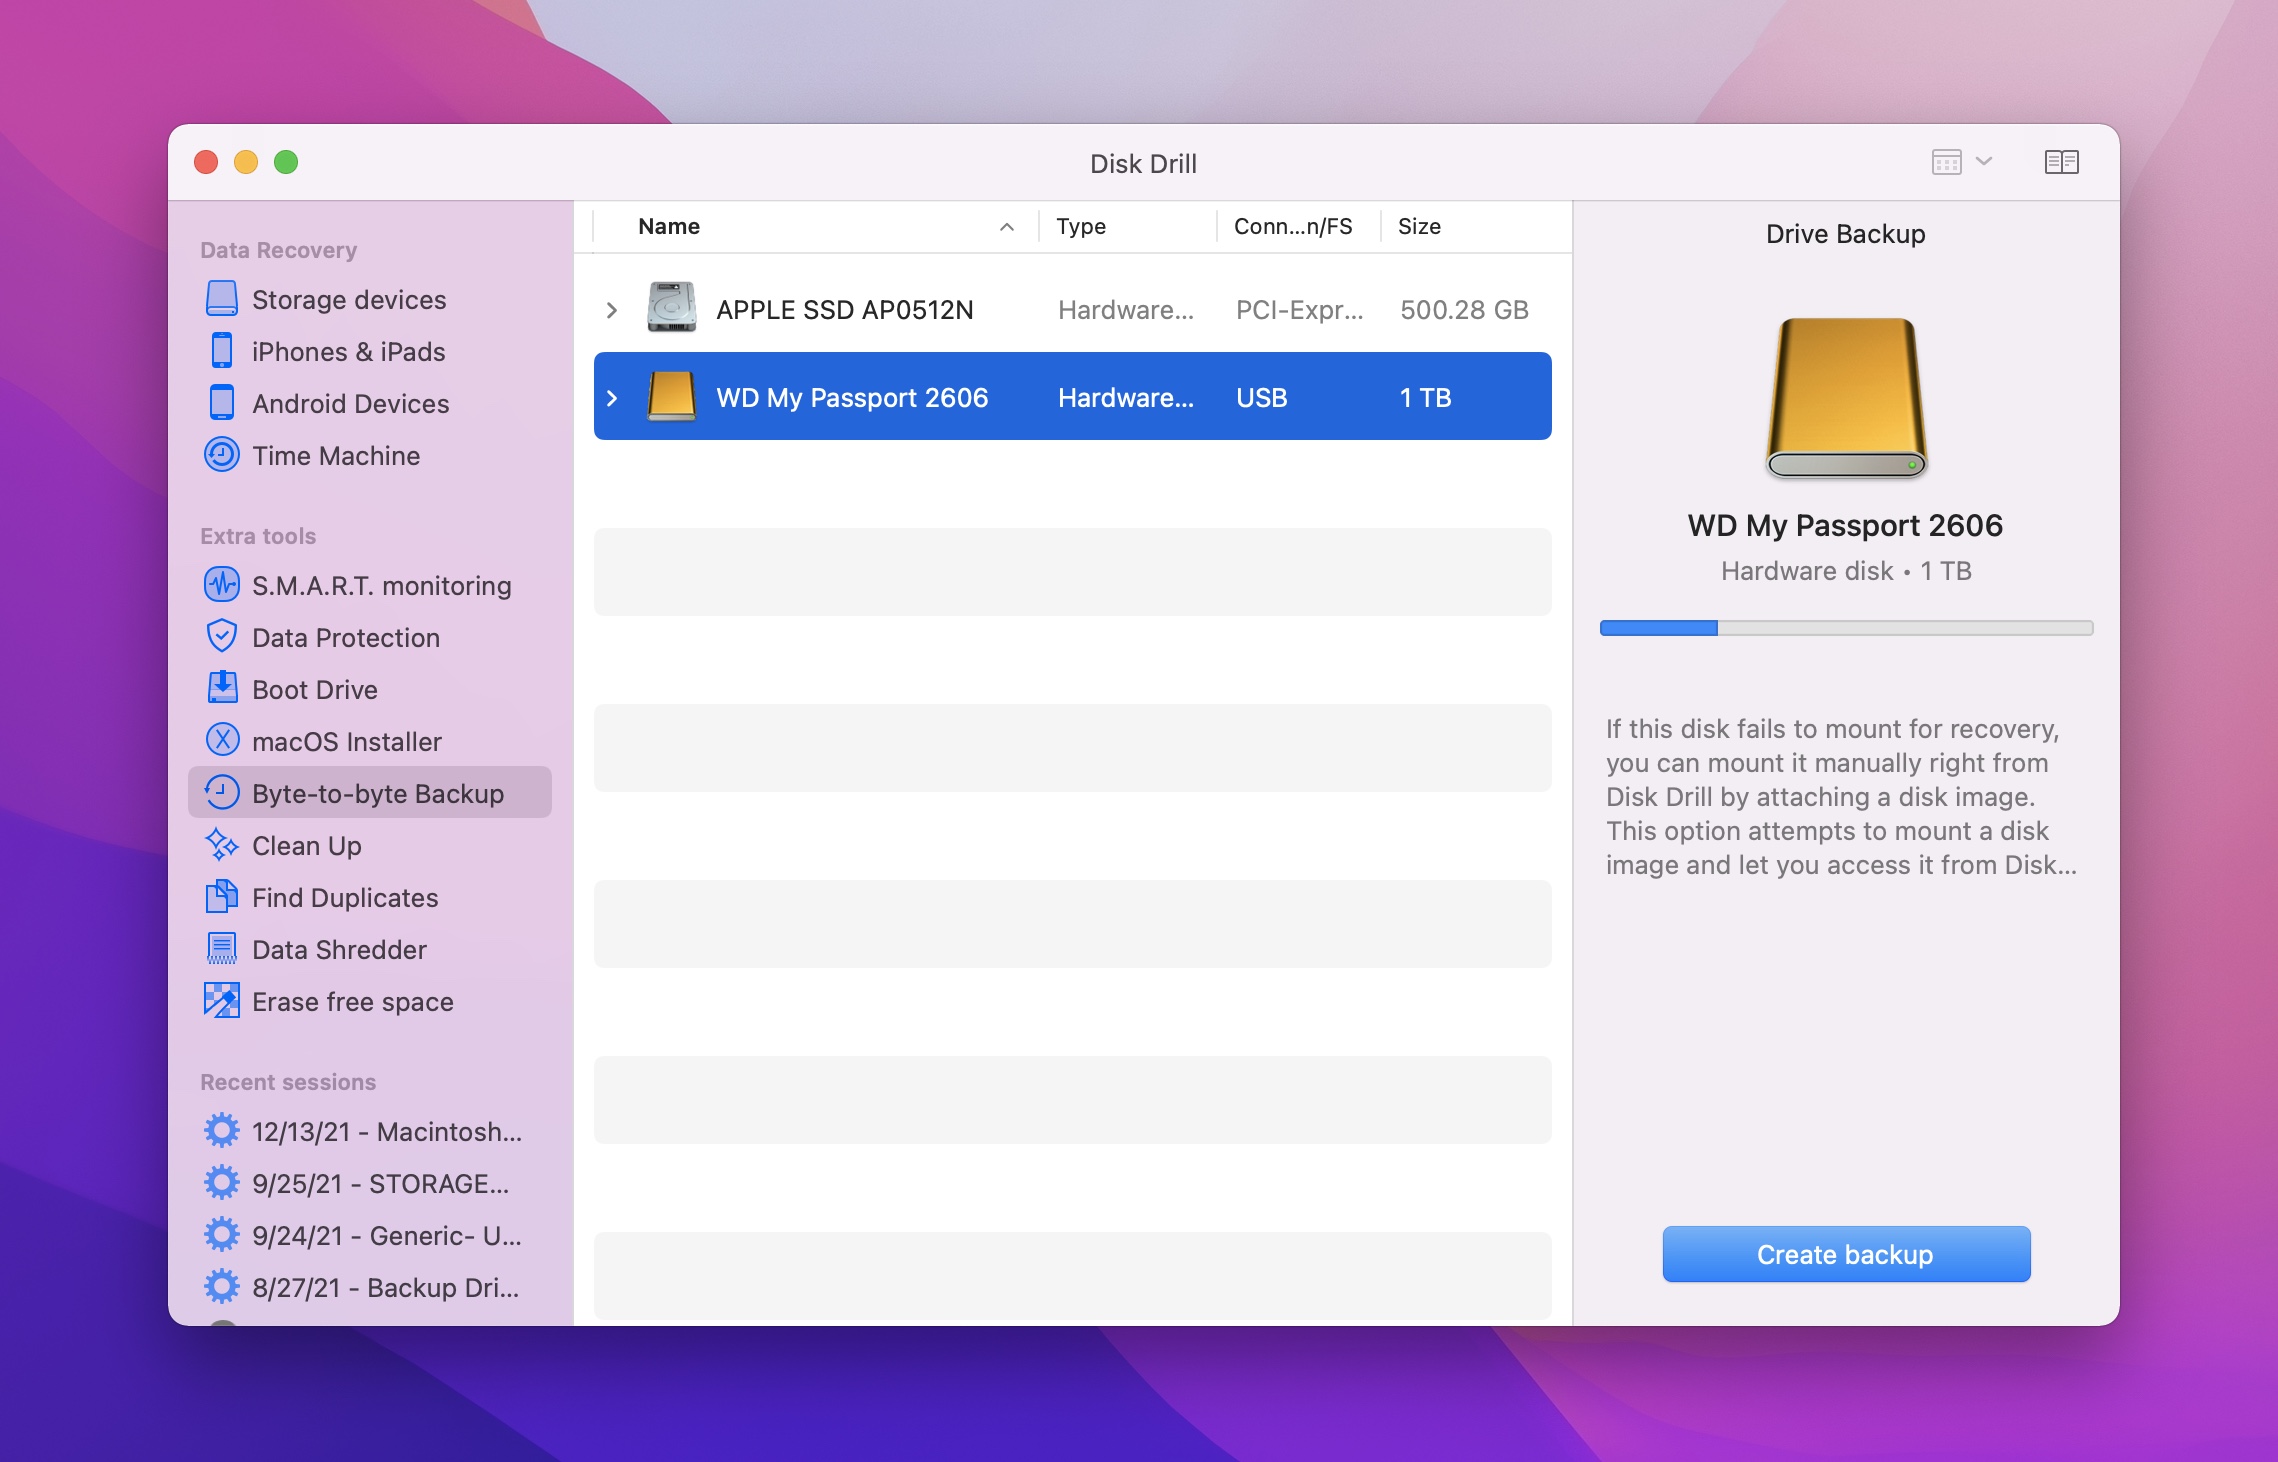
Step 3Navigate to the Byte-to-byte backup section of Disk Drill. You can find this halfway down the left-hand side column.
Step 4There is a little description that tells you more about what the Byte-to-byte DMG Backup process does. Let’s get started by clicking on “ok, let’s do it”!
Step 5Now, select the hard drive that you want to clone and then click on Create Backup. You will see here that Disk Drill has detected both my internal SSD in my Mac and the external hard drive that I plugged in that we’re going to clone the data to.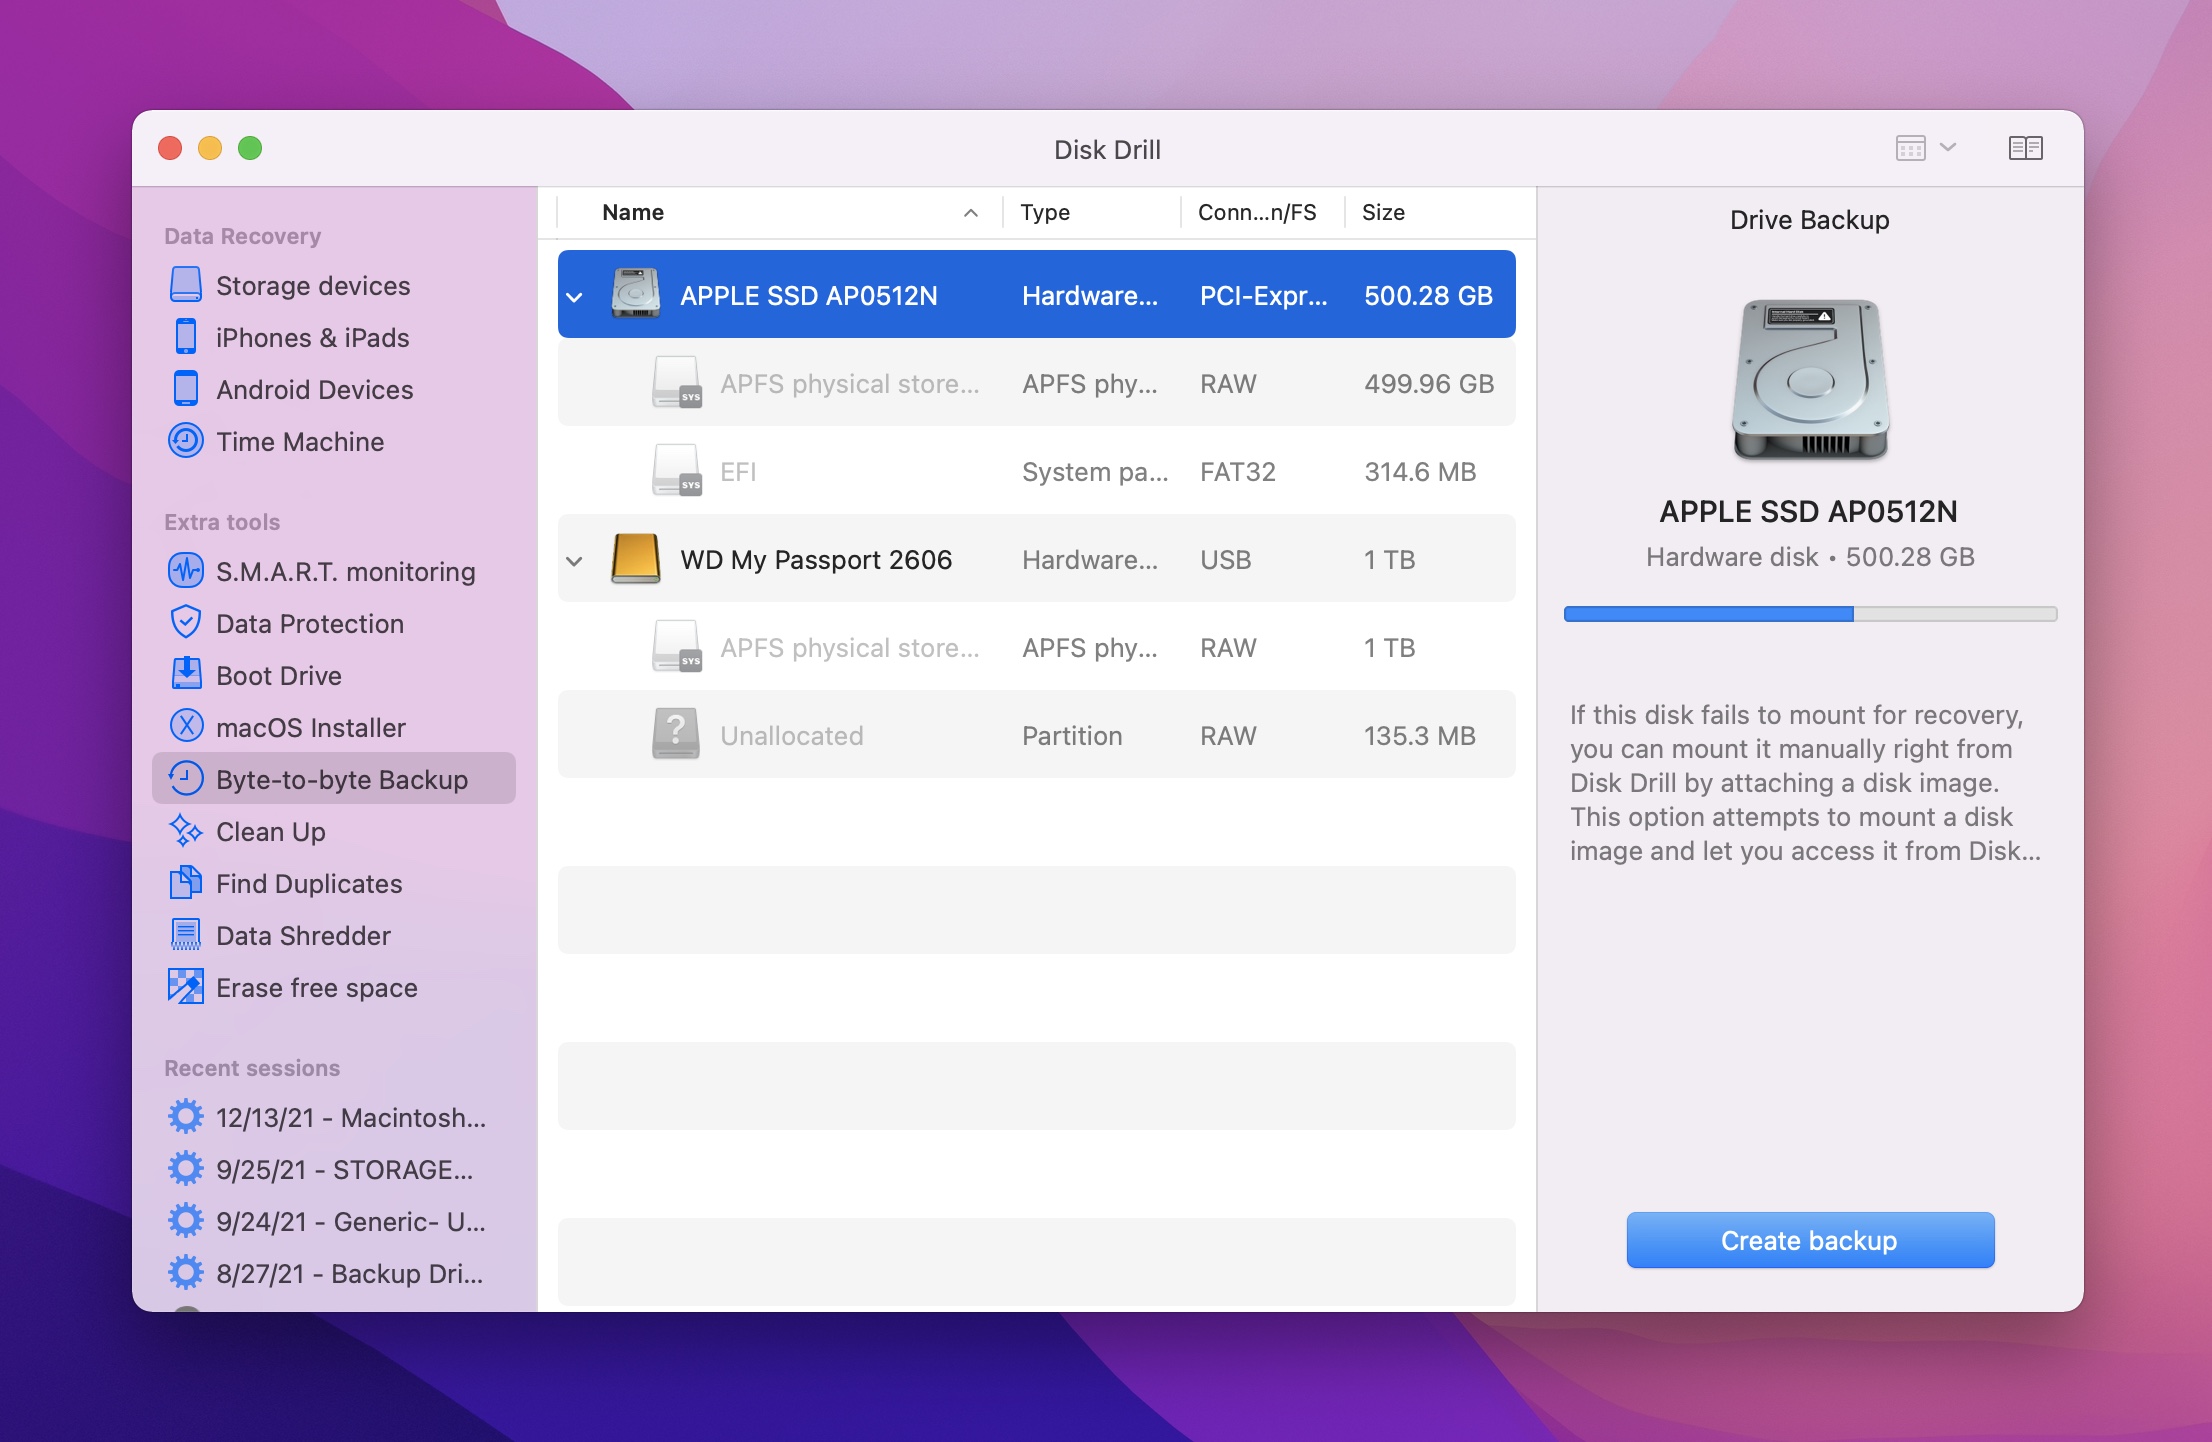
Step 6Choose the name of the backup and where you want to save the backup to. I just let Disk Drill choose the default name for the backup but you can change it to something custom if you would like to.
Step 7Wait for the backup to complete. This can take some time depending on the amount of storage that you’re backing up. For me, it took about 3 hours even though the time below is saying just over an hour. Keep in mind though, I have a slow mechanical hard drive. If I had an SSD, this process would have gone a lot faster.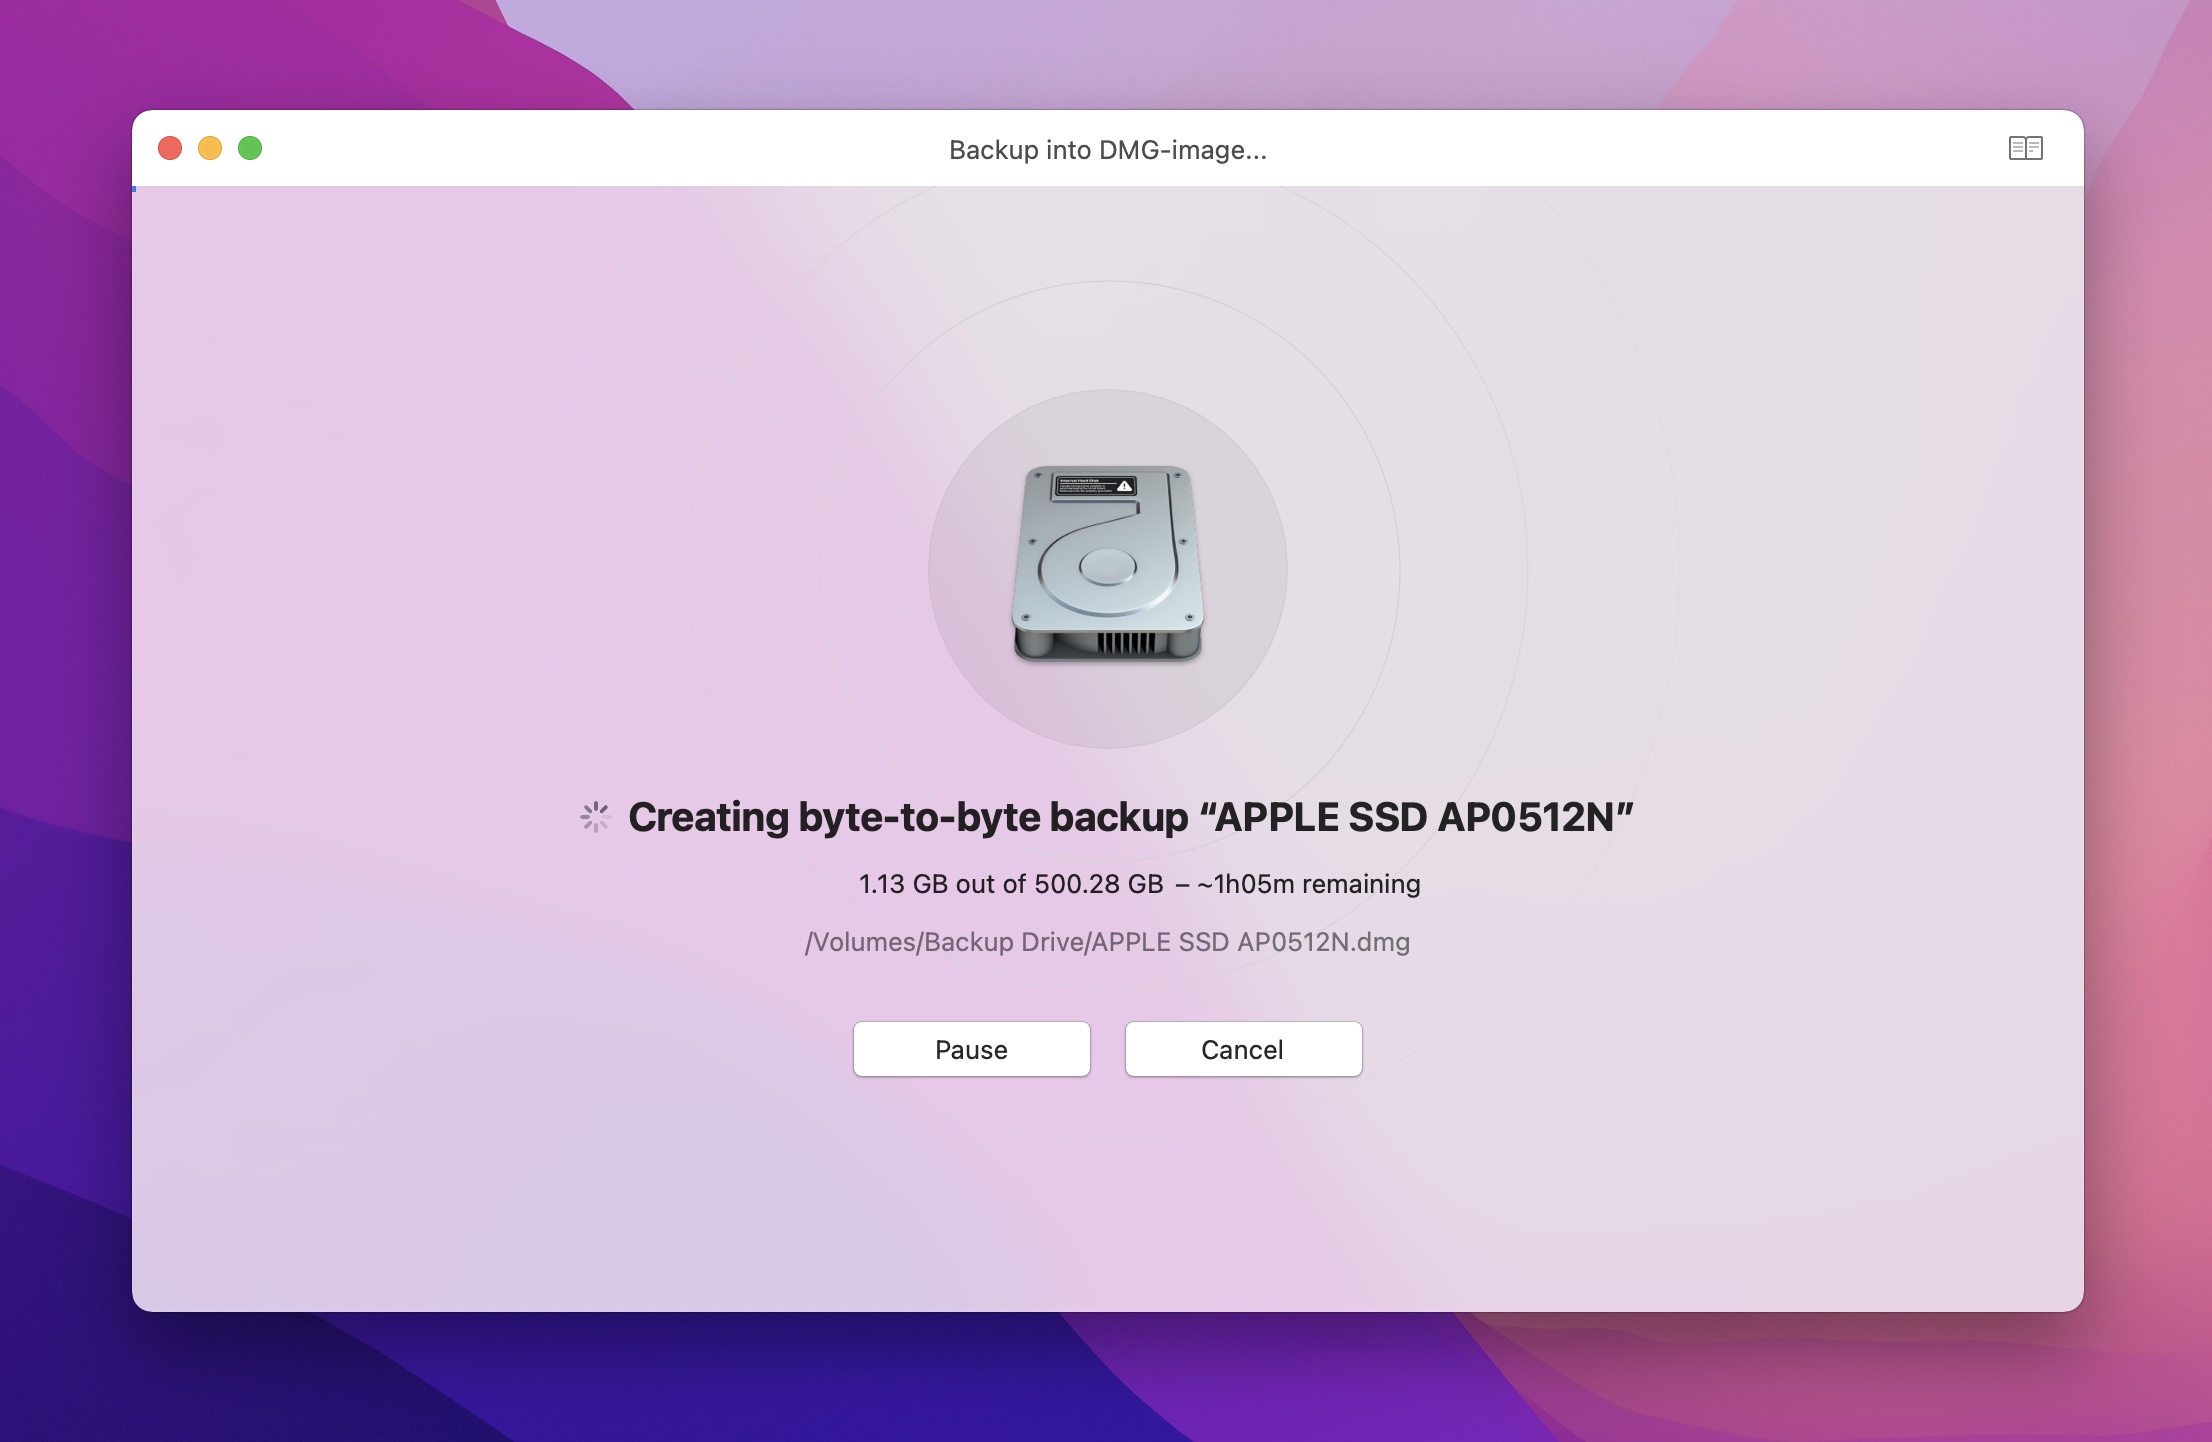
Step 8Once the backup progress is complete, you will receive a Disk image-created message. You now have all of your data backed up and on your external hard drive! Super easy :)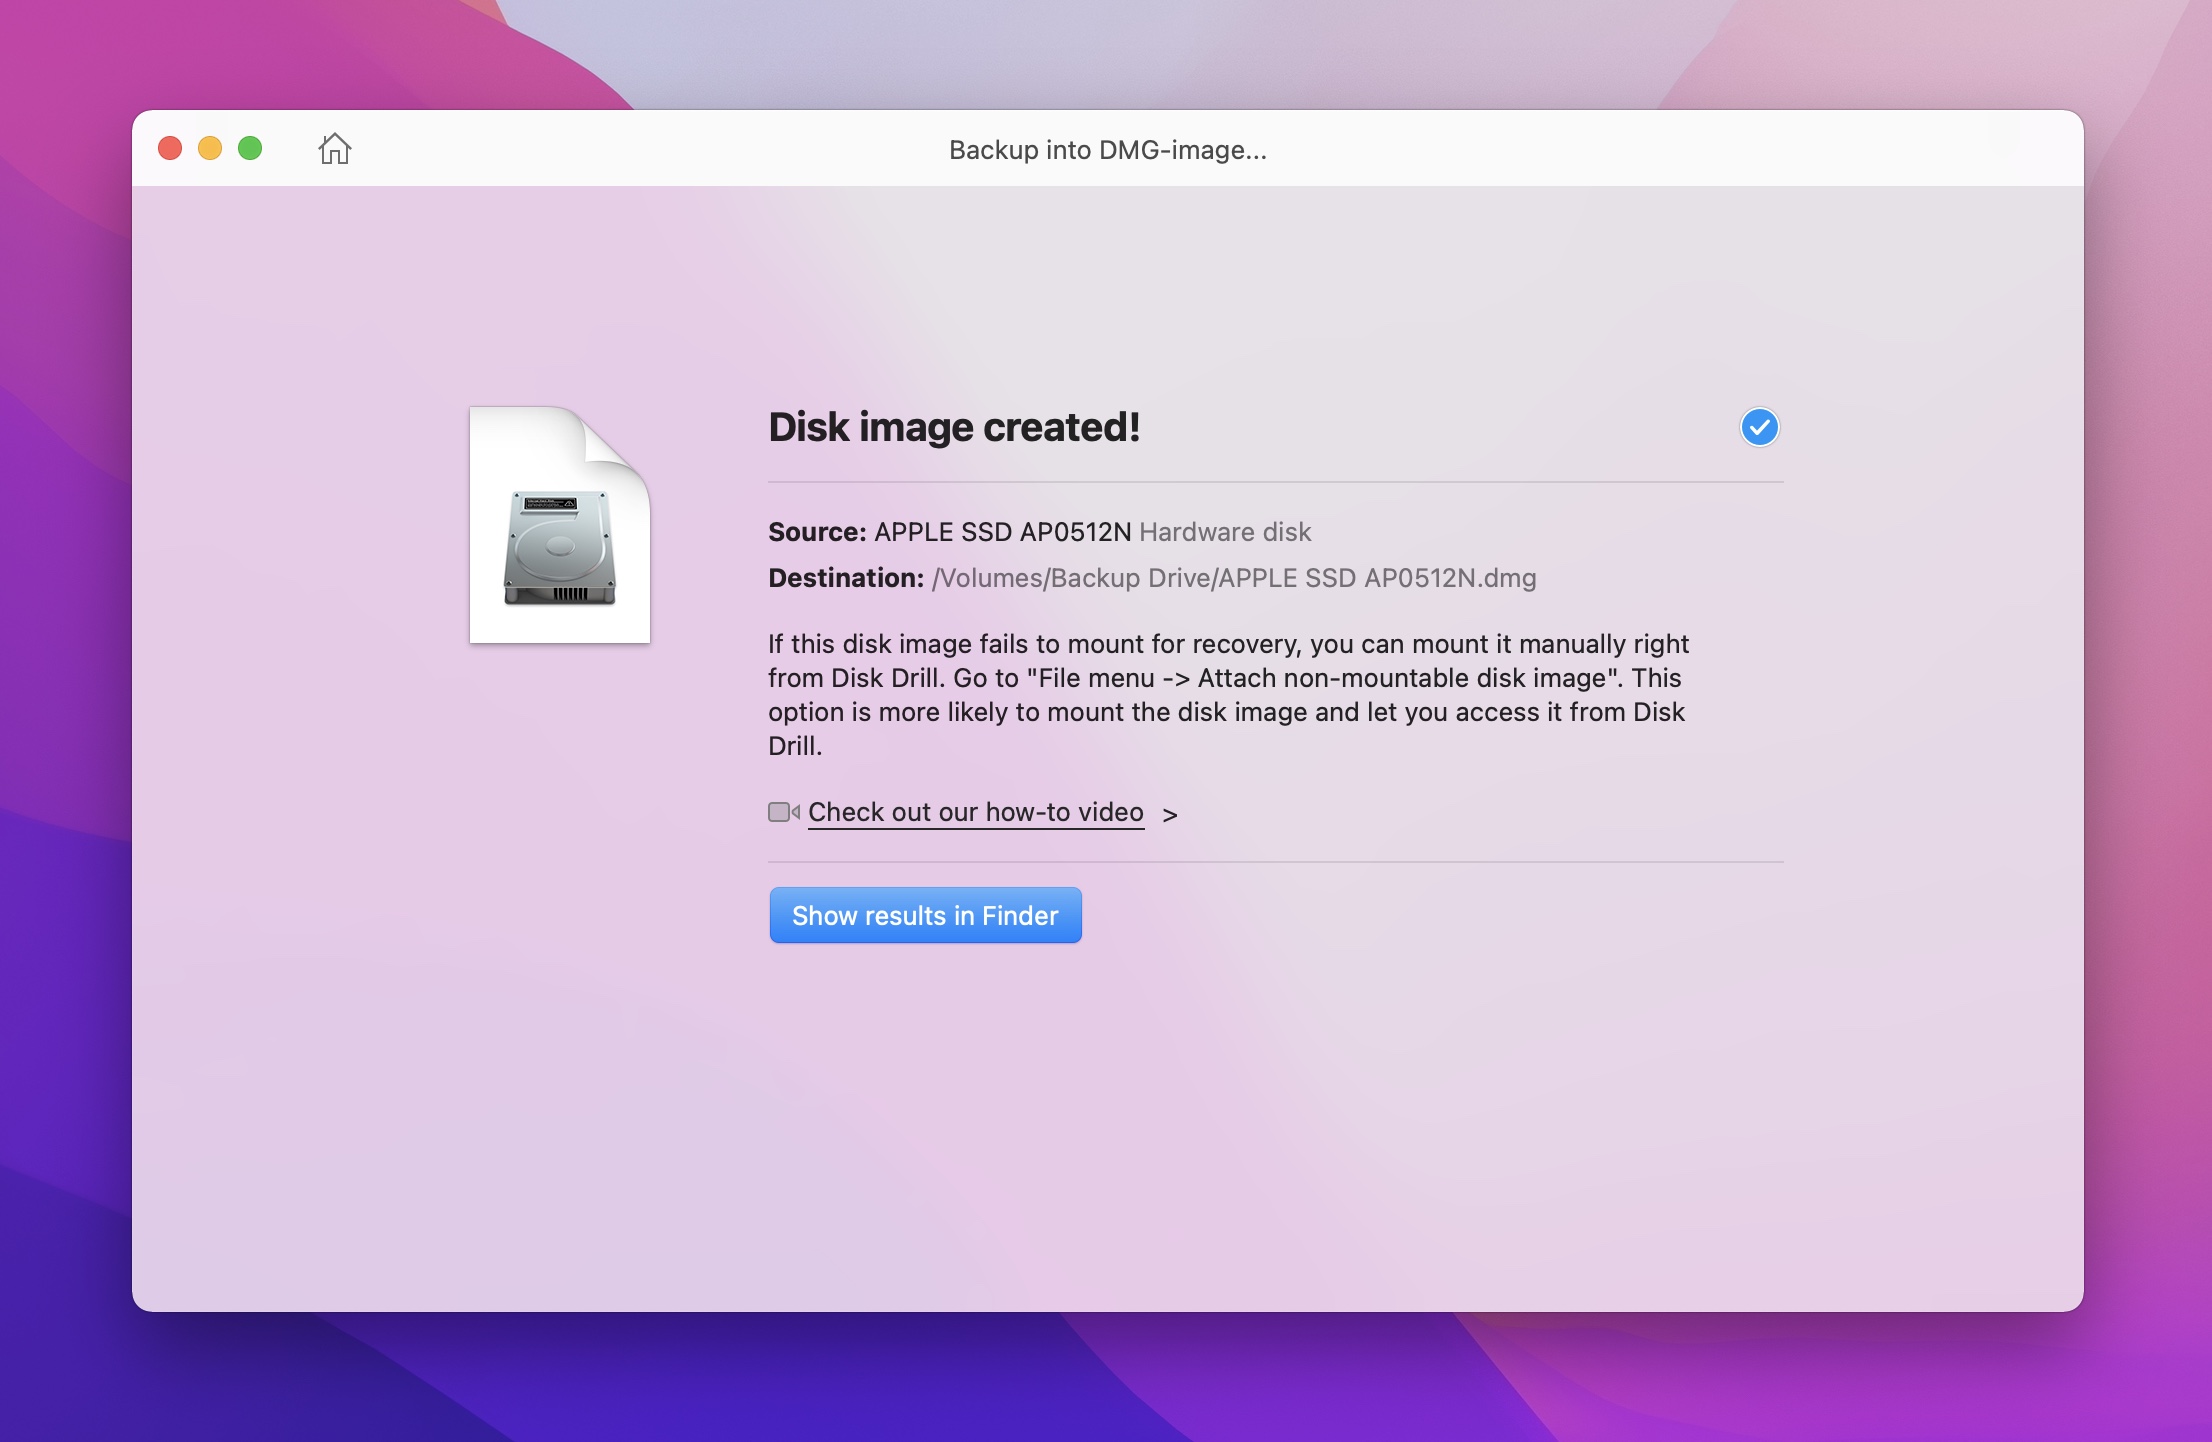
Step 9You can then click on Show results in Finder to see exactly where the clone was created on your external device. This is helpful if the drive that you cloned was experiencing issues.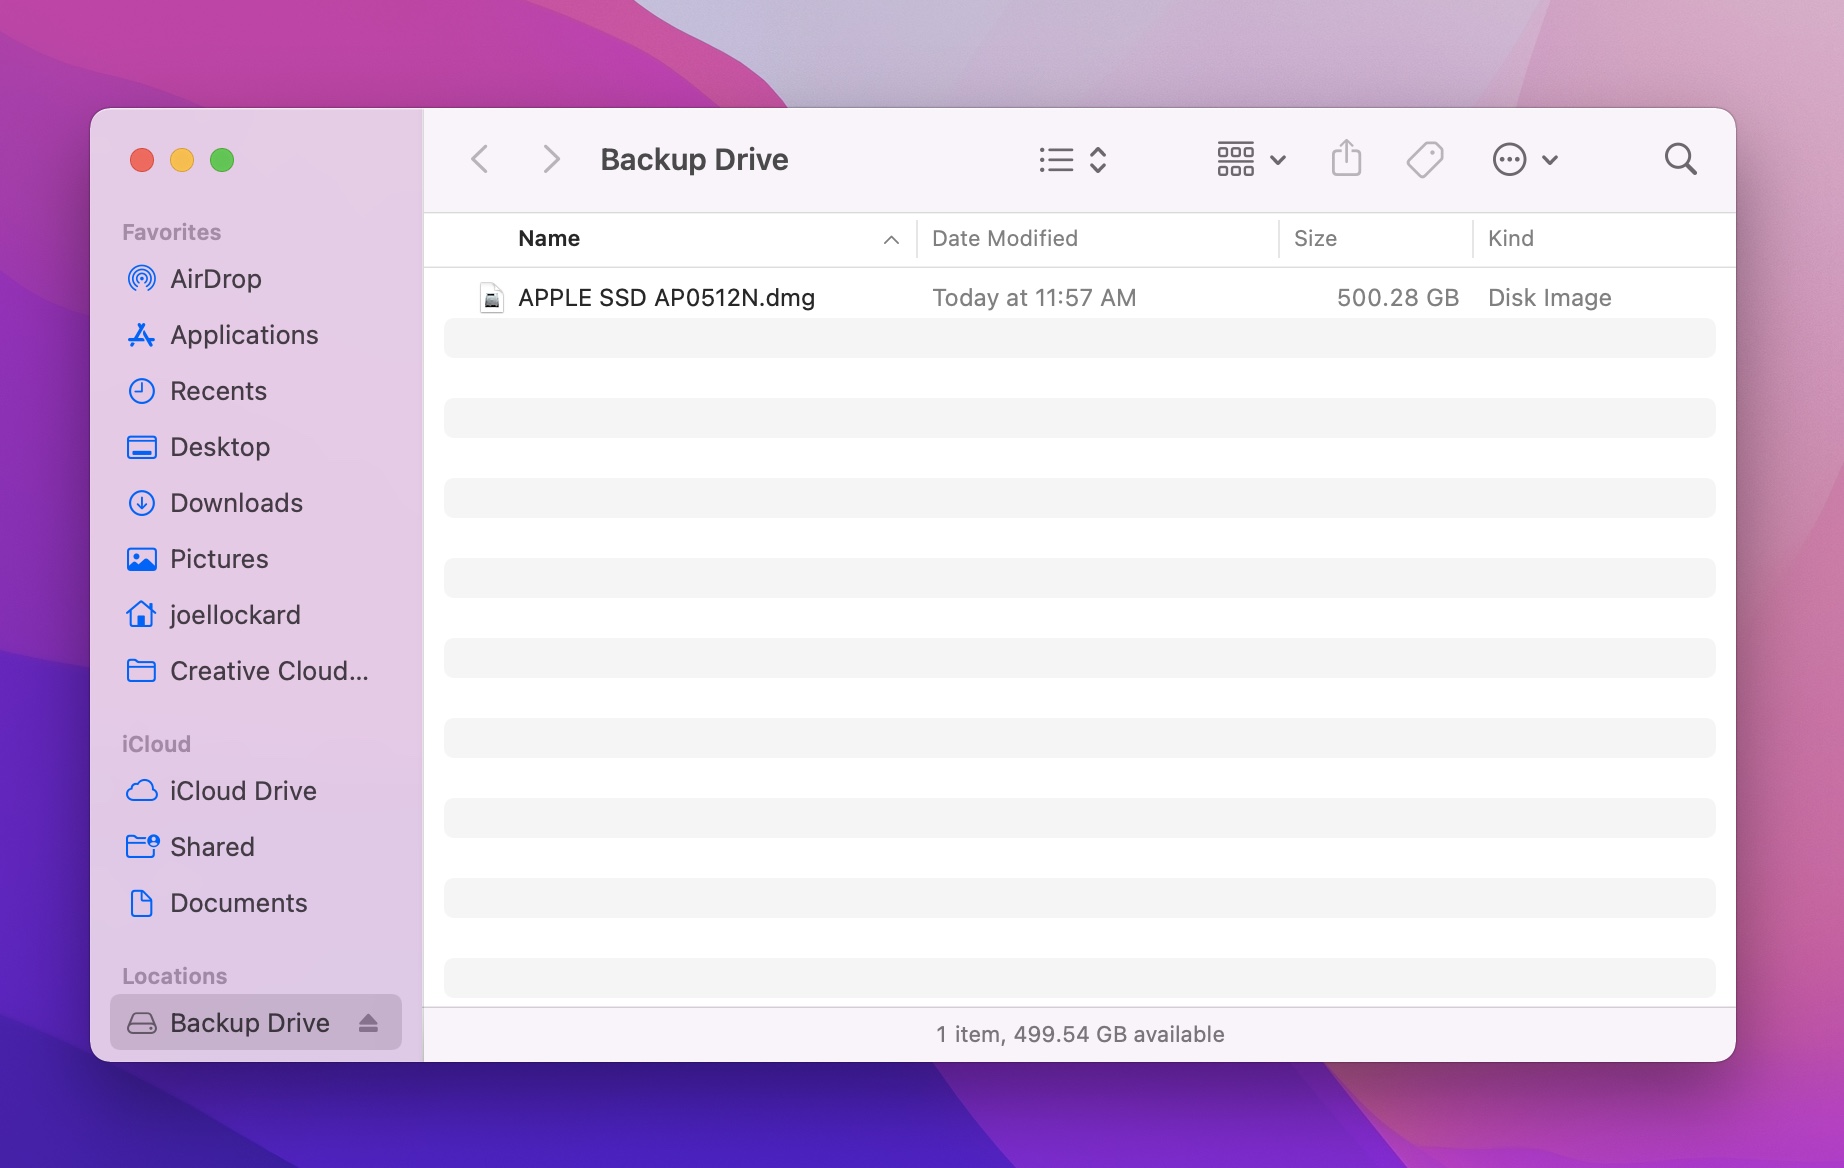
Step 10 Optional. You could then specifically use Disk Drill to scan the clone that we just created to recover files instead of continually using the hard drive which could cause further damage.
That’s it! When it comes to creating a clone of your data, you’re all set now! I would recommend coming back and backing up your data frequently to ensure that you have a current backup.
Let’s take a look at another way to clone our Mac hard drive. In the next example, we’re going to use Disk Utility.
How to Clone a Mac Hard Drive Using Disk Utility
We can also use Disk Utility to clone our hard drive on a Mac. Disk Utility comes built into macOS when you purchase your computer so it doesn’t cost you any money.
It’s another free cloning option but it isn’t as easy to use as Disk Drill. This is due to the fact that the interface just isn’t as friendly to use and it’s more technical. However, it still gets the job done and allows us to clone our Mac hard drive.
Let’s walk through how we can clone our Mac hard drive using Disk Utility.
Step 1Launch Disk Utility. To do this, use Spotlight search to find and launch the application. Simply press the COMMAND + Space bar at the same time and then type in Disk Utility. It will then show up as one of the results.
Step 2Once you’ve launched Disk Utility, select the backup drive that you would like to clone your Mac hard drive to.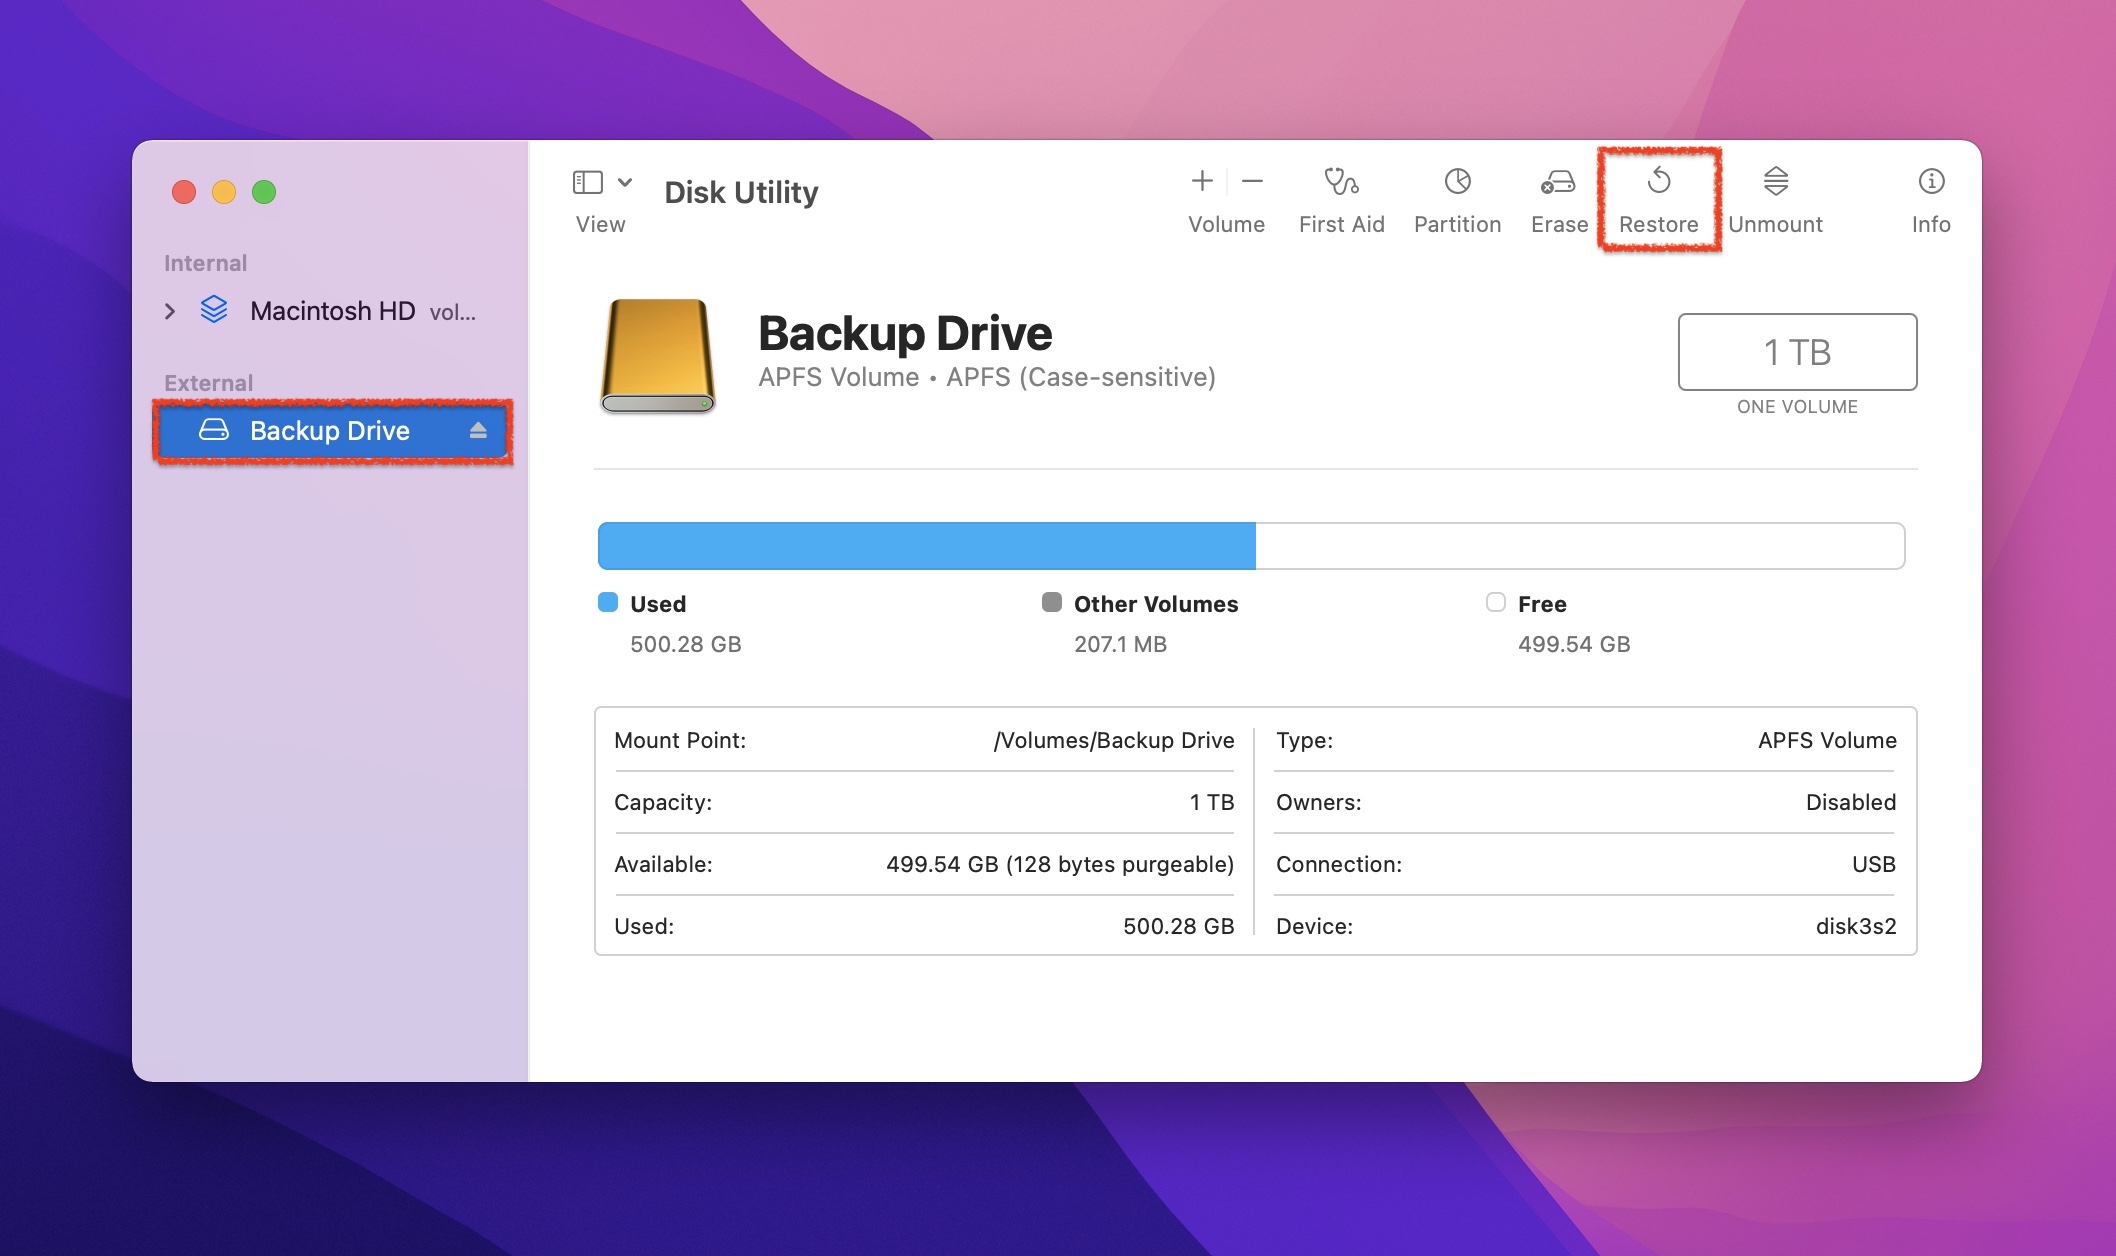
Step 3Then, choose what drive you would like to put onto the backup drive. In my case, I’m cloning my Macintosh HD to the backup drive that is plugged into my Mac.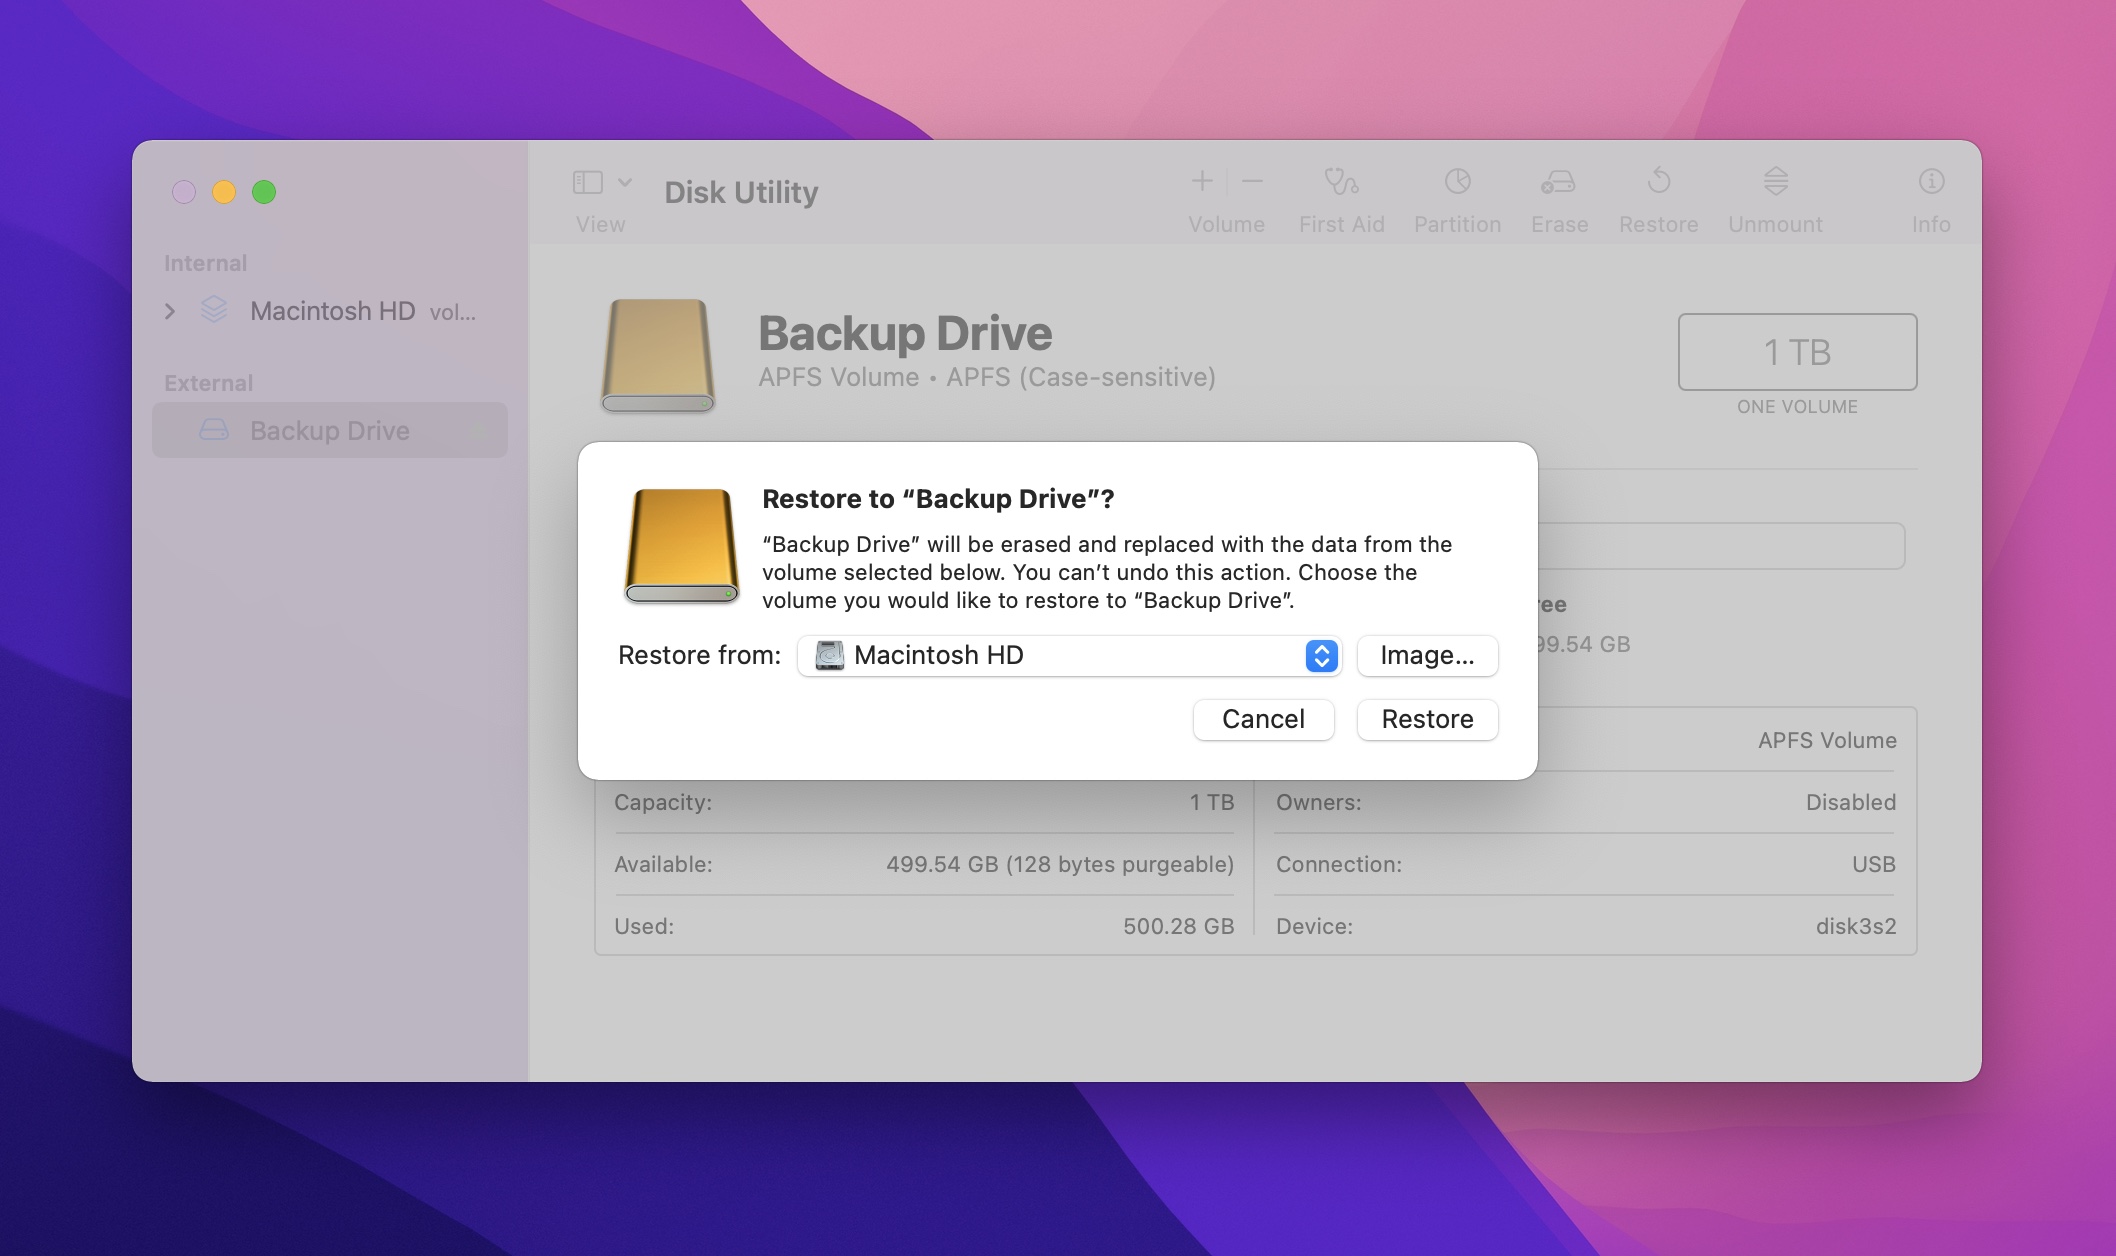
Step 4Once you’ve decided what you want to restore to your backup drive, click on Restore.
You will now have a clone created on your external storage device should something happen to the main internal hard drive in your Mac.
Let’s take a moment and talk about cloning a hard drive disk to an SSD.
How to Clone a Hard Drive Disk to an SSD
If you can clone your Mac hard drive to an SSD, that is your best option due to how much faster and reliable it will be.
If you’re currently using a hard drive disk (HDD) and want to copy the data over to a solid-state drive (SSD), the process would be the same using either of the methods above.
There are many benefits of cloning a Mac hard drive to an SSD instead of a mechanical hard drive. This includes but is not limited to:
- More reliable storage
- Faster storage for copying the hard drive
- No moving parts
While you will pay more for an SSD, it is worth the extra premium.
Conclusion
Knowing how to clone and create a backup of the data on your Mac helps you protect the important information on your computer that you most likely use every day.
No one thinks that data loss is going to happen to them so it’s important to be set up and ready for it just in case it does. Not to mention, it also gets rid of some stress should something happen, you already have a backup in place.


