 My Mum’s Core Duo 2ghz Macbook with 1gb of RAM was getting a little long in the tooth so my Dad had me research and find quotes for parts to upgrade etc. A local Apple Dealer and Repair shop was going to charge almost $500 to upgrade to a 320gb drive and 2gb of RAM.
I’m here to tell you that taking it to a store is wholly unnecessary. I knew beforehand that this upgrade should be easy so I told my Dad that I could probably do it. It’s one of the craziest, easiest processes I’ve run into with computers.
I’ll walk you through the basic steps.
- First you want to take a Disk Image with Disk Utility and save it to an external HDD. (Click New Image and Select your home drive.)
- Turn off the computer and take out the battery.
- Remove the L-bracket from inside the battery case.
- Flip the gray switches and out pops the RAM.
- Insert New RAM (Push hard, the most common problem from this upgrade is not seating the RAM properly.)
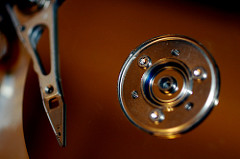
- Pull out the HDD by tugging on the white strap.
- Take off the Magnetic Shielding(what the white tab is affixed to), reattach it to the new drive.
- Slide the new HDD in.
- Reattach the L-bracket and reinsert the battery.
- Boot from an OS X DVD (insert the disk and hold C on start up.)
- Select the proper language at the initial prompt, but at the install screen select Utilities – Disk Utility from the Menu Bar.
- Attach your external drive.
- Format the new drive by selecting Erase in Disk Utility, here you will choose the Volume Format, the default is Mac OS X Extended (Journaled) which is what I went with.
- Move to the Restore tab, click Image and browse to the Disk Image you took in step 1 and saved to the external drive.
- Drag your new drive from the list on the left to the Destination field and click Restore.
- Wait! and Reboot. The copying of my Mum’s disk image took about 2 1/2 hours over USB 2.0 for a 72 gb image.
Amazing huh? 16 steps to a more capable computer.
The process might scare some people but I’m mostly writing this because I feel that this really is easy enough that someone in your family should be able to do it. There is really no need to pay someone for the service. My Dad saved about $300 by going to Newegg (and Me!) rather than taking it to a service center.
And really, if Jony Ive spent so much time designing these machines so it would be this easy, don’t we owe it to him to at least try?
*Disclaimer – If you are very encouraged by this post and decide to try the upgrade, neither I nor Macgasm.net claims any responsibility for it going wrong in any way. This guide should be taken as a informative article only, not a set of instructions.
Apple Upgrade Guides – RAM – http://support.apple.com/kb/HT1651
PDF LINK – HDD
![]()


