
RAIDs are used to increase computer performance and reliability. While not used as much in a personal setting, they can create extremely fast server setups and allow businesses to function without missing a beat if a hard drive happens to fail. In places where data must be accessible at all times, RAIDs are great for redundancy but also they allow for fast read and write speeds.
However, everything is susceptible to hardware failure and while it most likely won’t happen, there is always a possibility as hardware can fail. In this article, we’re going to take a look at how to recover data from RAID hard drives on Mac.
Table of Contents
What Are the Different Types of Raids?
There are five different RAID levels with each of them having its own use case. Let’s take a look at the different RAID Arrays for Mac and look into how they work.
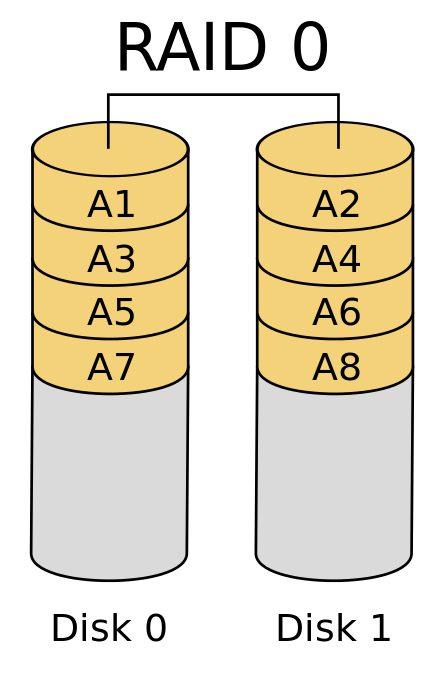
RAID 0 – Striping
Known as a stripe set or striped volume. This is great for users who are seeking high capacities and faster performance. Usually, RAID 0 is not recommended for those seeking data security due to its lack of redundancy. Repairing RAID 0 can be done at the individual drive level.
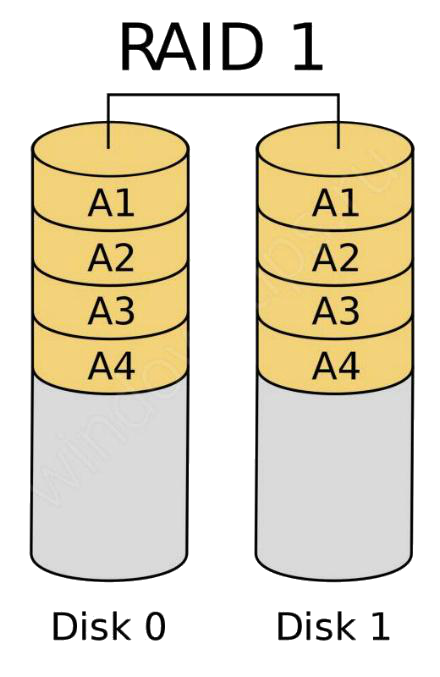
RAID 1 – Mirroring
Known as mirroring, this RAID achieves redundancy and data security by continuously replicating or cloning data across two hard drives. This creates a complete backup down to the last bit of data. This is a handy setup to have if you can’t have your computer go down for any reason. If one hard drive fails, most of the time you can take it out and replace it with a new one. This sets up the RAID again without losing data in most cases.
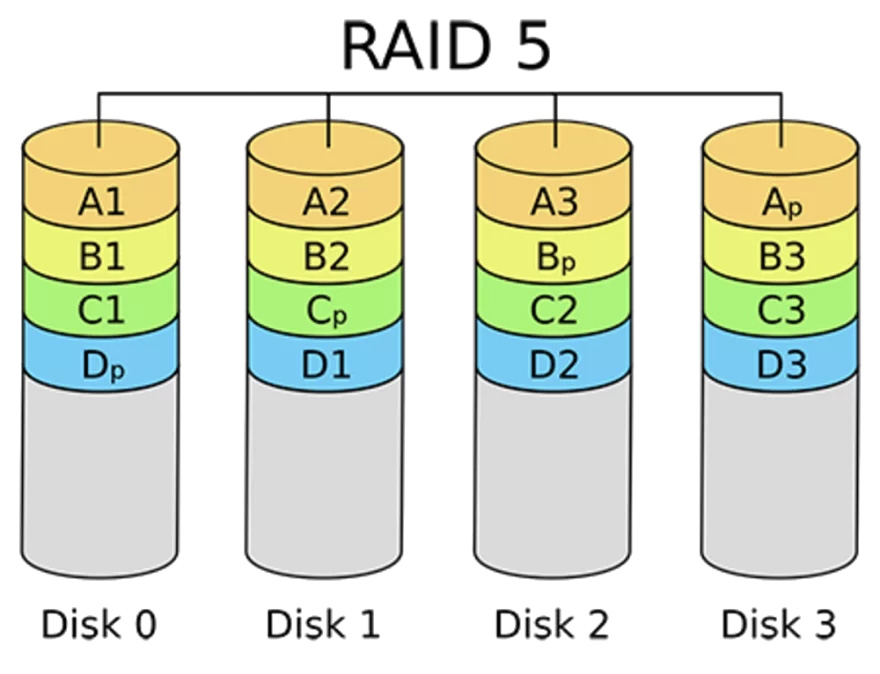
RAID 5 – Striping With Parity
One of the most popular RAID types. It’s much more effective in achieving optimal capacity and redundancy. RAID 5 encompasses block-level striping with distributed parity. It has a checksum implemented into it called parity. It requires 4 hard drives and if one fails, it can read the data from the other 3 that are still operational. Recovering data from RAID 5 normally isn’t necessary as you can replace the failed hard drive and continue operation.
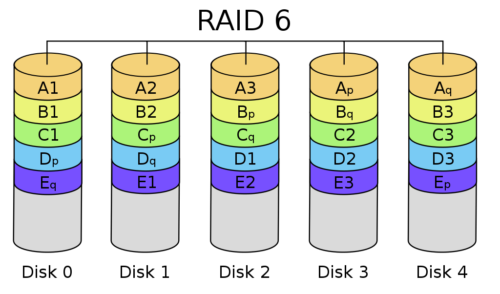
RAID 6 – Double-Parity RAID
This RAID type is similar to RAID 5, but it uses two drives’ worth of storage for parity data instead of one to provide data redundancy in case of two drive failures. To implement RAID 6, at least four hard drives are necessary, and this makes it too expensive for most regular home users. What’s more, the extra level of protection provided compared to RAID 5 is outweighed by a slightly lower write performance.
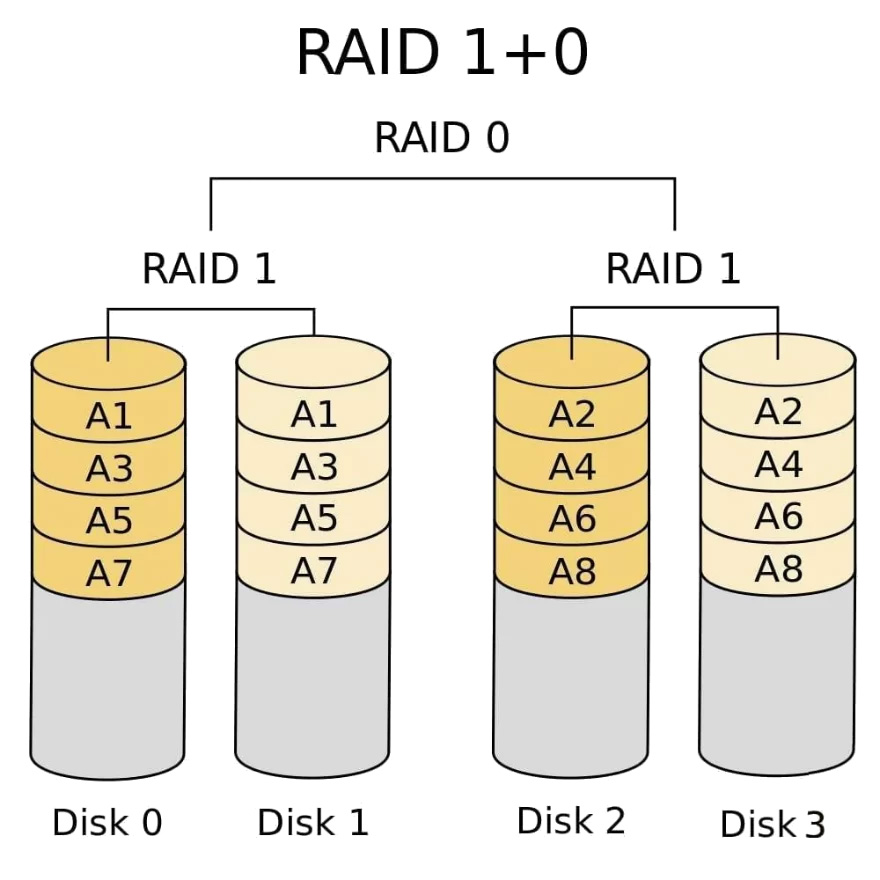
RAID 10 – Combining Mirroring and Striping
This type of RAID array combines the pros of both RAID 1 and RAID 0. It combines increased capacity and fault tolerance into a single solution. You achieve double the performance and capacity. It’s great when performance and space are concerns while maintaining a budget. Recovering your data from this RAID is normally pretty successful as long as multiple hard drives haven’t failed.
JBOD – Just a Bunch Of Disks
This RAID type stands for “Just a Bunch Of Disks,” a name that perfectly describes its nature. Unlike other RAID types, JBOD doesn’t use any RAID-specific data protection or performance enhancement techniques. Instead, all hard drives retain their independence, but the user can access them as if they were just one large drive. Because of how simple JBOD is to set up and use, it’s often implemented by home users who don’t care much about data protection.

5 Tools to Recover Data From Raid Array
If you have lost data from within your RAID, where do you start at getting the data back?
Below I am going to list 5 Mac RAID software options that I would recommend that you take a look at and then we will look deeper into one of the options from this list.
1. R-Studio
With both a Windows and Mac version available, R-Studio is a solid choice when it comes to RAID data recovery on your computer. The Windows, Mac and Linux versions are specifically designed for each operating system which makes them more reliable and powerful. They aren’t just ports that were put onto either of the operating systems.
The tool is our favorite because it supports the largest number of file systems and RAID configurations (both software and hardware), as well as Networ-Attached Storage (NAS) devices. Thanks to its ability to automatically collect relevant information about the RAID array you want to recover, R-Studio makes the recovery process fairly painless and consistently delivers good results.
2. Disk Drill
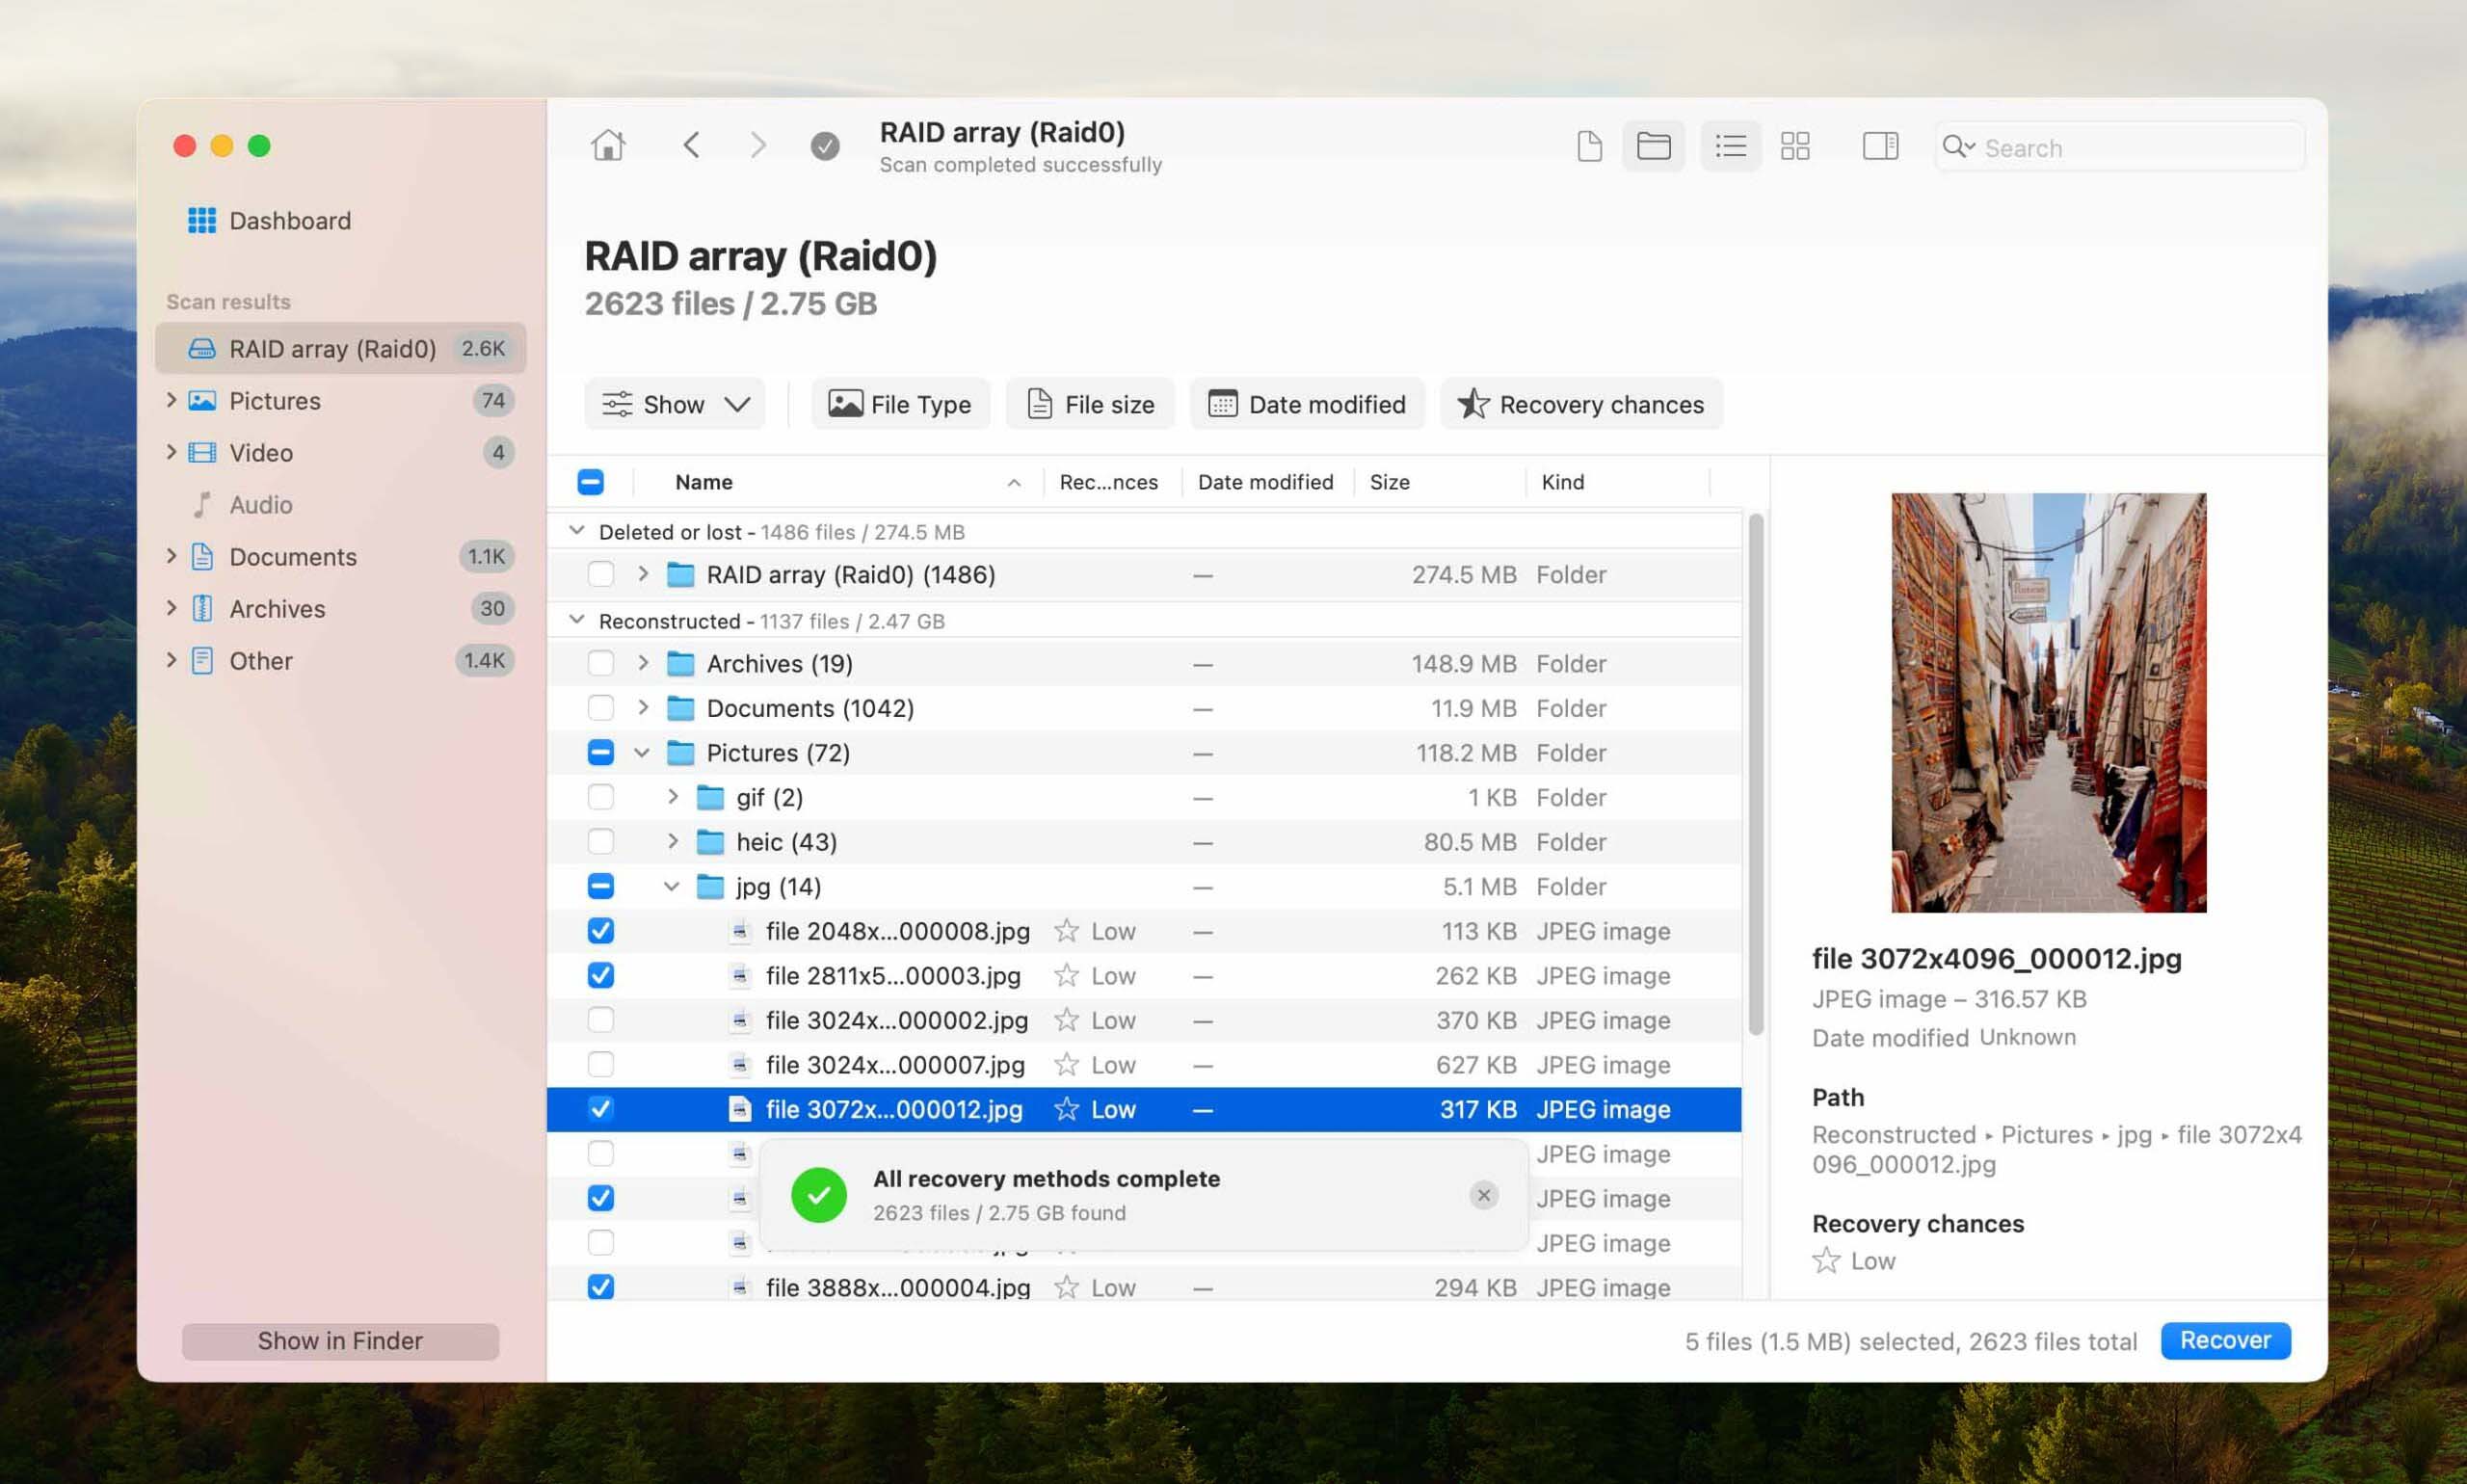
Disk Drill is a highly versatile and incredibly easy-to-use data recovery application, especially when compared with R-Studio, whose busy user interface and countless advanced options make it intimidating for anyone but the most advanced users.
The application works best with software arrays, but it can also help with some hardware RAIDs. Disk Drill greatly simplifies the RAID recovery process by automatically collecting RAID array information so that you don’t need to enter it manually.
The free version of Disk Drill can be used to preview an unlimited number of recoverable files, so you can know for sure if it’s capable of recovering your files before you spend money on a license.
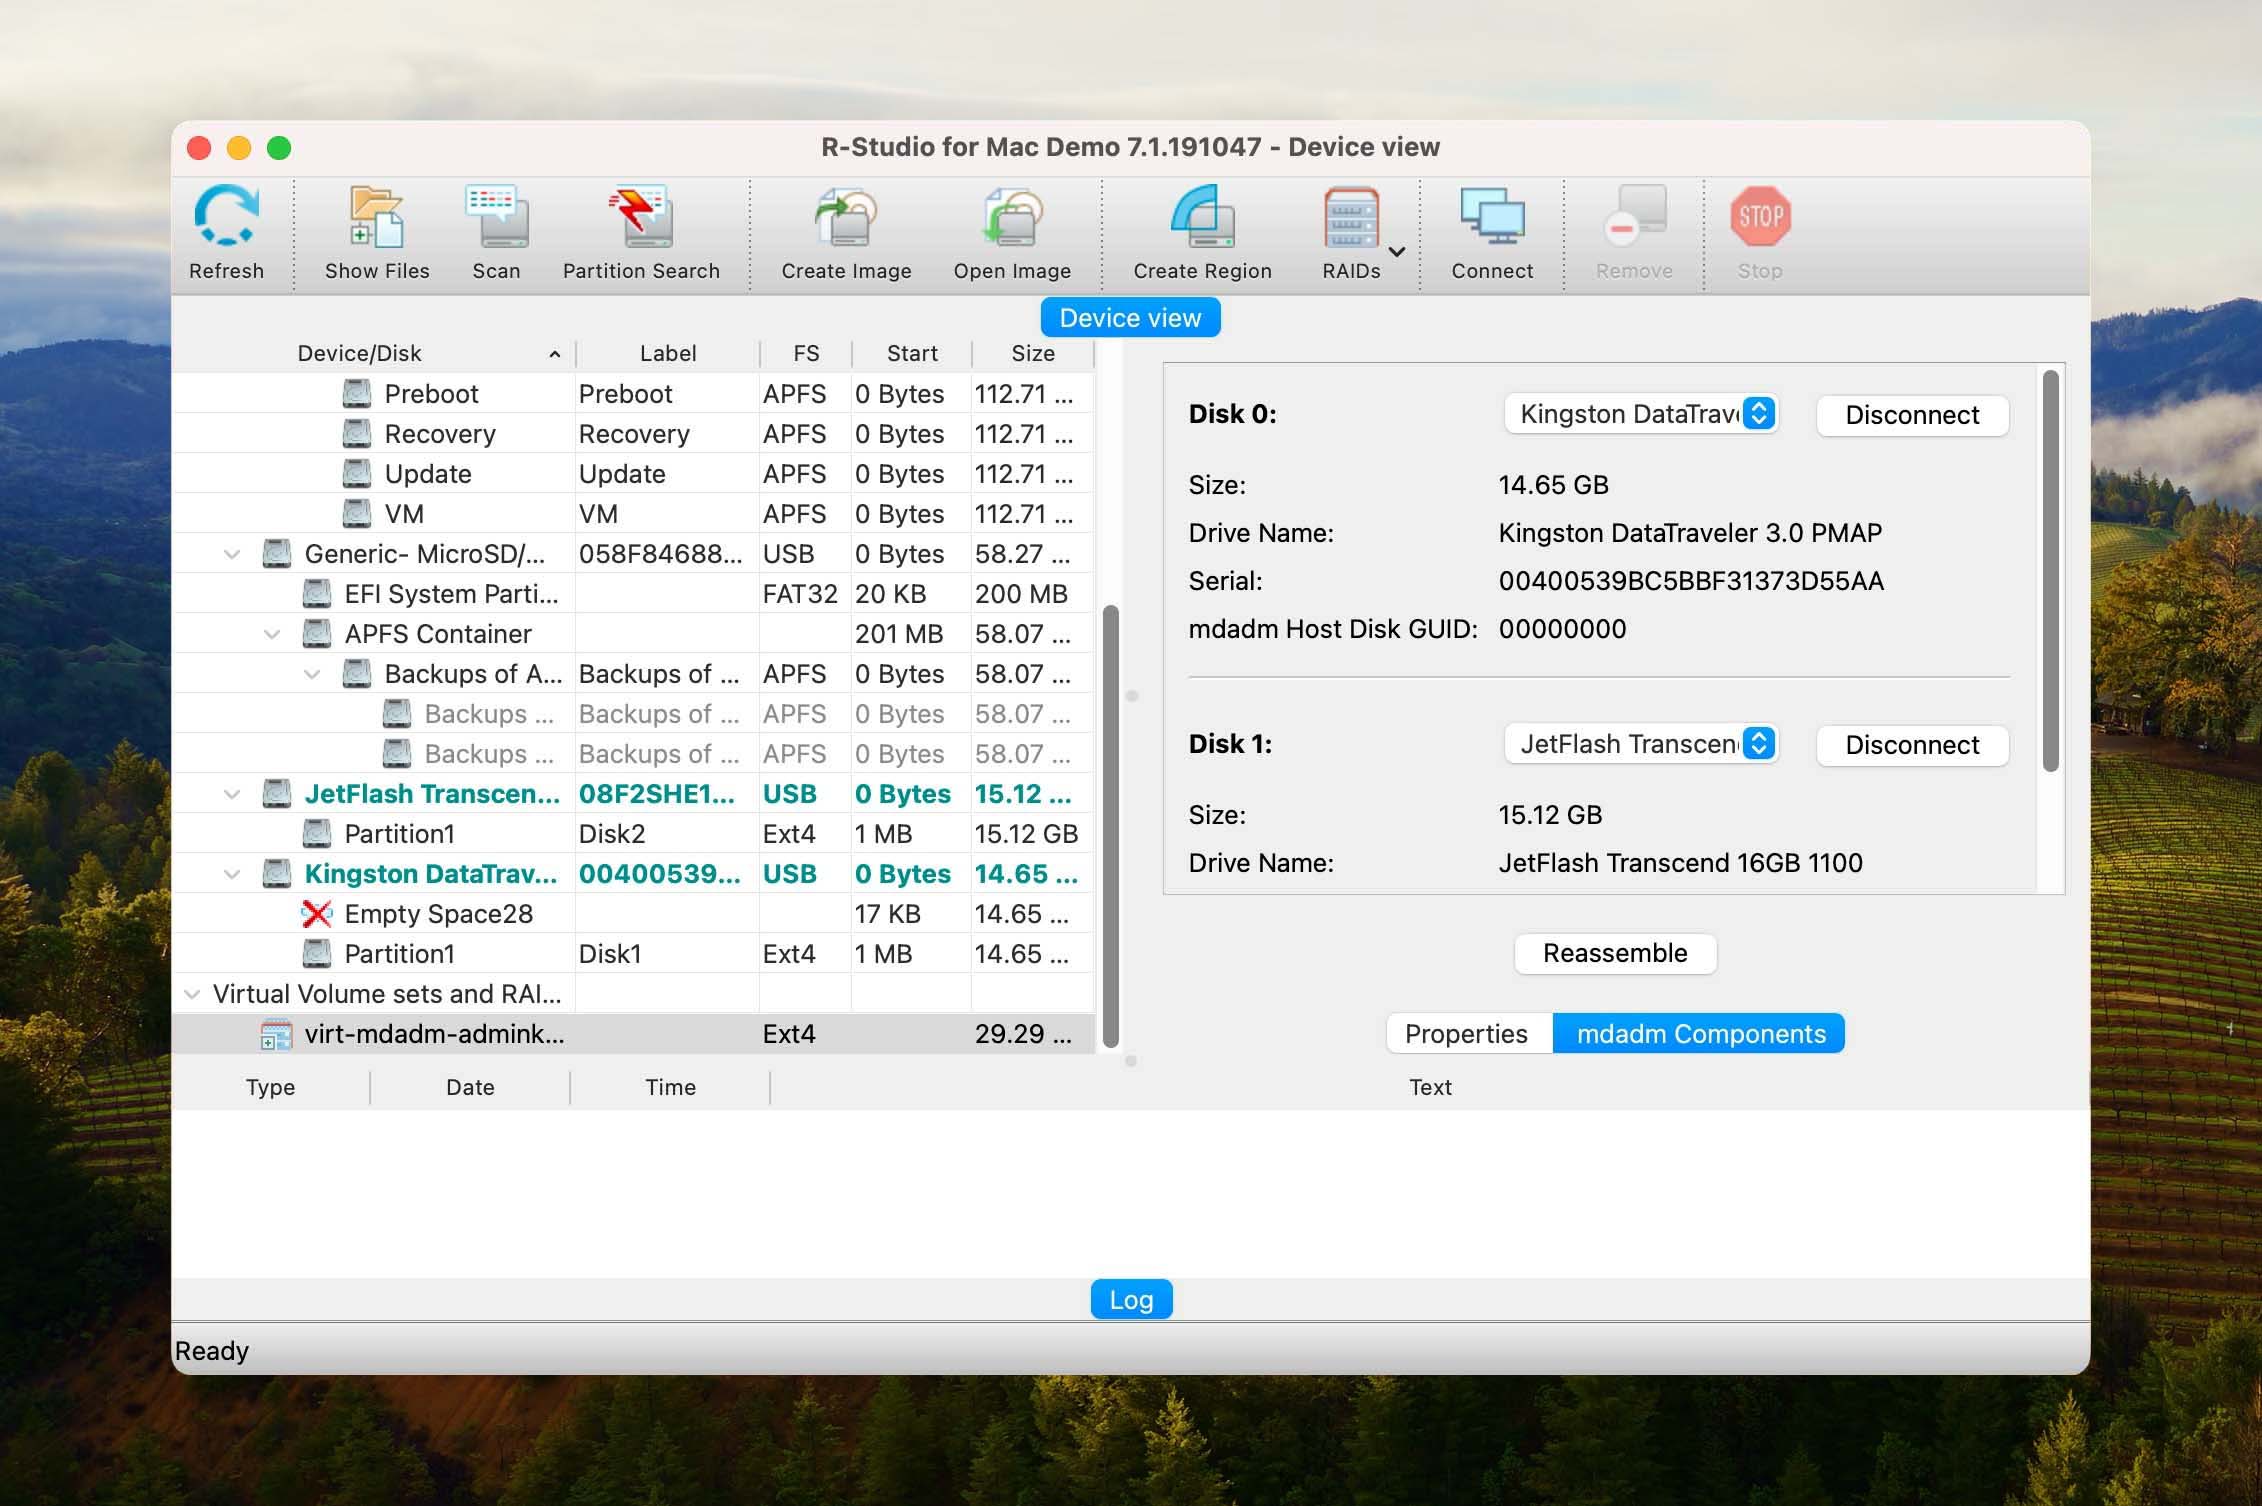
3. UFS Explorer RAID Recovery
UFS Explorer supports Windows, Mac, and Linux. While it is a pricier option than some of the others, you do get a very nice RAID-based data recovery option here because the application is designed specifically to address RAID-related data loss.
UFS Explorer boasts support for the largest number of RAID types, and its file system support is similarly impressive. While it can automatically detect RAID parameters, RAID configurations need to be defined manually. Another downside worth mentioning is the fact that its scanning algorithms are a bit weaker compared with the two above-recommended tools.
4. TestDisk
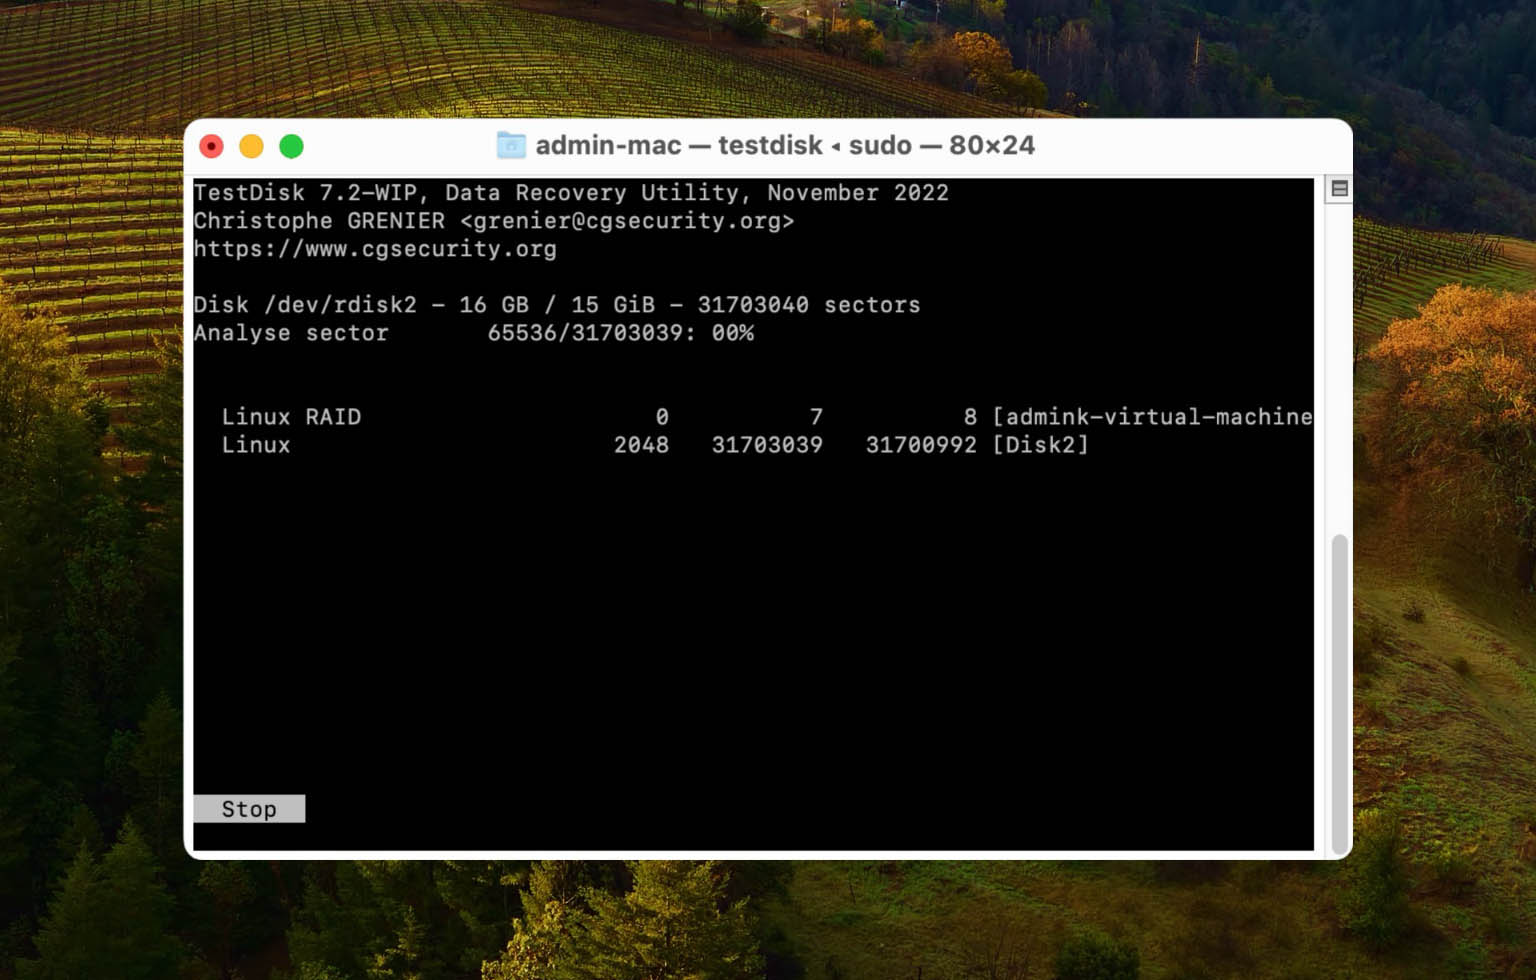
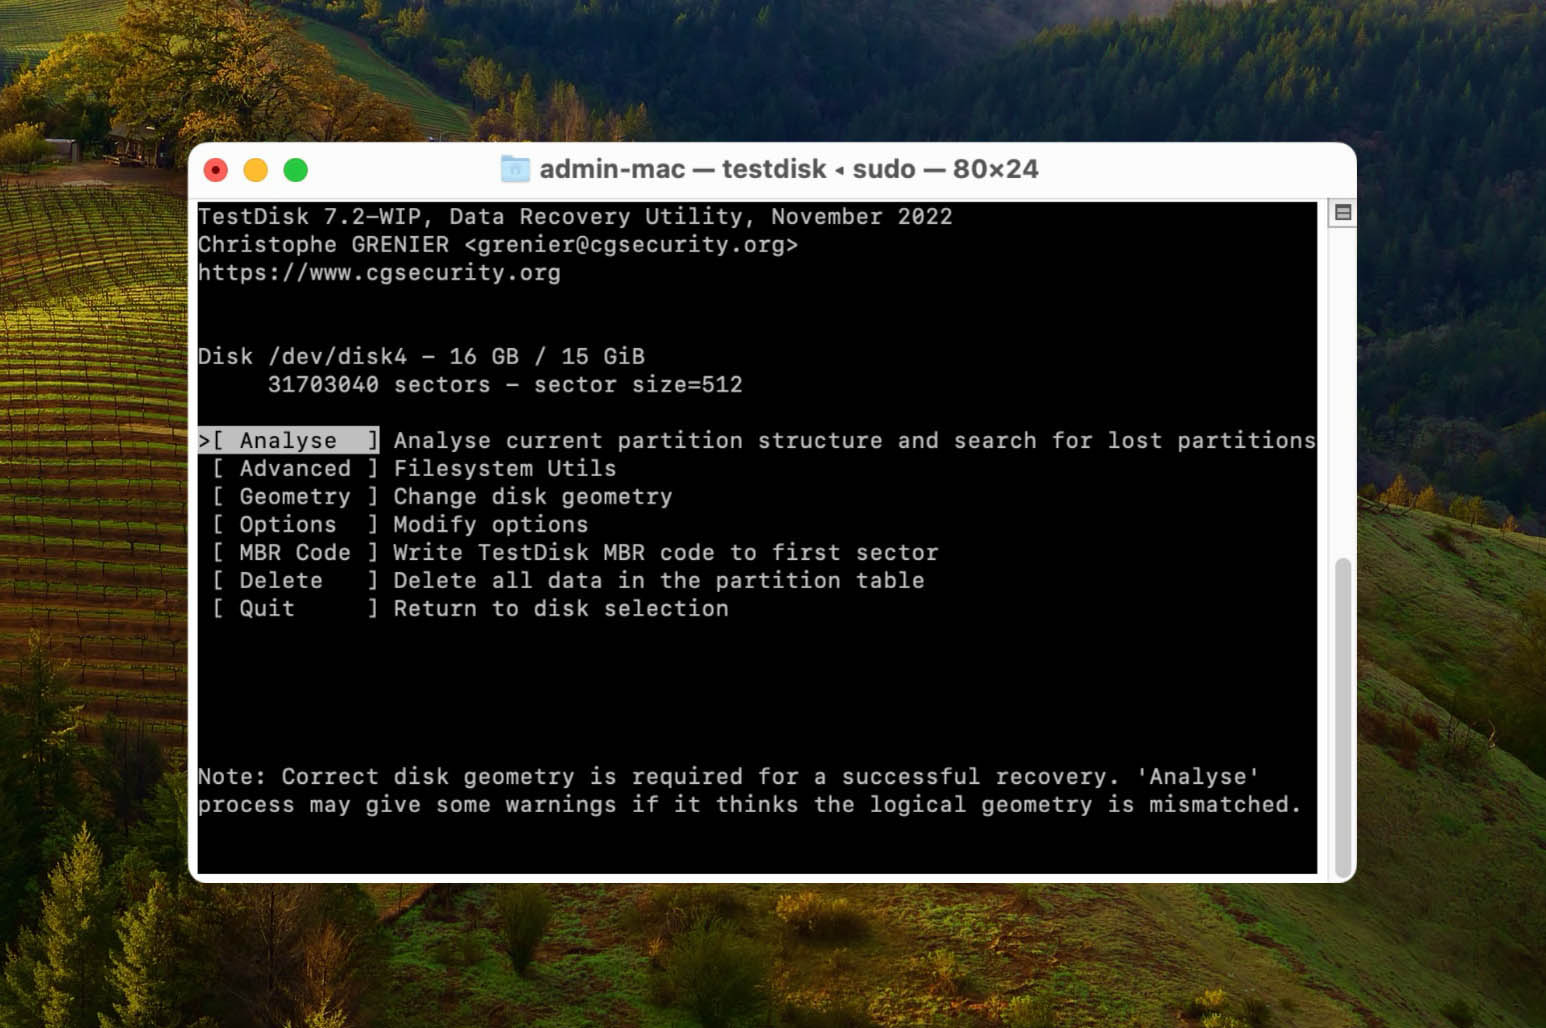
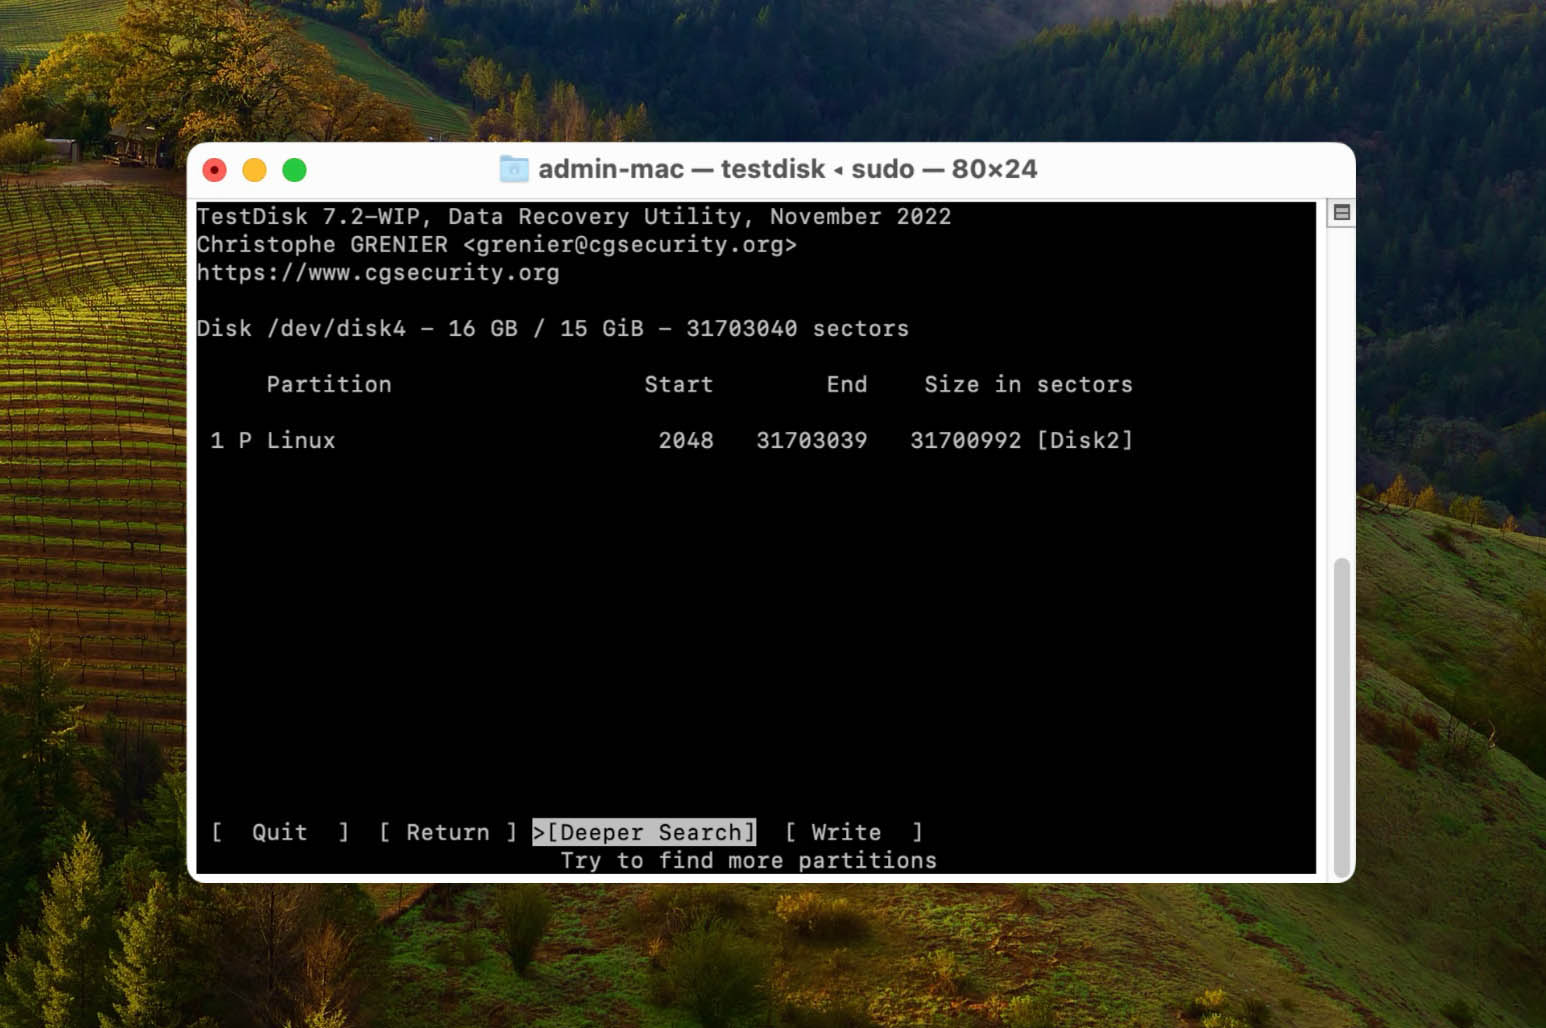
TestDisk is a completely free and open-source data recovery tool that can be used to get back lost data from Linux RAID md 0.9/1.0/1.1/1.2 (RAID 1, RAID 4, RAID 5, and RAID 6) arrays. In terms of recovery performance, it stands out with its ability to find lost partitions on a RAID array.
As you can tell by looking at the screenshot above, TestDisk doesn’t have a graphical user interface, and that’s easily its biggest downside. For this reason, we can really recommend it to inexperienced users who are looking for something straightforward. Such users are much better off using Disk Drill instead.
5. MiniTool Power Data Recovery
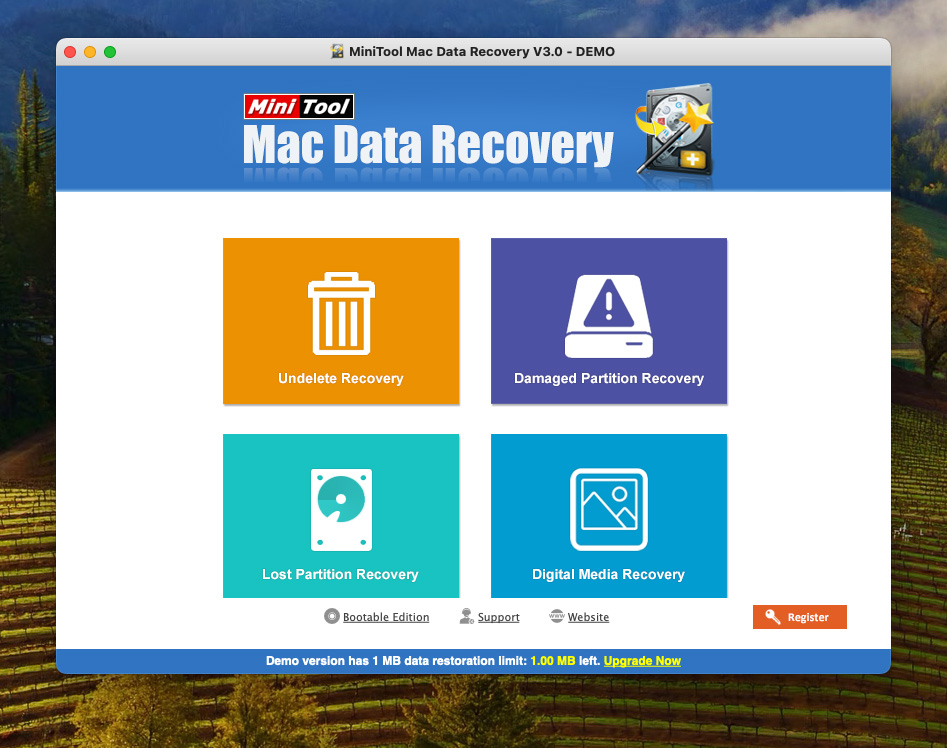
MiniTool Power Data Recovery is a file recovery app from the developers of (the highly popular) MiniTool Partition Wizard. It supports over 100 file formats, including the most popular photo, video, audio, and document formats, including JPG, PNG, TIF, MP4, MP3, AVI, DOC, XLS, PDF, etc., and many more.
Most importantly, the app supports recovery from software RAID arrays – specifically: spanned volumes, striped volumes (RAID 0), mirrored volumes (RAID 1), and RAID-5 volumes.
While we prefer the GUI design of other apps on this list, MiniTool’s visual interface makes RAID recovery easy enough for beginners. It also has decent file browsing features, such as thumbnail view (which makes it easier to browse photos and videos) and search and filter tools to narrow down the list of files.
Overall, MiniTool is a decent recovery tool for beginner users that works best for restoring common files from software RAID setups. It also offers 1MB of free data recovery, which should be enough to check if the app will work for you.
How to Recover Data From Software Raid Configurations With Data Recovery App
As we previously mentioned in this article, we’re big fans of Disk Drill. While it may not have the advanced features that R-Studio and other technician tools have, it’s powerful enough for most home users while being super simple to operate.
Aside from its beginner-friendly interface, Disk Drill also recognizes a large number of file types (including RAW), and it excels at restoring original folder structure. Most importantly, it recognizes and supports both hardware RAID (e.g. NAS) and software RAID arrays.
In the guide below, we’ll show you exactly how to use Disk Drill to recover data from a RAID array. However, the steps are highly similar to those of other recovery apps, so feel free to use the tool of your choice.
Step 1. Download and install Disk Drill onto your Mac.
Step 2. Launch Disk Drill and select the RAID category in the left pane. Then select your RAID array and click Search for lost data.

Step 3. Wait for the scan to complete.
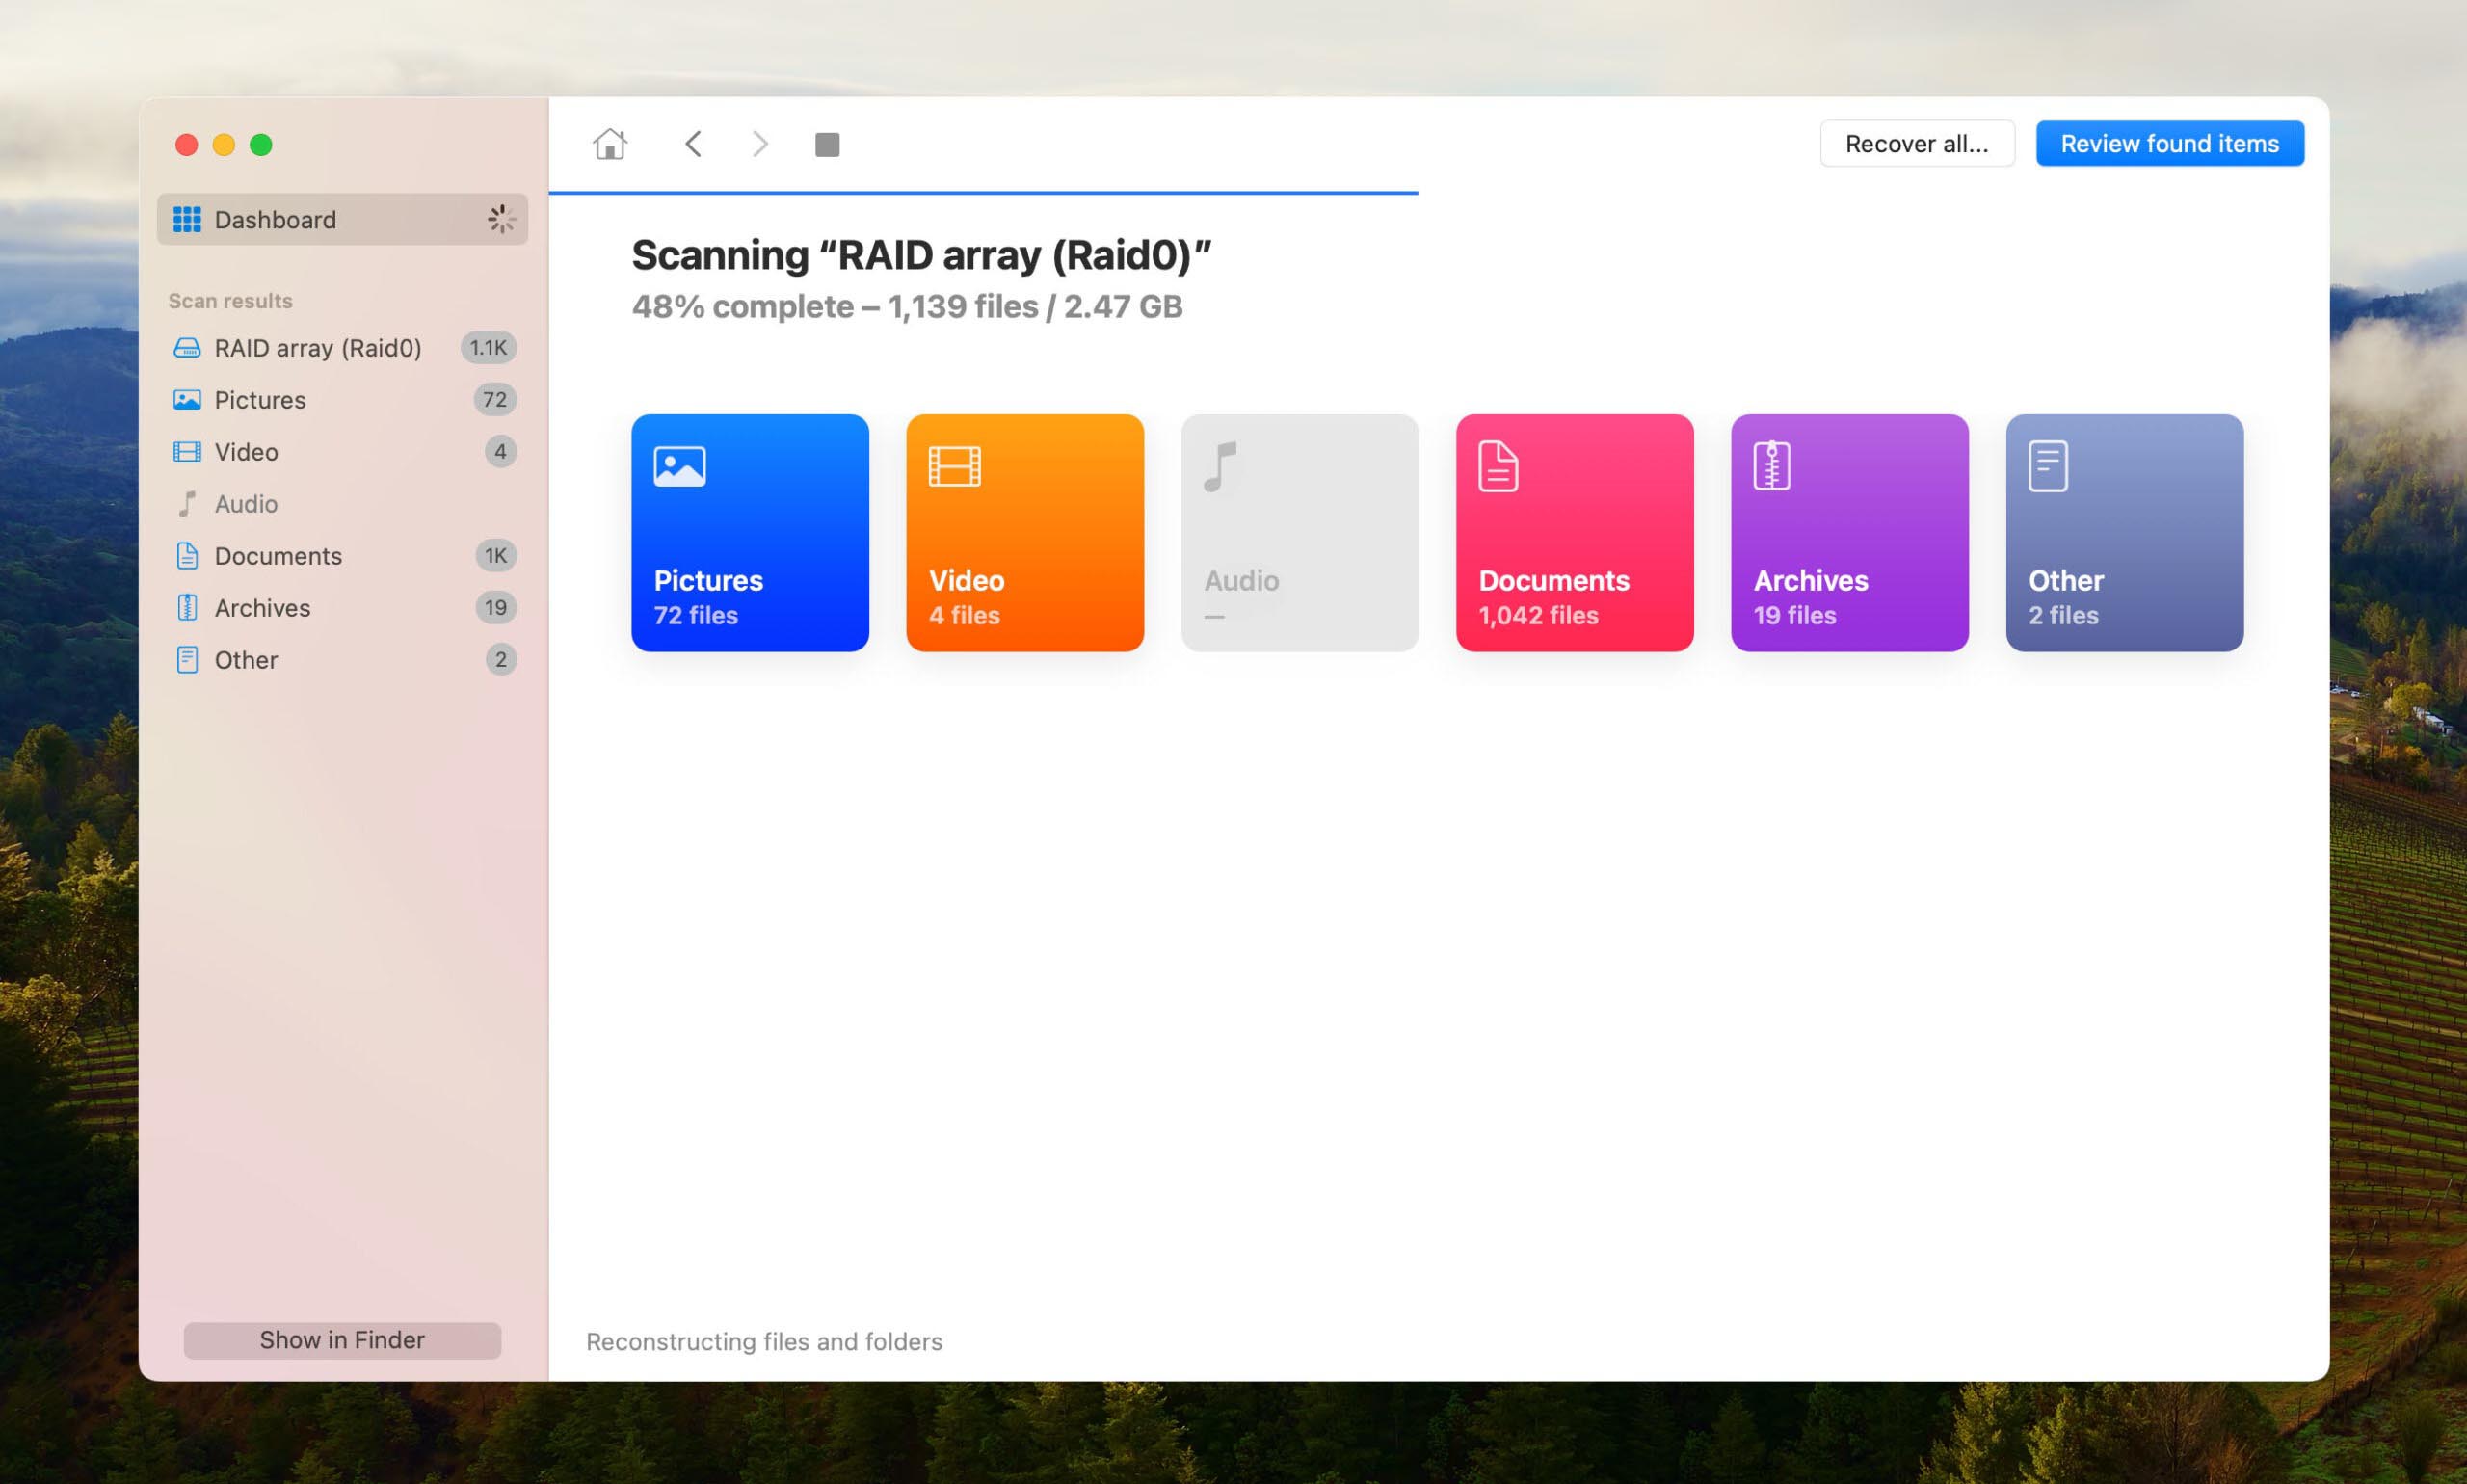
Step 4. Select which data you would like to restore from your RAID array. You can use the preview function to see many file formats directly within Disk Drill.

Step 5. Once you have found and selected what you would like to recover, click on the blue Recover button and choose a suitable recovery destination.
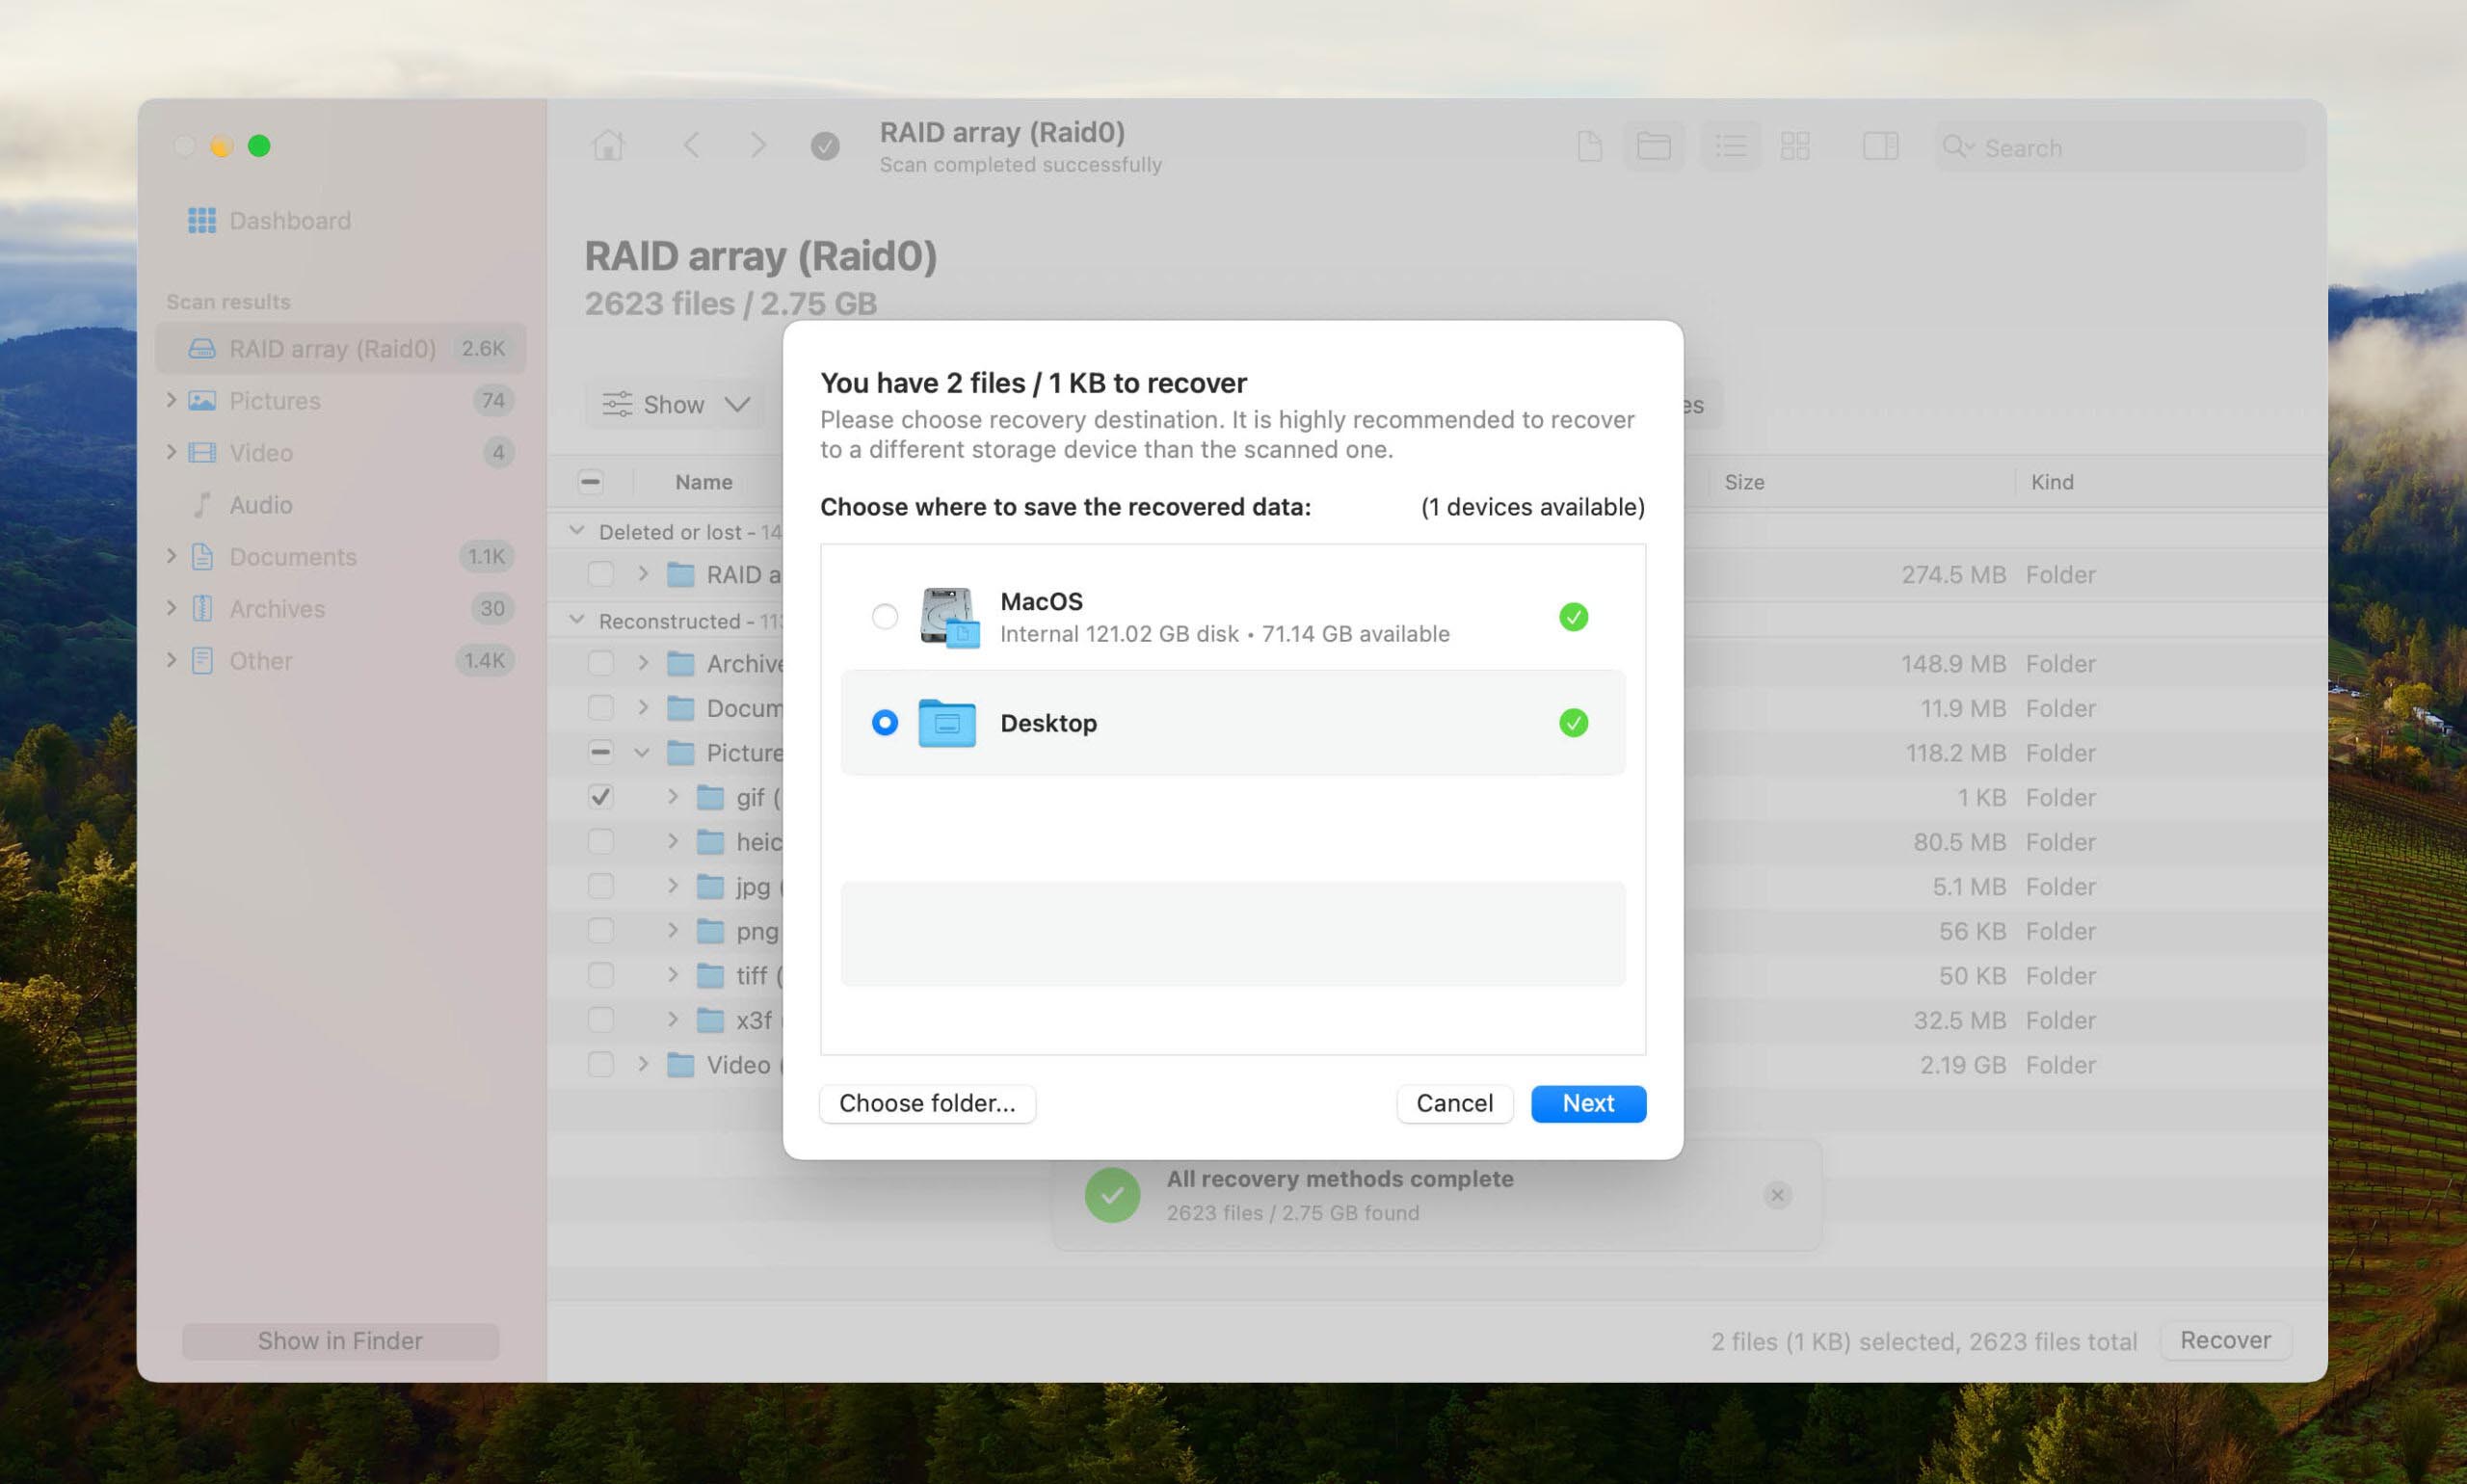
Step 6. Finally, Disk Drill will display a brief recovery summary with an option to the recovered files in Finder.
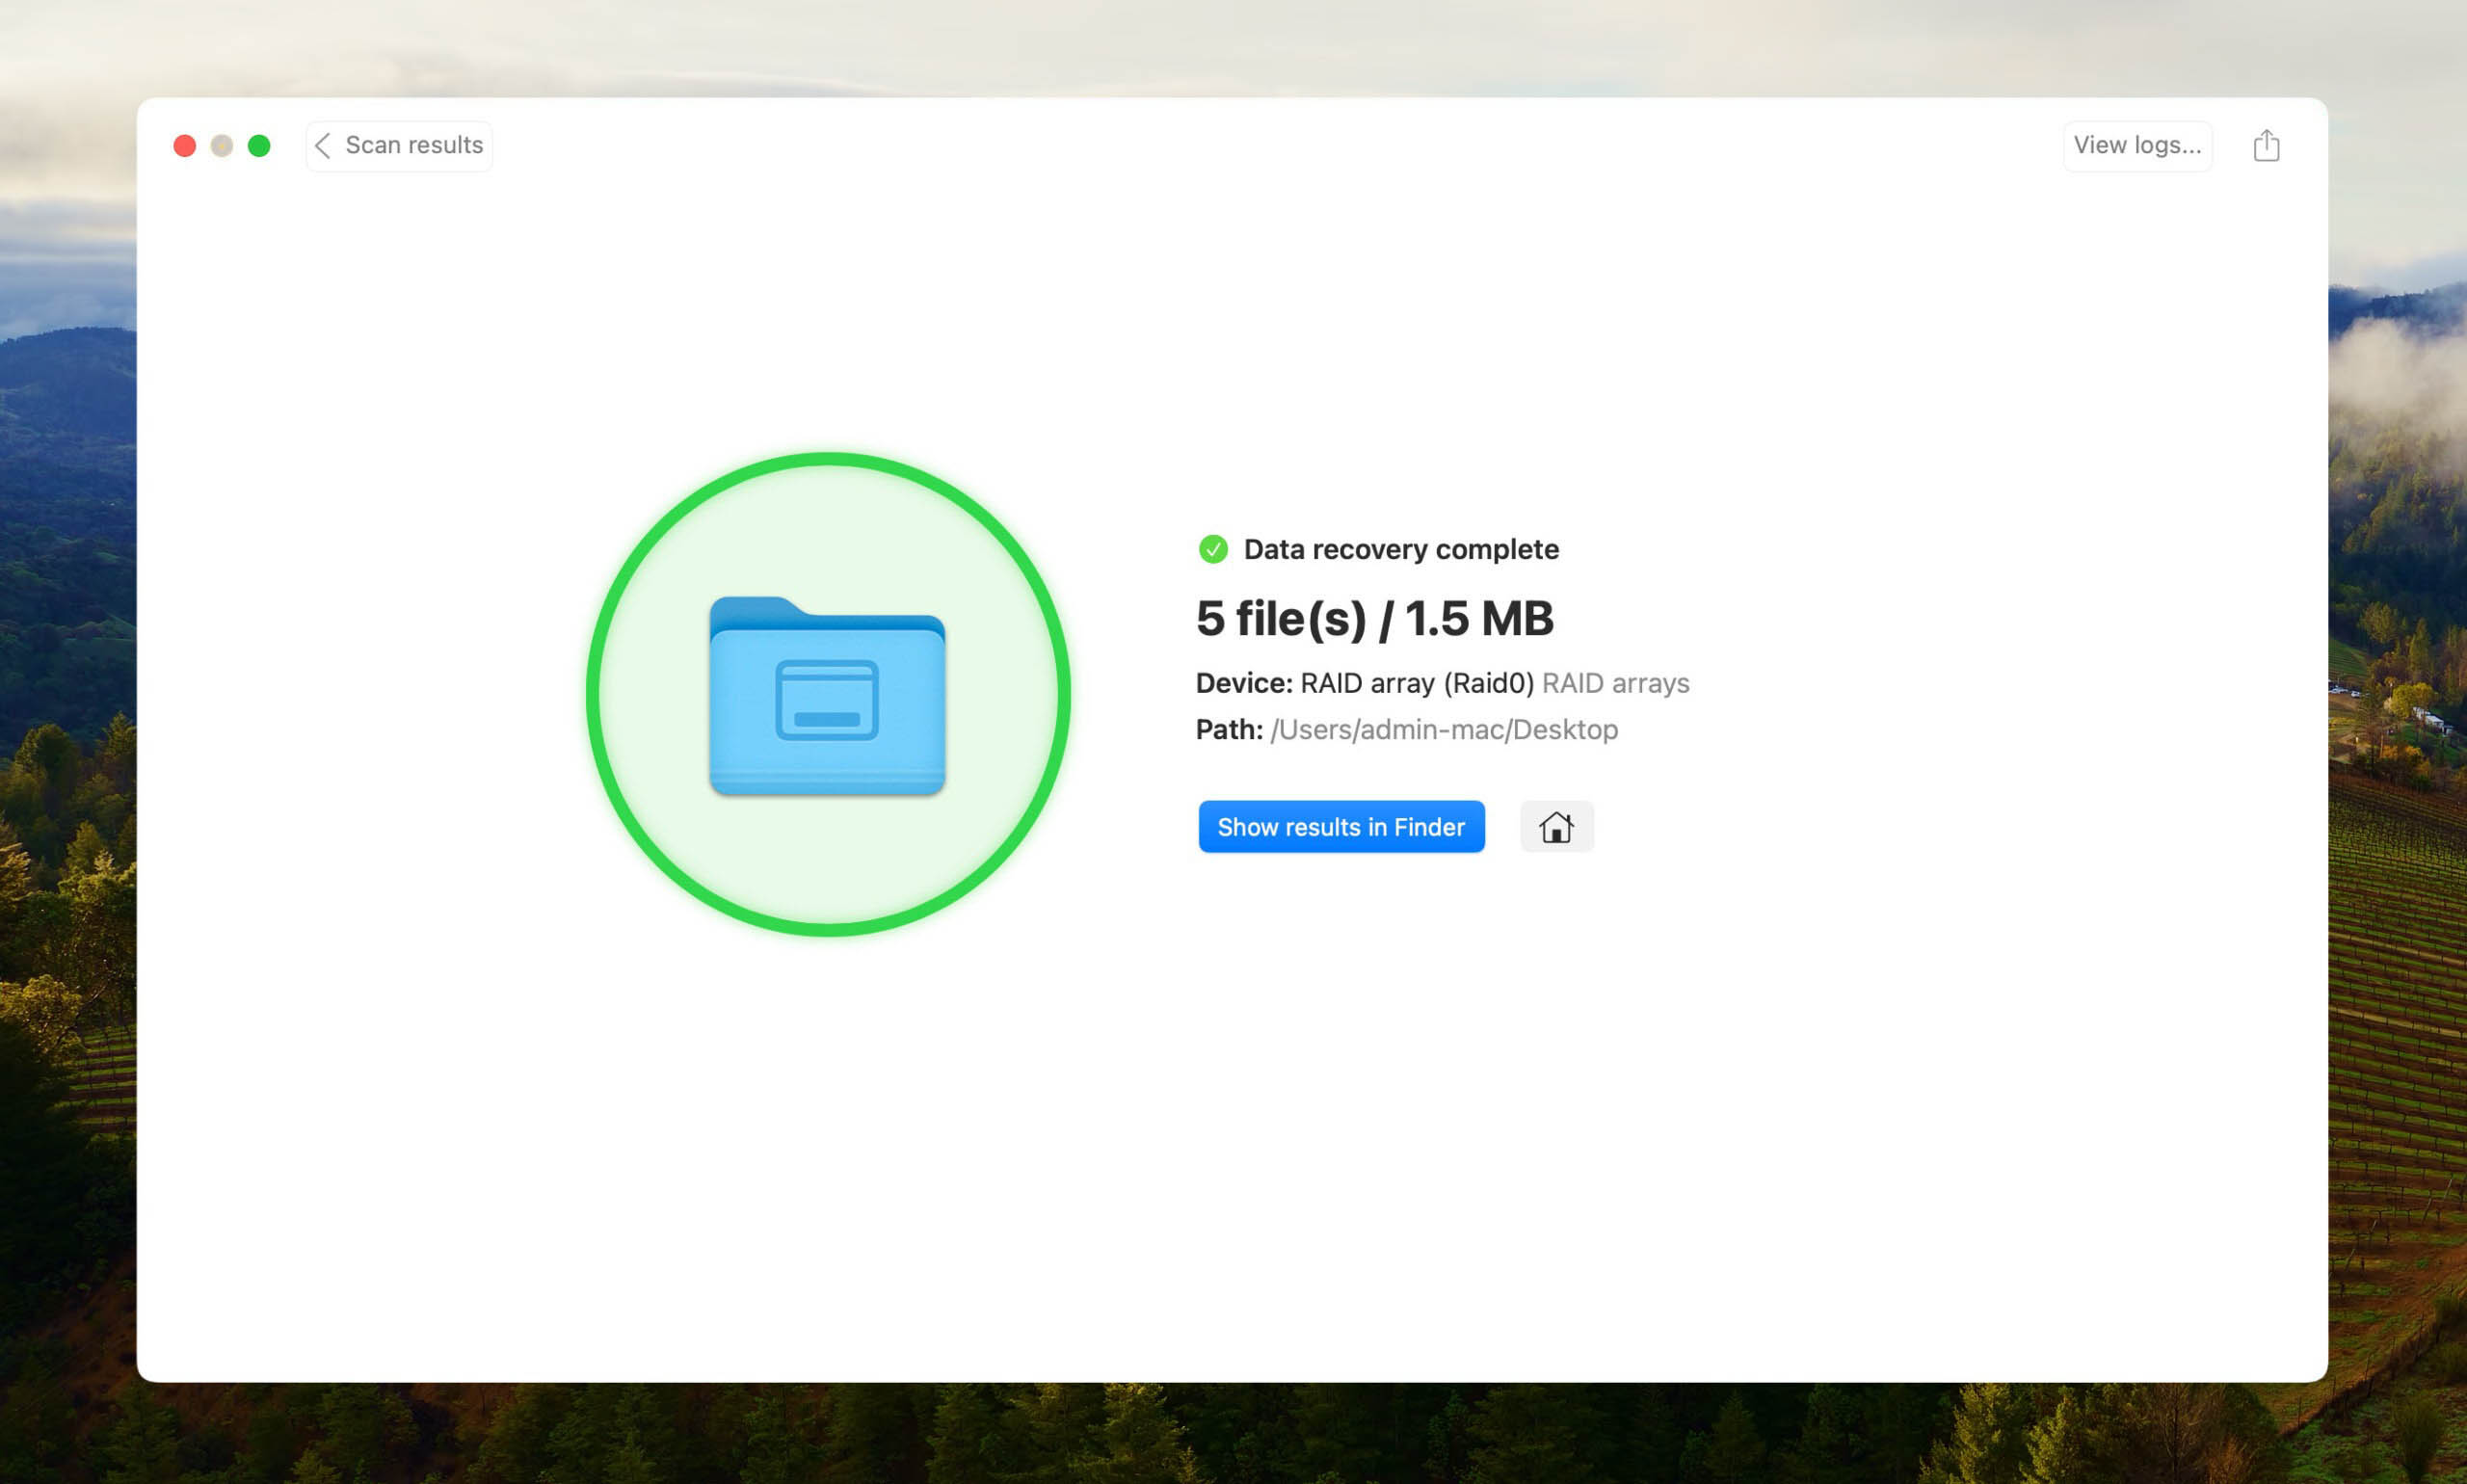
That’s how easy it is to recover files from a RAID array using Disk Drill.
Free RAID Recovery Method
Here is a free method that might help you recover data from a Linux RAID on Mac, it’s not as convenient as previous one, but is completely free with no strings attached:
Step 1. Connect the RAID disk to your Mac.
Step 2. Install TestDisk using Homebrew.
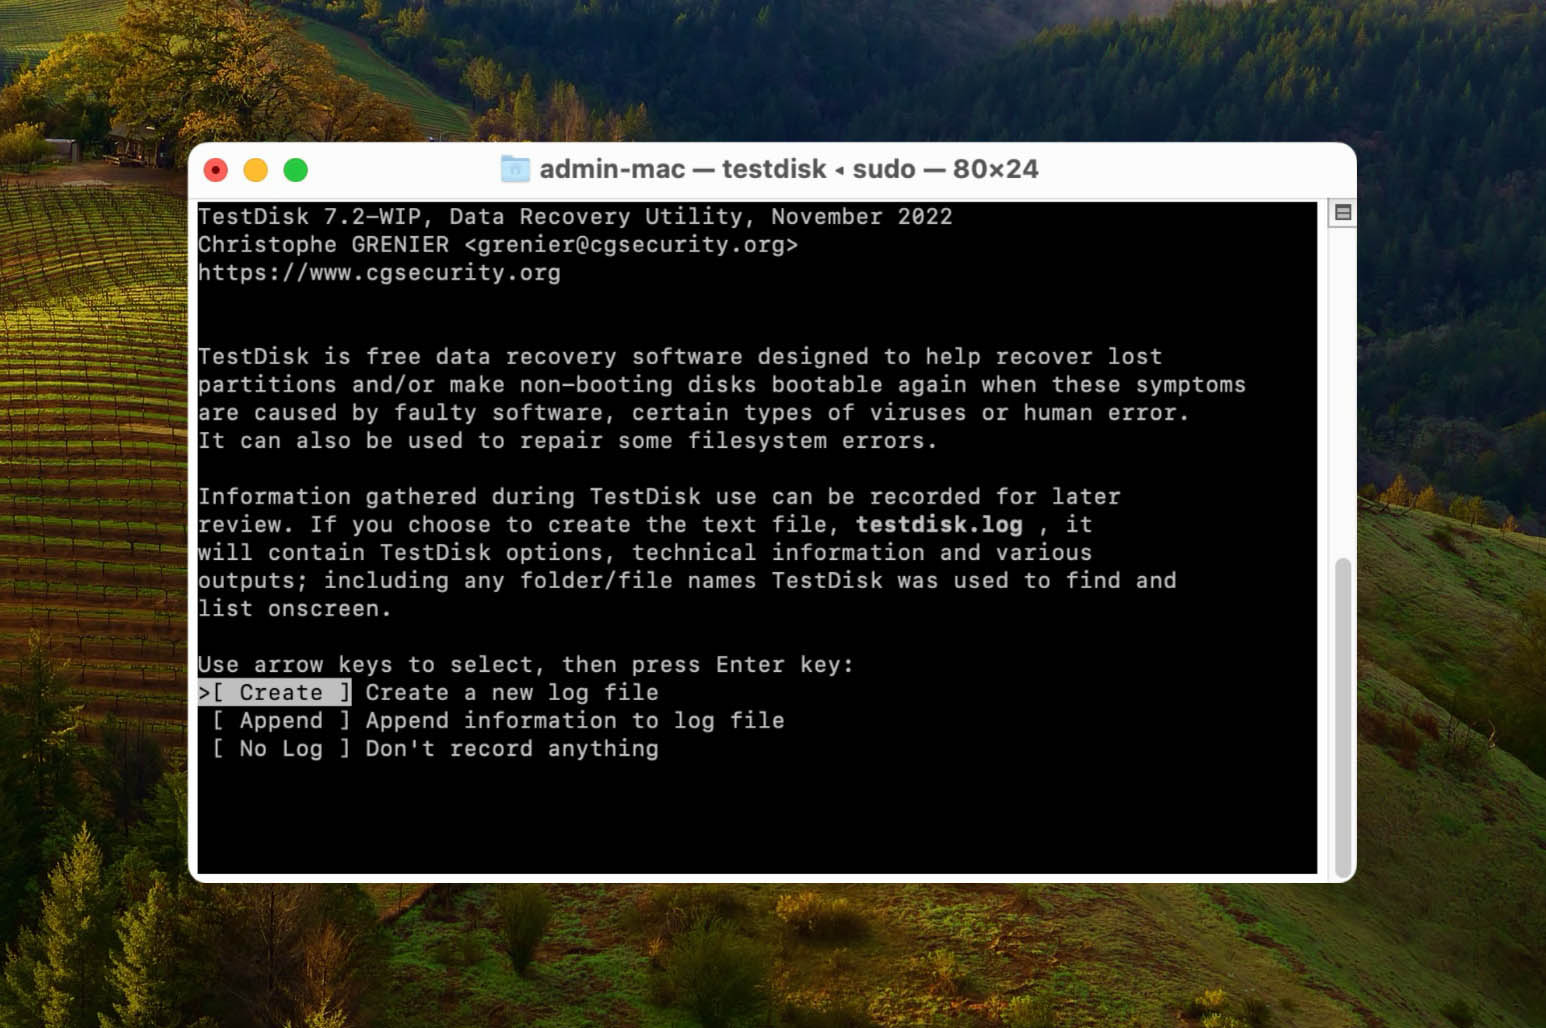
Step 3. Launch TestDisk in Terminal and decide if you want to create a log file.
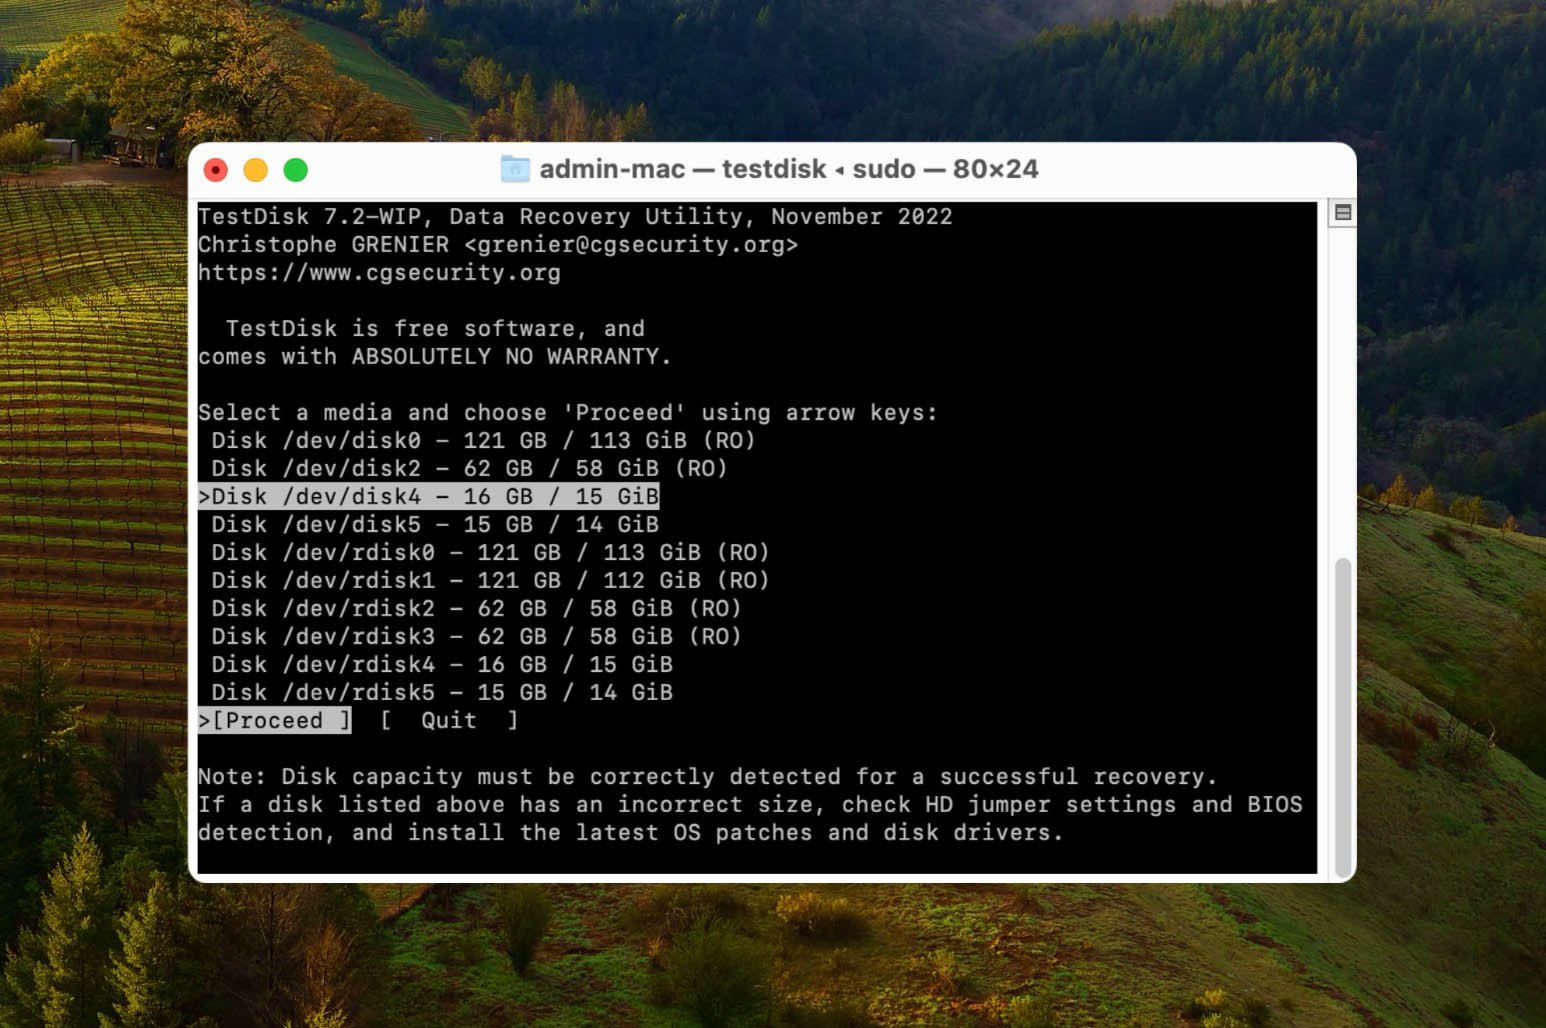
Step 4. Select the RAID disk you want to scan.
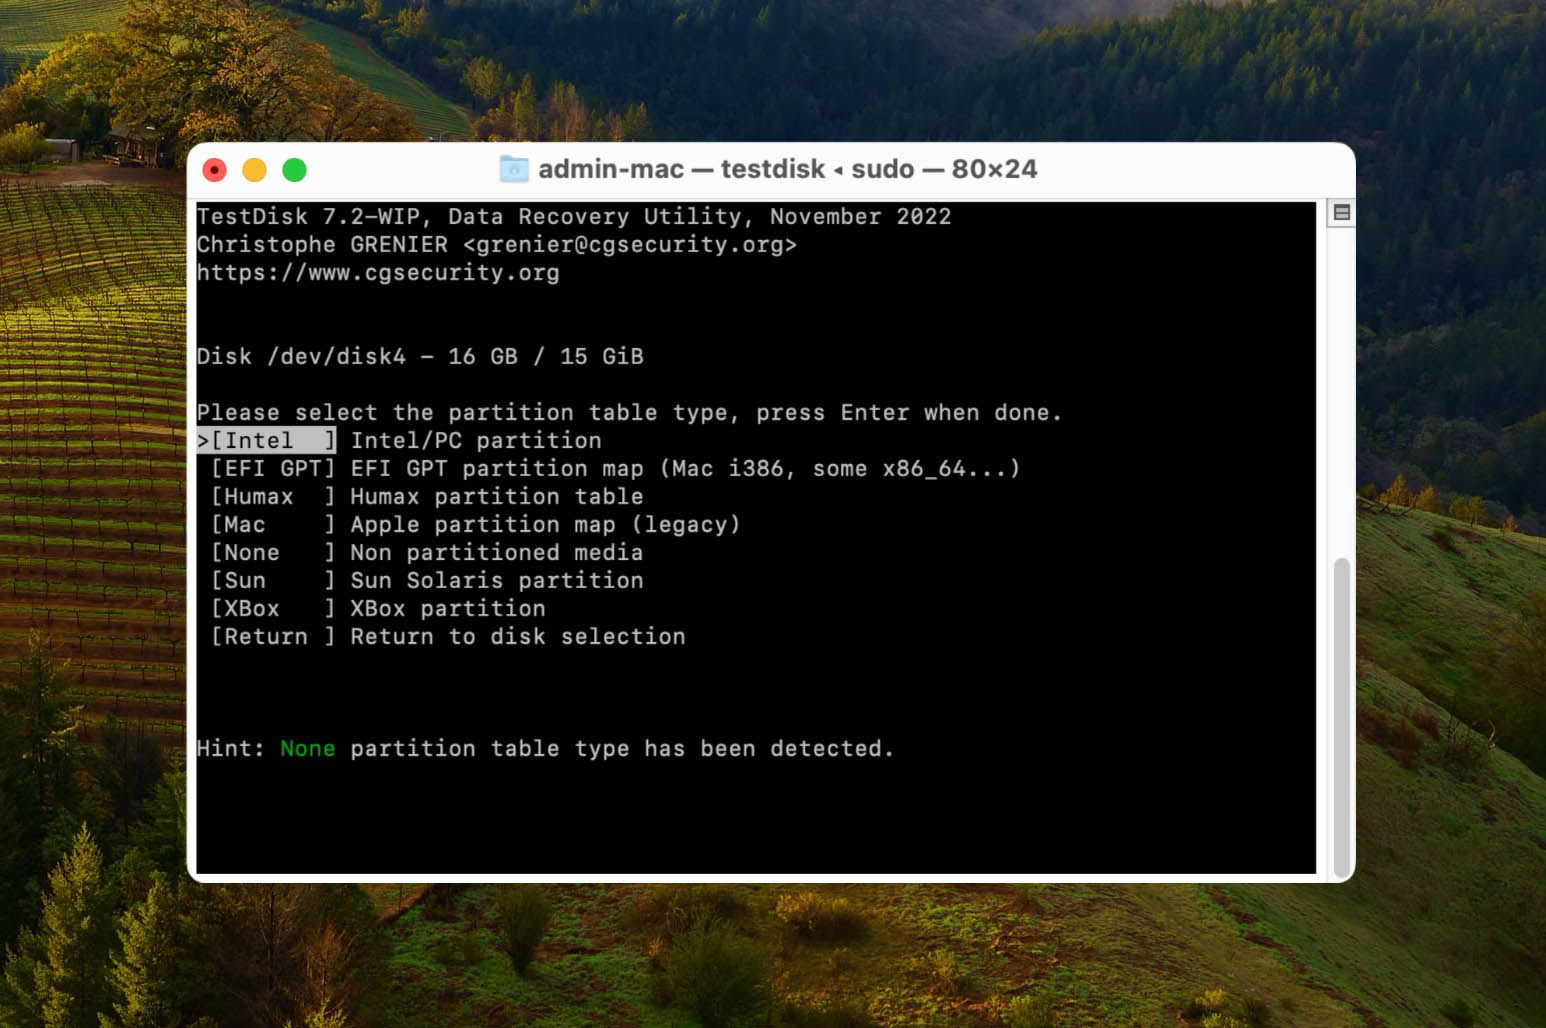
Step 5. Select the partition table type.
Step 6. Use the Analyse option to search for lost partitions.
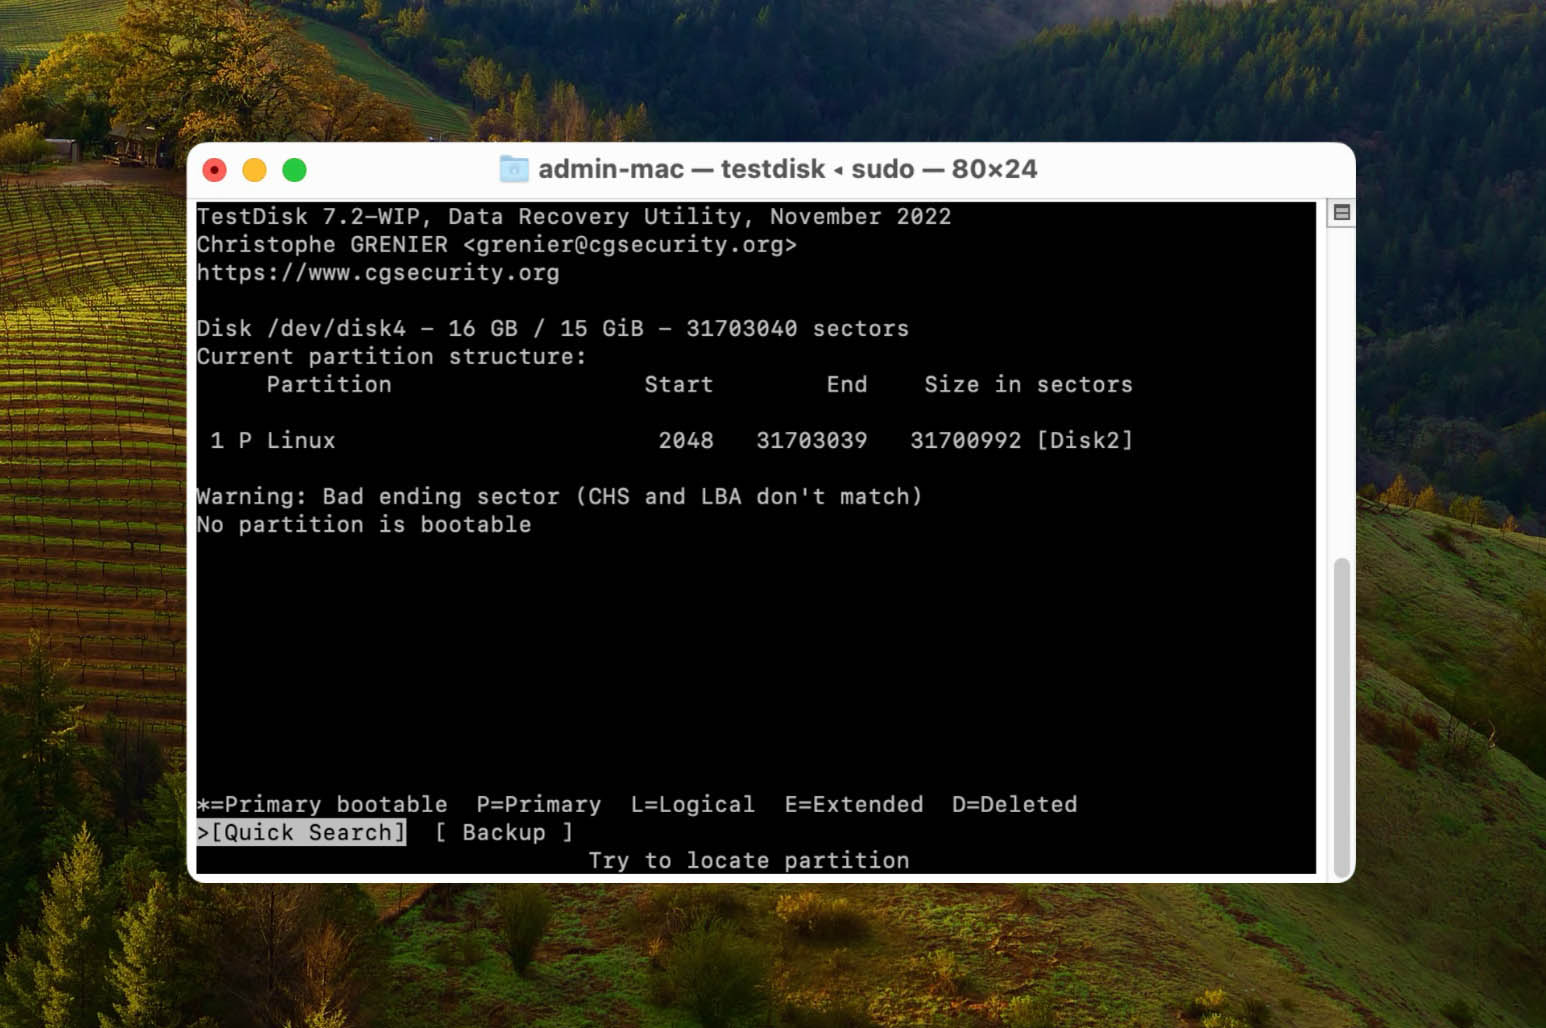
Step 7. Select the Quick Search method to find lost partitions.
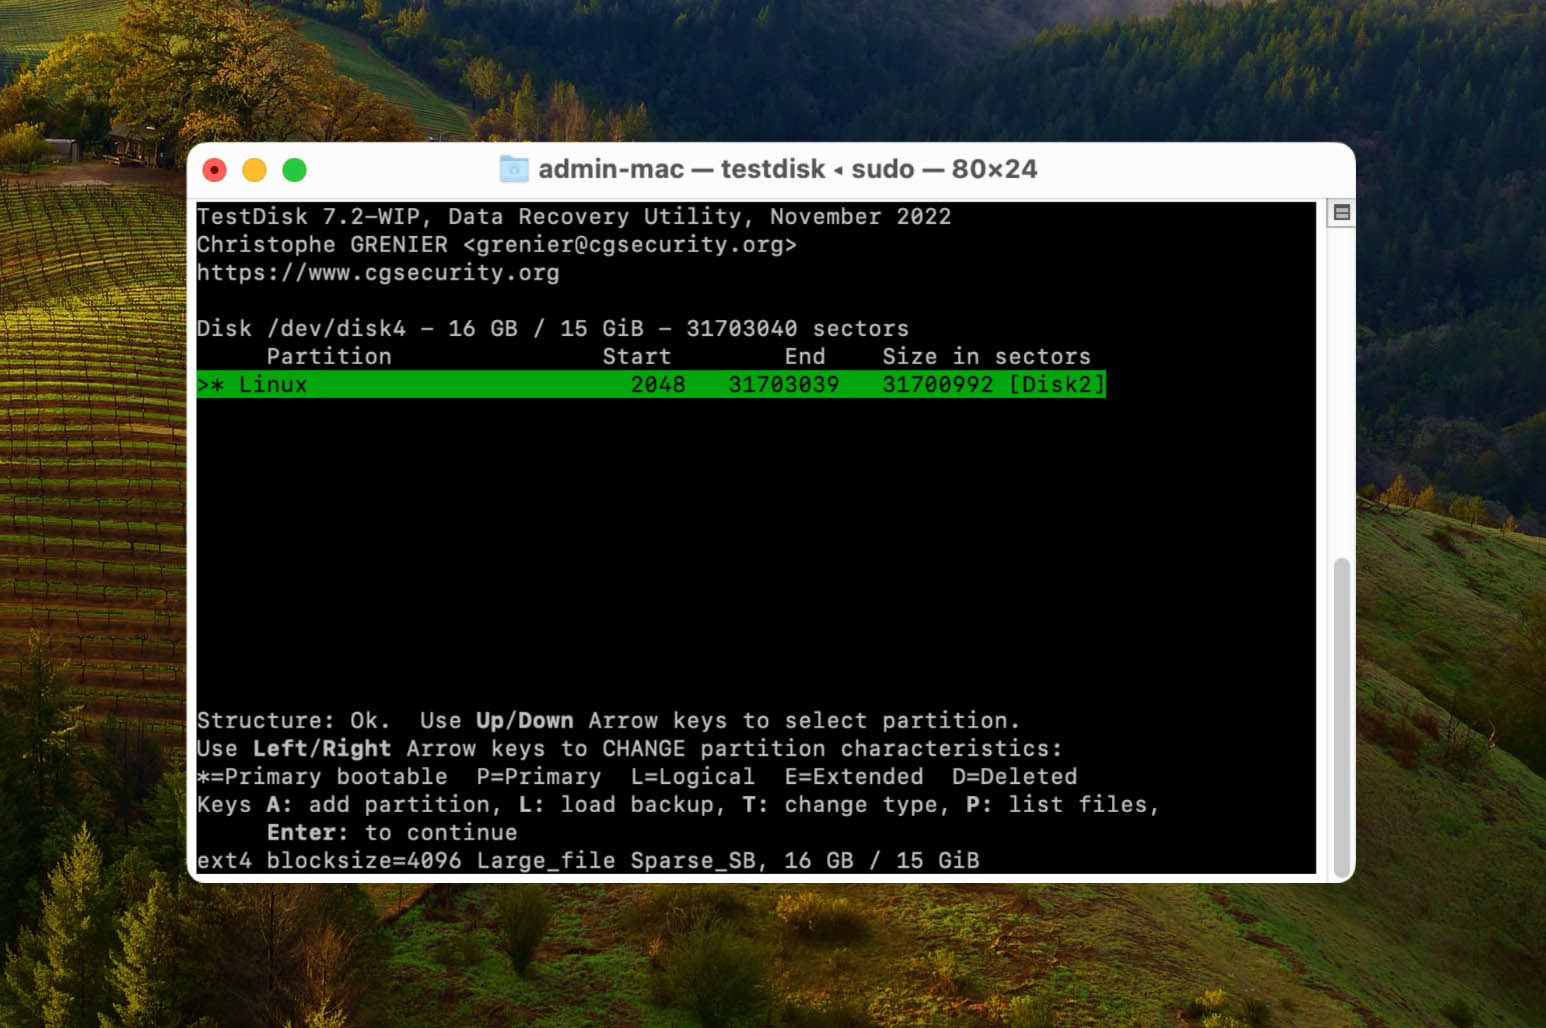
Step 8. Change partition characteristics if needed or press Enter to continue.
Step 9. Write the new partition structure to the disk.
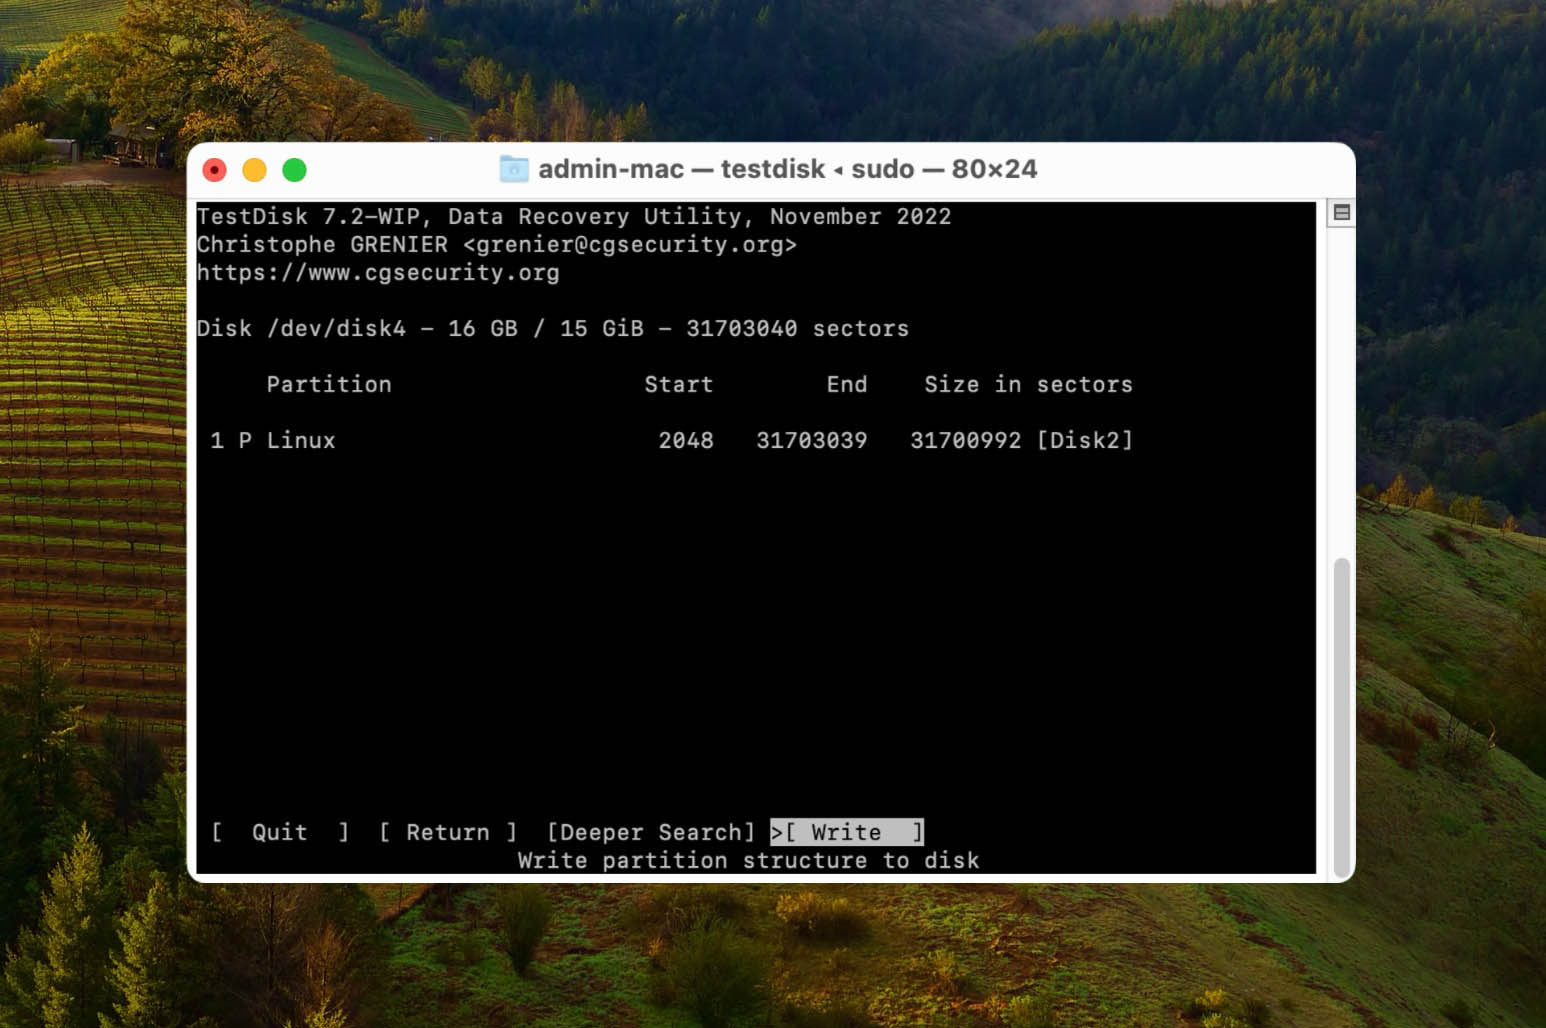
Step 10. Use the Deeper Search method to look for more partitions if they’re still missing.
Conclusion
RAID recovery isn’t difficult as some may think. You’re essentially recovering data from a hard drive and saving it should the RAID that you have implemented start to not work correctly.
Even if you don’t have a RAID setup, the recovery methods in this article will help you with just normal data recovery as well if you ever experience data loss.


