
While hardware issues on your Mac are rare, they can occur. A startup disk error message can be particularly problematic as it will prevent your computer from booting most of the time.
In this article, we’re going to look at how to fix the no startup disk error on your Mac, and then we will look at how to recover files.
First, let’s define what the startup disk is and what it does for our Mac.
Table of Contents
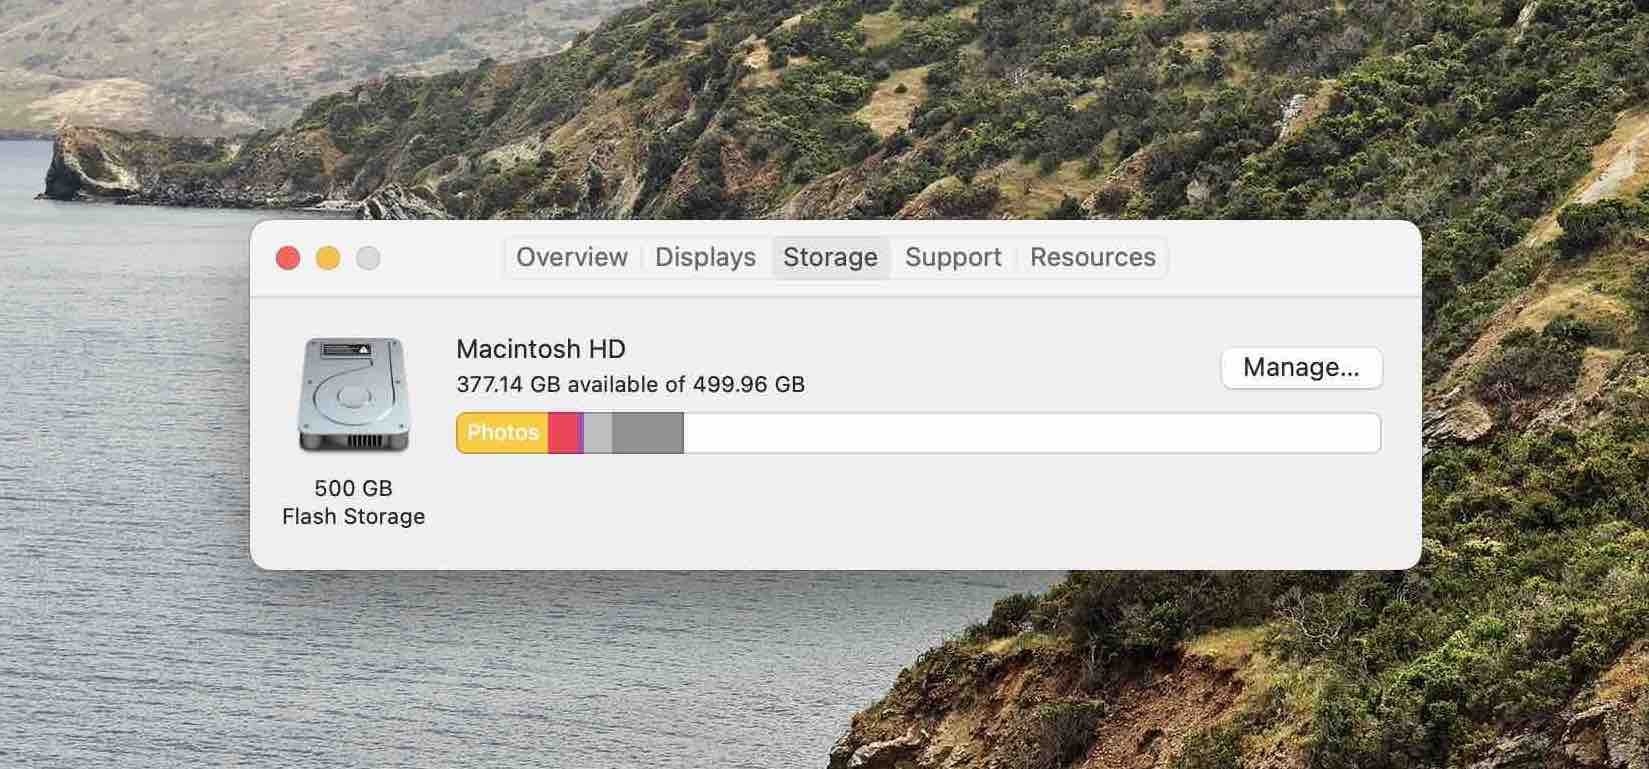
What Is the Startup Disk on Your Mac?
The startup disk is where your Mac will store things such as your operating system and applications. These are stored on a physical hard drive that is located within your Mac.
Without it, your Mac wouldn’t be able to turn on and run. It’s the core of your machine.
Let’s take a look into why your MacBook startup disk may not be working.
Why Your Startup Disk Might No Longer Be Working Correctly
When you buy a Mac today, you’re going to get an internal SSD hard drive which is a very reliable storage unit with no moving parts. However, even with these reliable storage devices you can still experience a hard drive failure and have no startup disk on Mac.
Some of the most common reasons that you might experience a hard drive failure would be the following:
- ❓ If you see a question mark: Your Mac no longer has a startup disk available or it doesn’t contain a working Mac operating system. This can be due to a corrupted operating system meaning that there is an error in the code that is causing it to not work or you might have a loose connection causing a hardware component to not connect inside your Mac.
- 🚫 Circle with a line through it: this means that your Mac contains an operating system but it’s not one that your Mac can use.
No matter what the reason for the startup disk missing on Mac, there are ways that we can attempt to fix it and get it working again.
Let’s take a look at the best methods for troubleshooting our Mac and how we can get it to work again.
Method #1: Running First Aid in Disk Utility
First Aid is a feature built into macOS that allows you to find and repair disk errors. Sometimes these may be the reason that our Mac won’t boot. Running First Aid hopefully will fix the issue of our Mac not showing the startup disk.
Let’s take a look at how we can use First Aid on our Mac.
- The first thing that we need to do is boot into Recovery Mode. There are 2 ways to do this and they depend on if you’re using an Intel processor or Apple Silicon.
- Apple silicon: Turn on your Mac and continue to press and hold the power button until you see the startup options window. Click the gear icon labeled Options, then click Continue and this will bring you into Recovery Mode.
- Intel processor: Turn on your Mac, then immediately press and hold these two keys until you see an Apple logo or other image: Command (⌘) and R. You might have to hold these keys for a little bit of time to get into Recovery Mode.
- Now that we’re in Recovery Mode, we will see a list of options. We want to select Disk Utility to be able to get access to First Aid. After selecting Disk Utility, we then want to click on the Continue tab.
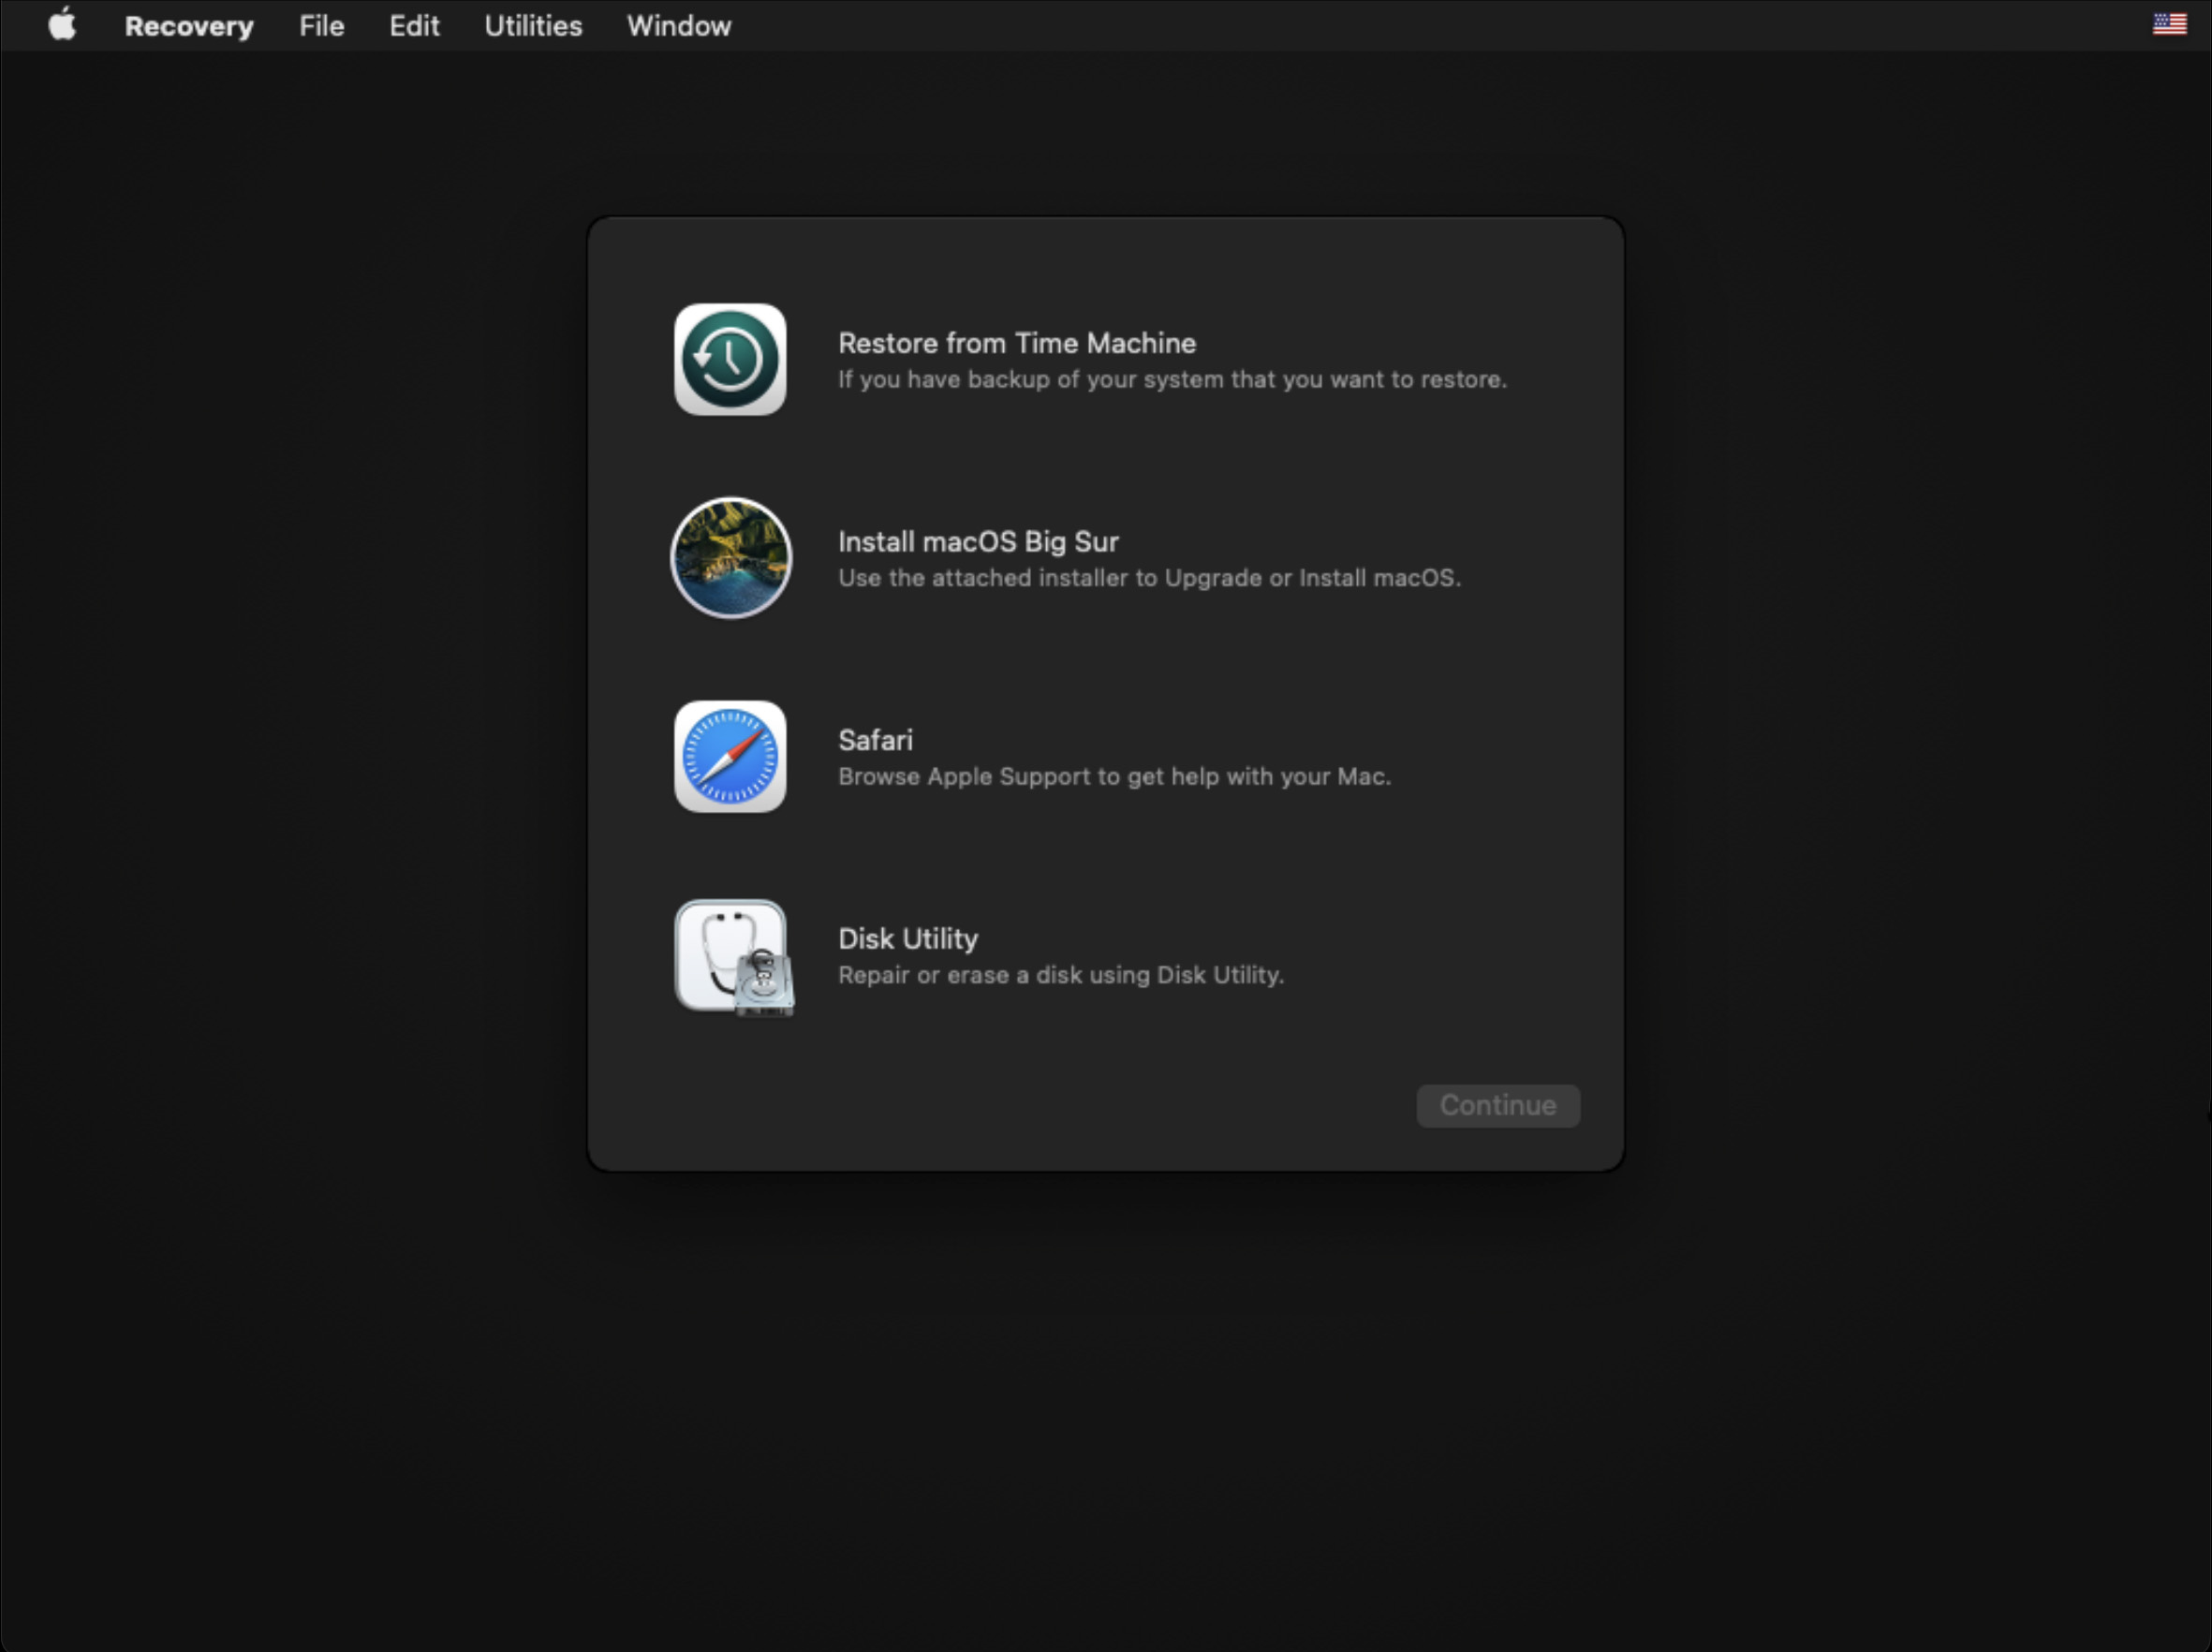
- Once within First Aid, we then want to select the startup disk and run First Aid on it.
- Once First Aid has run and is complete, you should see a complete message like this one below.

- Turn off your Mac by going up to the Apple logo in the upper left-hand side and then choose Shut Down. Once your Mac has shut down, turn it back on and let it boot normally.
Hopefully, now the issue of your MacBook not being able to find the startup disk is fixed and your computer is booting normally.
If it hasn’t, we can try and reset the NVRAM on your Mac.
Method #2: Reset the NVRAM/PRAM on your Mac
NVRAM (nonvolatile random-access memory) is a small amount of memory that your Mac uses to store certain settings and access them quickly. PRAM (Parameter RAM) stores similar information, and the steps for resetting NVRAM and PRAM are the same.
NVRAM stores things such as your sound volume, display resolution, startup disk selection, time zone, and recent kernel panic information. It’s essentially like turning your Mac off and back on again but taking it to a deeper level.
If you’re using a newer Mac that has a T2 security chip, you can release the keys right after you see the Apple logo.
With your Mac not starting up, this might be a way to get it to boot.
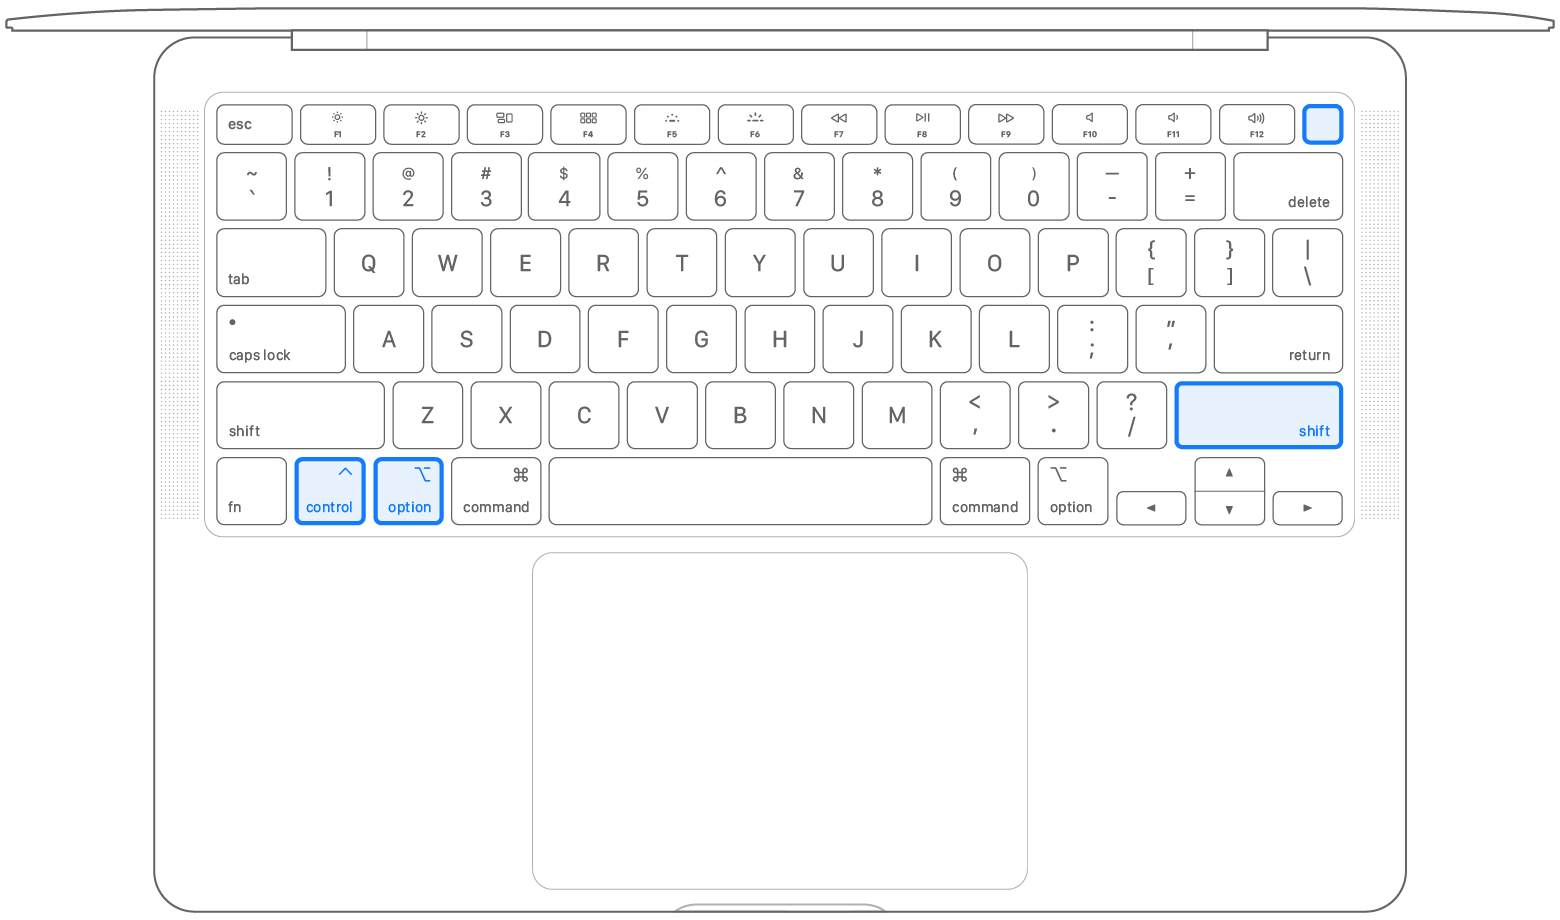
- Press the power button on your Mac and then immediately press and hold OPTION+COMMAND+P+R and hold these keys for about 20 seconds.
- Your Mac will then boot up and hopefully take you to the home screen.
If this didn’t fix your issue, let’s move on to resetting your SMC on your Mac.
Method #3: Reset SMC on Mac (Intel Processor Only)
The SMC or System Management Controller controls things related to power, battery, fans, and other features of your Mac.
This step will only apply to Macs that have an Intel processor. If you’re using one of the newer Apple Silicon Macs, then you can skip this step.
The steps below will walk you through how to reset the SMC on your Mac.
- On your keyboard, press and hold the following keys: Control + Option + Shift.
- Keep holding down all three keys for 7 seconds, then press and hold the power button as well.
- Continue to hold all four keys for another 7 seconds, then release all of them.
- Wait a few seconds, then press the power button to turn on your Mac.
If while following those steps your Mac did nothing and your Mac startup disk is still not showing or booting correctly, then it might be time to reinstall macOS.
Method #4: Reinstall macOS
If you’ve tried all of the above methods and none of them have made your Mac boot, then we might want to try reinstalling macOS onto our Mac. This will not delete any of the data that is on your Mac as it will only attempt to reinstall macOS.
- Let’s get boot our Mac into Recovery Mode. There are 2 ways to do this and they depend on if you’re using an Intel processor or Apple Silicon.
- Apple silicon: Turn on your Mac and continue to press and hold the power button until you see the startup options window. Click the gear icon labeled Options, then click Continue and this will bring you into Recovery Mode.
- Intel processor: Turn on your Mac, then immediately press and hold these two keys until you see an Apple logo or other image: Command (⌘) and R. You might have to hold these keys for a little bit of time to get into Recovery Mode.
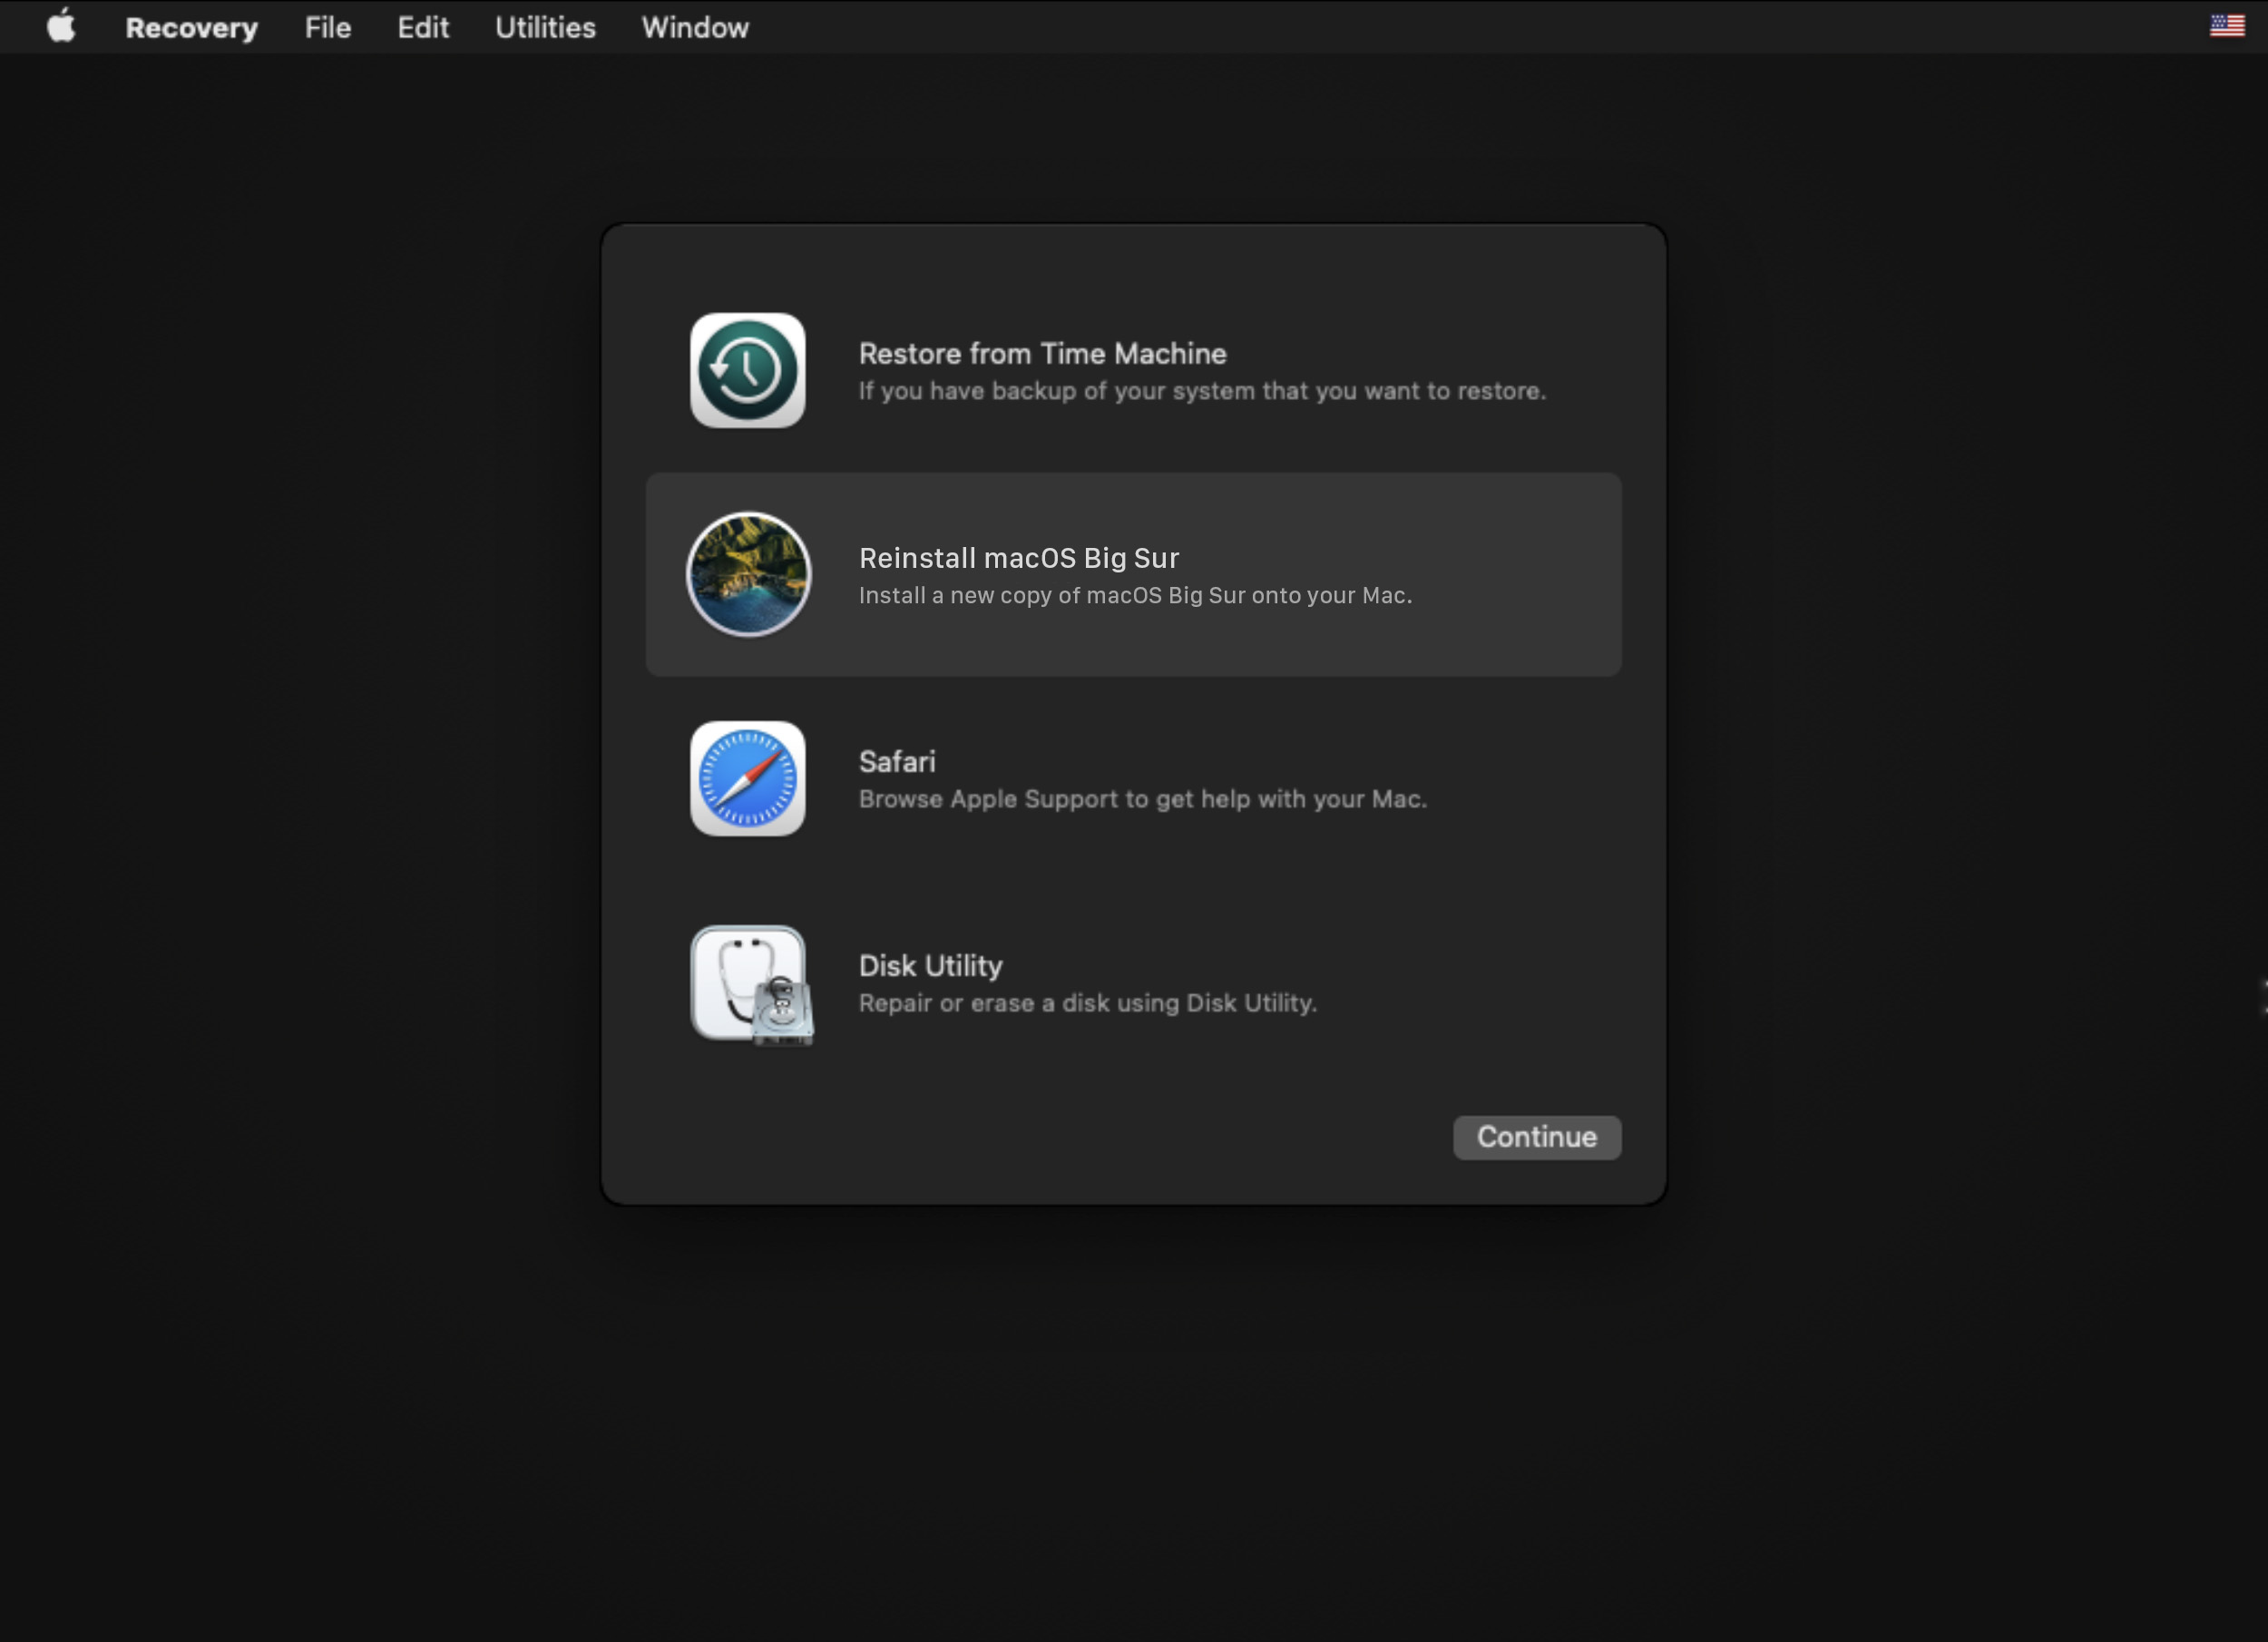
- Now you should be greeted by the Recover Mode menu where we will want to select Reinstall macOS.
- Click through and accept the install prompts.
- Choose the hard drive that you would like to reinstall macOS to and then wait for the installation to complete. I would also recommend that you leave your Mac connected to power during the installation process.

Now you should be able to boot up and use your Mac.
The last thing that we can try before bringing our Mac to a repair technician would be to boot your Mac from another startup disk.
Method #5: Choose Another Startup Disk
If none of the above methods worked, the last one that we can try would be to choose another startup disk for our Mac to boot from.
You would need to have a working external hard drive with a version of macOS on it for this one to work or you could use something such as a USB thumb drive that has macOS on it.
There are many reasons that you might want to boot from another startup disk.
- Trying to repair a disk that isn’t working correctly.
- Troubleshoot general issues.
- Format another hard drive.
- Update the startup disk.
- Reinstall macOS on another disk.
- You could also have more than one startup disk installed or attached to your Mac and it might be trying to boot from that one when you don’t want it to.
Change Your Startup Disk for One Start-Up
You may only want to change your startup disk once and not have it be a permanent solution. If this is the case, follow the steps below.
- Connect the external hard drive or storage device to your Mac that has the other startup disk on it.
- Turn your Mac on and follow the steps below depending on which process your Mac has:
- Apple Silicon: Press and hold the power button until you see “Loading startup options”
- Intel processor: Press and hold the Option key as your Mac boots up.
- If you’re using a Mac Mini, wait for the system indicator to turn amber.
- You will then see the available startup disks where you can select the one that you want your Mac to boot from.
- When you restart your computer the next time, it will then boot from the selected startup disk that one time.
Change Your Start-up Disk for Every Startup
If you want to permanently change the startup disk, we can do that as well. You must use System Preferences for this option so you will have to first use the option previously talked about and then move on to this one.
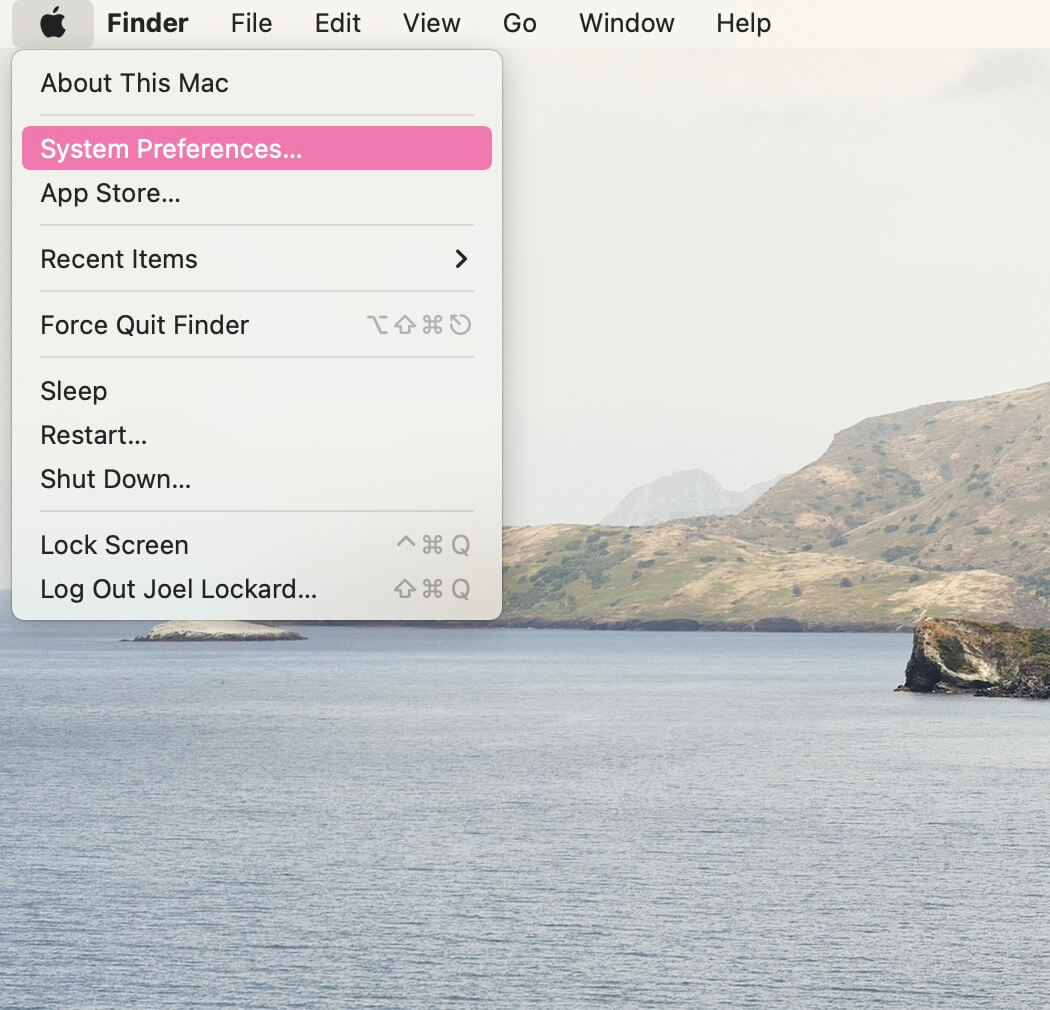
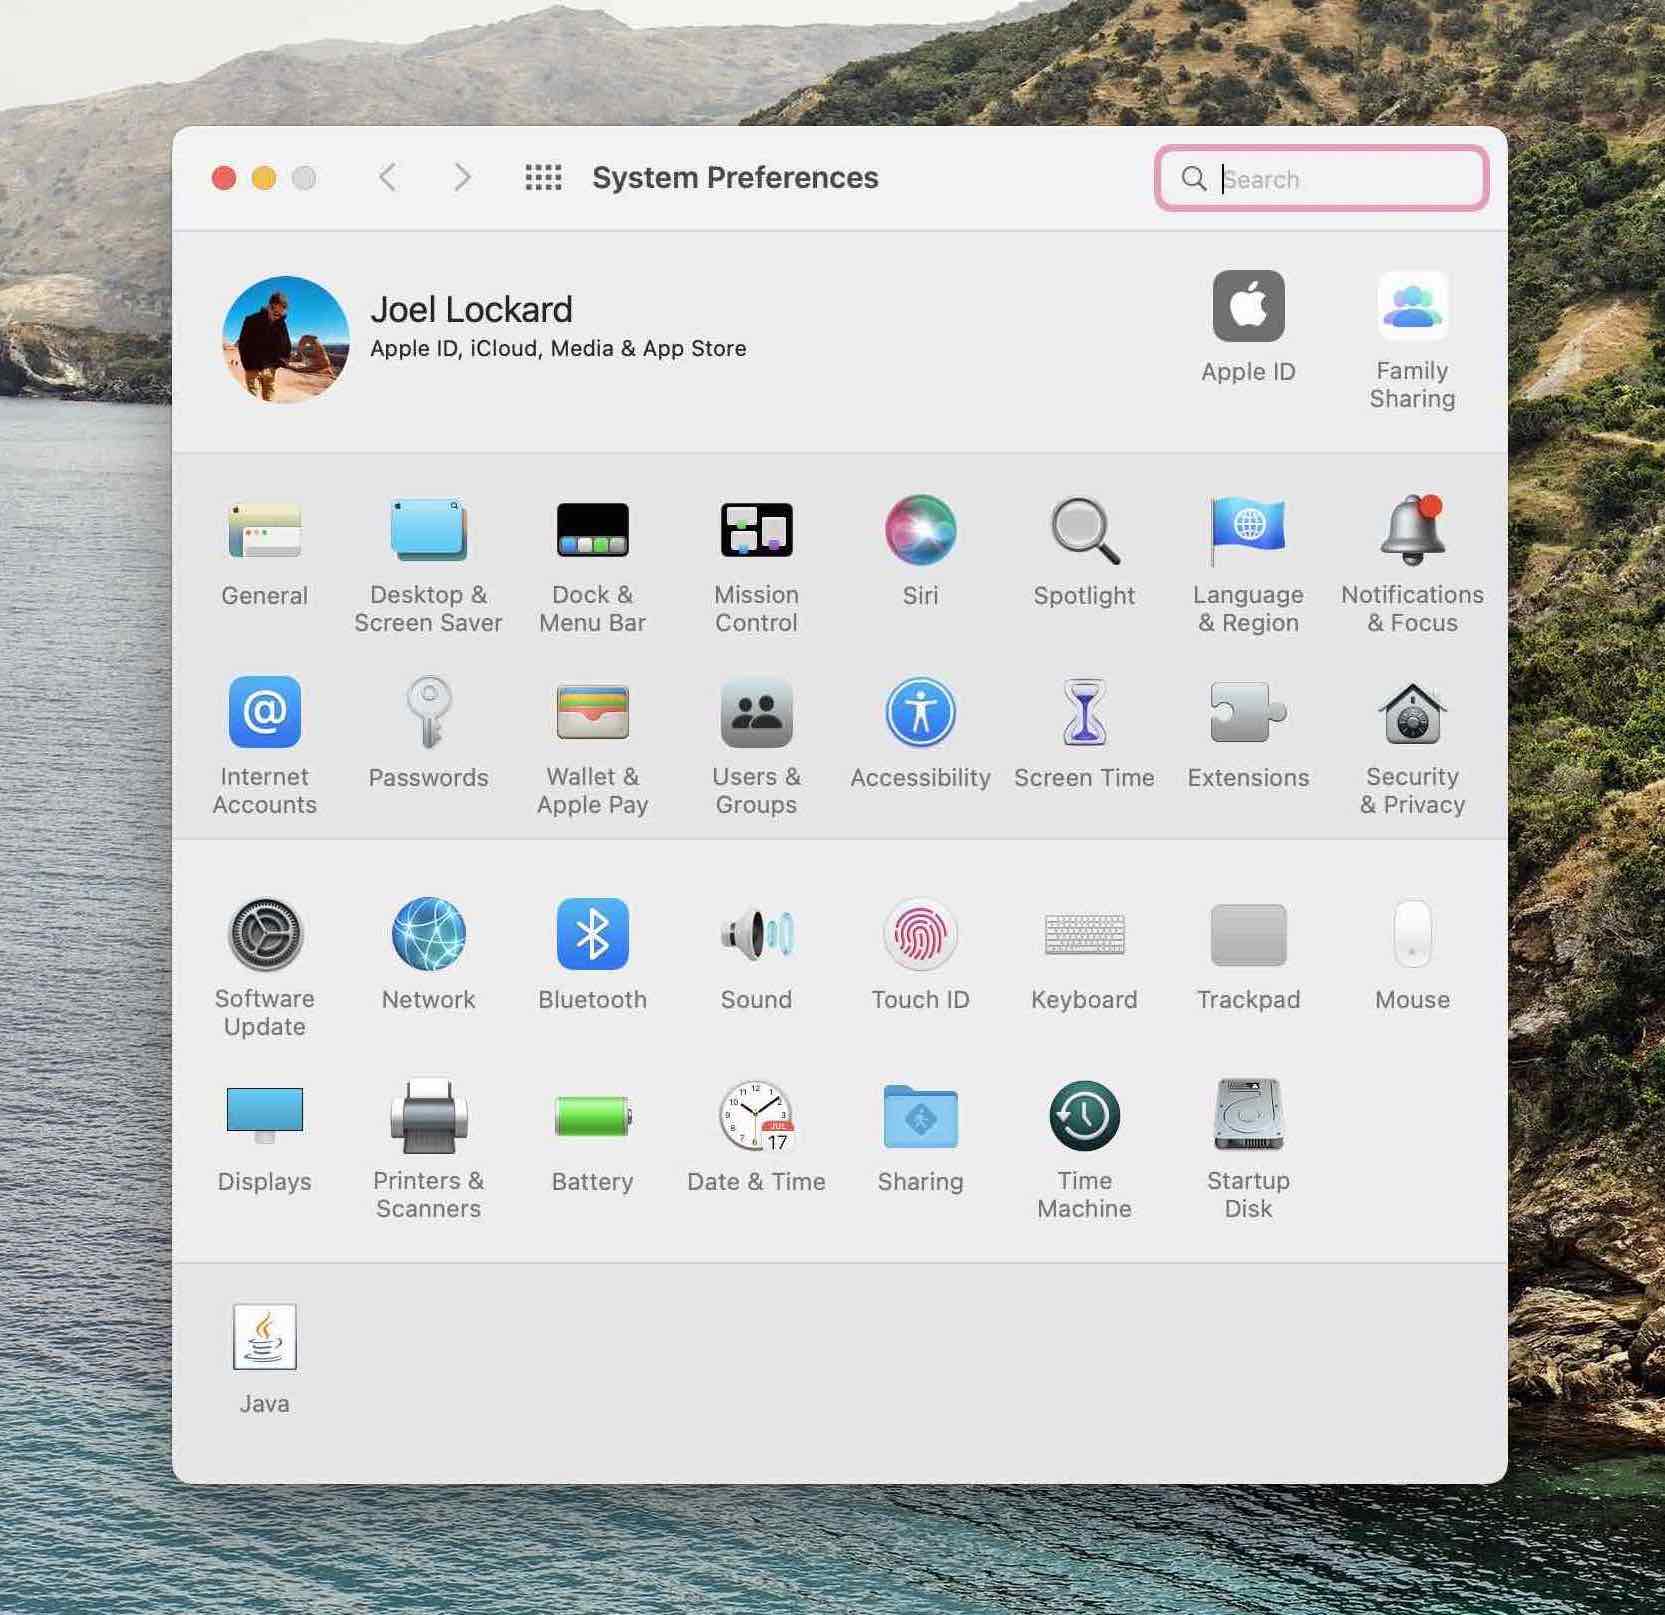
- Boot up your Mac to the Desktop and then select System Preferences.
- Once within System Preferences, select Startup Disk.
- Click the lock on the lower left-hand corner of the screen.
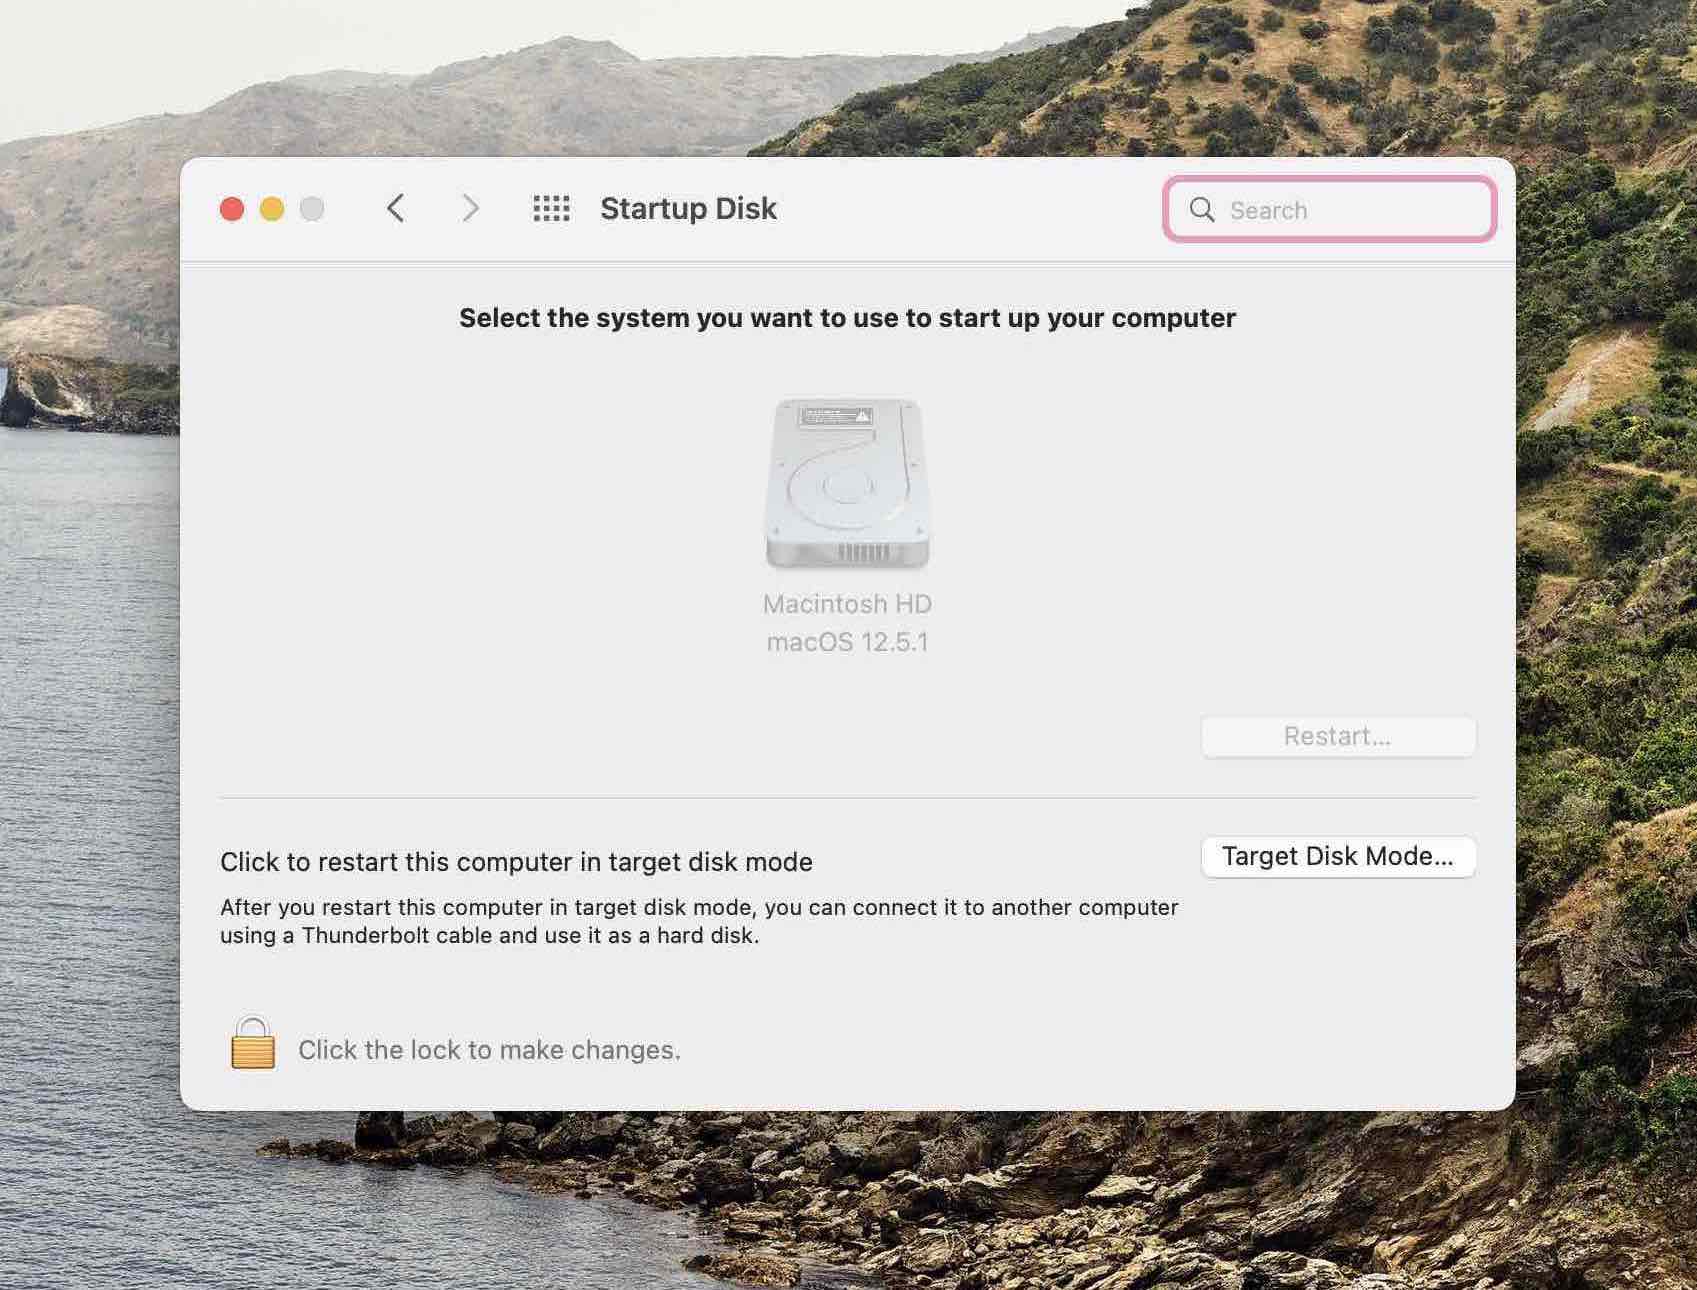
- Type in your password.
- Select the new startup disk that you would like your Mac to boot from.
If after all of these steps you haven’t been able to get your Mac to boot, we can run third-party data recovery software such as Disk Drill in Recovery Mode and recover data.
Running Disk Drill in Recovery Mode to Recovery Files
Disk Drill is a data recovery app that we can use to recover files on Mac even if it won’t boot up. We can enter Recovery Mode and save them from there.
There are many reasons that I want to use Disk Drill for this example. It’s the best data recovery app if you ask me and some of my favorite features are:
- Disk Drill works on both a Mac and a PC.
- You can scan any storage device rather it be an internal hard drive or any storage device that you plug into your Mac. This would include things such as iPhones and iPads.
- You can run it in Recovery Mode! Such a powerful feature for recovering data from our Mac.
Now, we have some data to recover!
- Power down your Mac.
- Turn on your Mac and boot it into Recovery Mode.
- Apple silicon: Turn on your Mac and continue to press and hold the power button until you see the startup options window. Click the gear icon labeled Options, then click Continue and this will bring you into Recovery Mode.
- Intel processor: Turn on your Mac, then immediately press and hold these two keys until you see an Apple logo or other image: Command (⌘) and R. You might have to hold these keys for a little bit of time to get into Recovery Mode.
- We now need to open the Terminal. Once within Recovery Mode, click on Utilities and then Terminal.
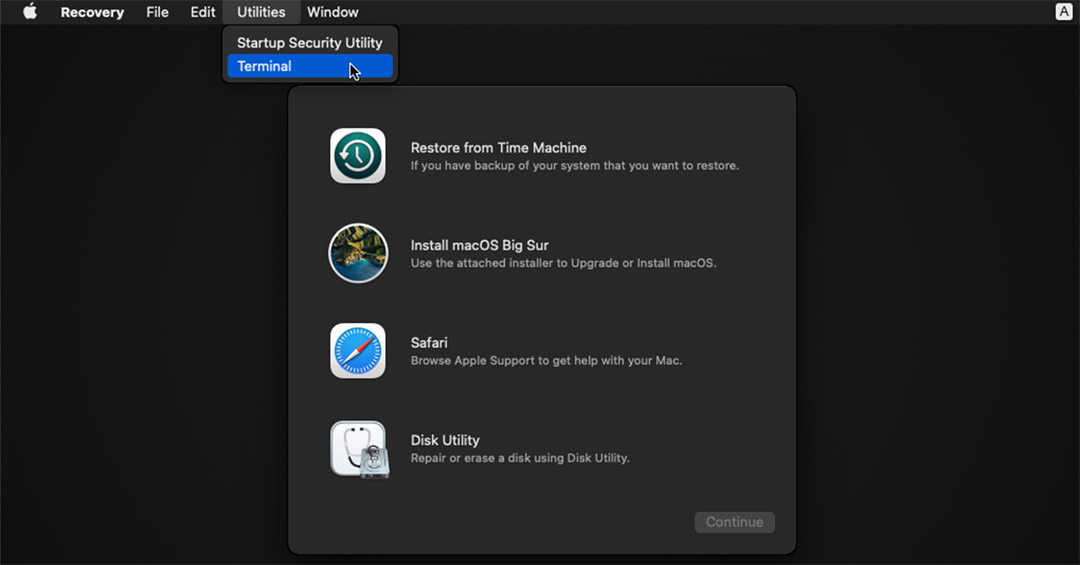
- Enter this command within a new Terminal window to launch Disk Drill
sh <(curl http://www.cleverfiles.com/bootmode/boot.xml)
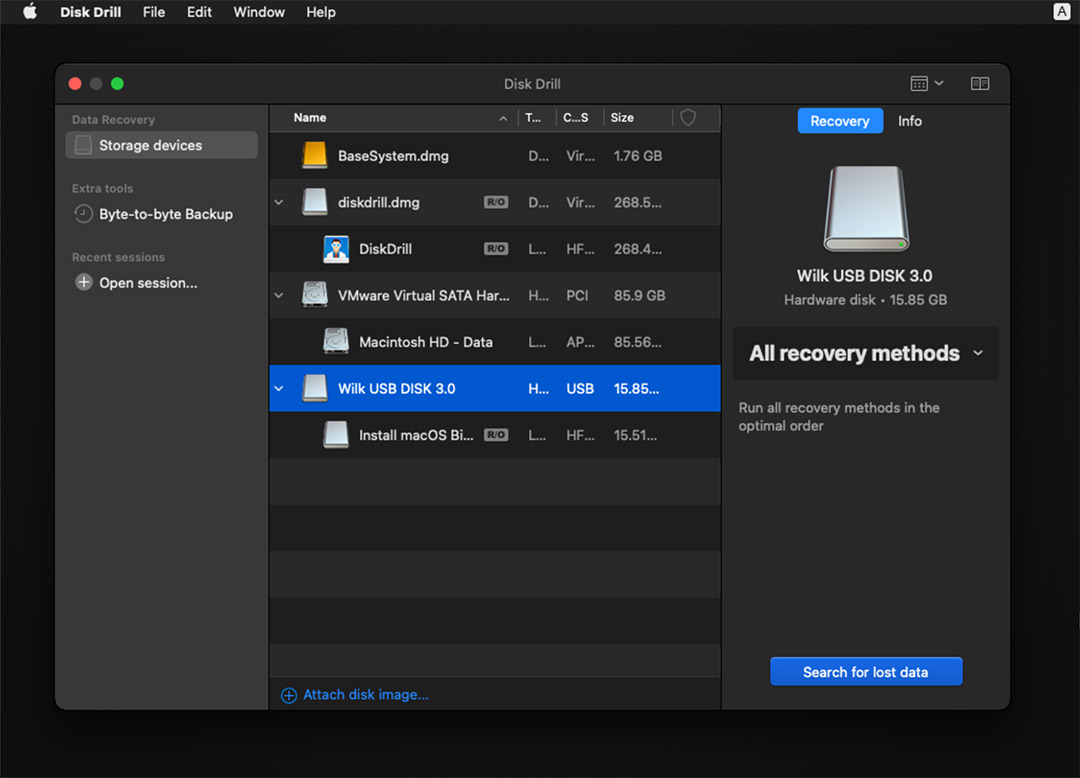
This will download and launch Disk Drill right from within Recovery Mode! Just wait for this process to finish.

- Press Return on your keyboard after you’ve inserted the command.
- Disk Drill will now launch within Recovery Mode and you will now be able to recover any files that you want to save.
Conclusion
When you have the right tools and know how to use them, you can do so much when it comes to fixing issues on your MacBook such as it having no startup disk showing.
Not only can you now know how to fix those errors, but we now know that we can use data recovery software such as Disk Drill in Recovery Mode to get our data back if troubleshooting doesn’t fix the issue.


