
If this is your first accidental deletion of important data from your MacBook Pro, then we have bad news for you: it probably won’t be the last. But there’s also good news: learning how to perform MacBook data recovery isn’t difficult nor expensive.
In this article, we describe several effective methods and tools that can help you recover data from your MacBook Pro hard drive in no time. We also discuss the most common reasons for MacBook Pro data loss so that you know what to watch out for in the future.
Table of Contents
Pitfalls of Data Recovery from Mac SSD
Recovering data from an SSD (solid-state drive) is trickier than restoring a traditional hard drive. This is primarily due to the TRIM function, which was designed to optimize the drive’s “garbage disposal” process.
On traditional HDDs, deletion behavior is as follows: (1) user deletes the file from from macOS, (2) hard drive marks the file’s data block for overwriting, (3) when a new file is saved, the new file’s data writes over the former’s data block, “overwriting” the old file’s data.
On SSDs with TRIM, deletion behavior is way more straightforward: (1) user deletes the file from macOS, (2) the SSD proactively erases the data in the deleted file’s block. This is one of the reasons why SSDs are considered more efficient than traditional hard drives.
However, this makes it a lot harder to restore data because most recovery technology relies on reconstructing the data left in the block. With this in mind, here’s a quick guide for turning off TRIM to make future recovery easier:
- Open the Terminal app (Finder > Applications > Utilities).
- Type the following command and hit Return:
sudo trimforce disable
Enter your password if prompted.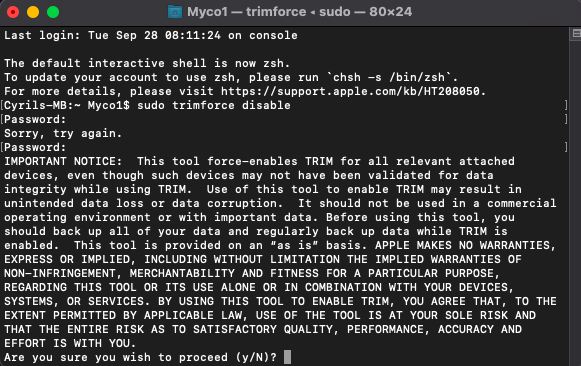
- When asked if you wish to proceed, hit the Y key to confirm.
Methods to Recover Deleted Files from MacBook Pro Hard Drive
As a MacBook Pro user, you can choose between several different data recovery methods, each capable of addressing different data loss scenarios. Let’s go over the most useful methods and describe how they work and in which situations they should be used.
Method 1: Time Machine
![]() Time Machine is Apple’s homegrown backup software application, and it’s distributed as part of macOS. Time Machine keeps local snapshots as space permits, hourly backups for the past 24 hours, daily backups for the past month, and weekly backups for all previous months.
Time Machine is Apple’s homegrown backup software application, and it’s distributed as part of macOS. Time Machine keeps local snapshots as space permits, hourly backups for the past 24 hours, daily backups for the past month, and weekly backups for all previous months.
If Time Machine had backed up your data prior to their deletion, then you can painlessly recover them from your Time Machine backup:
- Make sure your Time Machine backup drive is connected to your MacBook Pro.
- Click the Time Machine icon located in the Menu Bar and choose Enter Time Machine.

- Navigate to the folder that used to contain the deleted files.
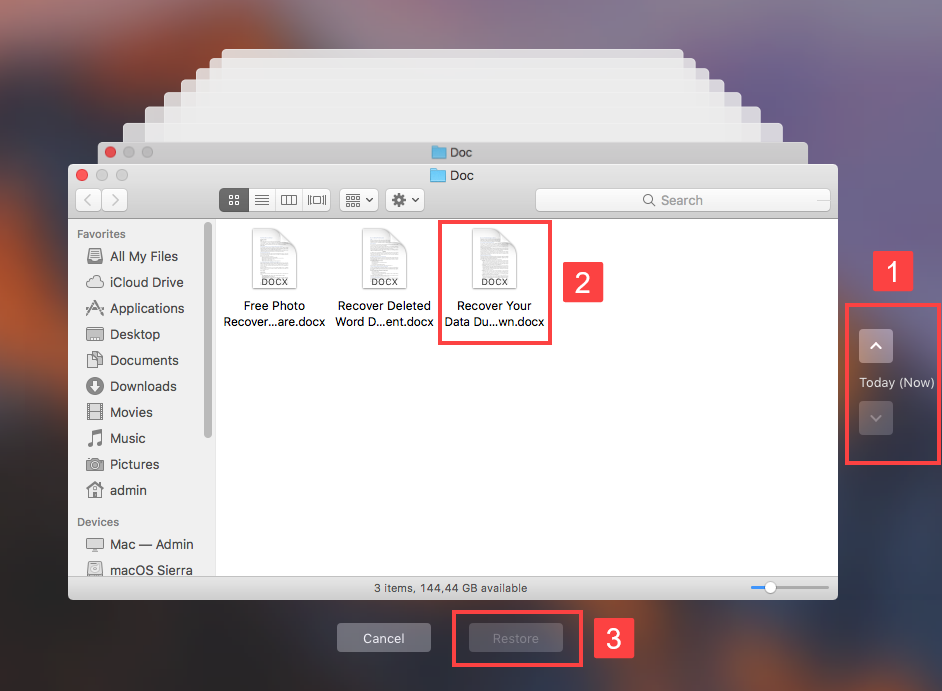
- Use the navigational arrows or timeline on the right to find a backup copy of the folder that contains the deleted files.
- Select the files you want to recover and click Restore.
Method 2: Data Recovery Software
![]() Aside from the built-in Time Machine that Apple provided us, we can also use data recovery software to recover your deleted files. In this tutorial, we’ll be using our favorite, Disk Drill.
Aside from the built-in Time Machine that Apple provided us, we can also use data recovery software to recover your deleted files. In this tutorial, we’ll be using our favorite, Disk Drill.
Disk Drill is safe to use and is one of the most recommended recovery programs on the market. Recovery programs like this go through your entire drive and collect all the files that haven’t yet been overwritten. Before you start contacting a professional data recovery expert, give the steps below a try. You might be able to recover your deleted files on your own.
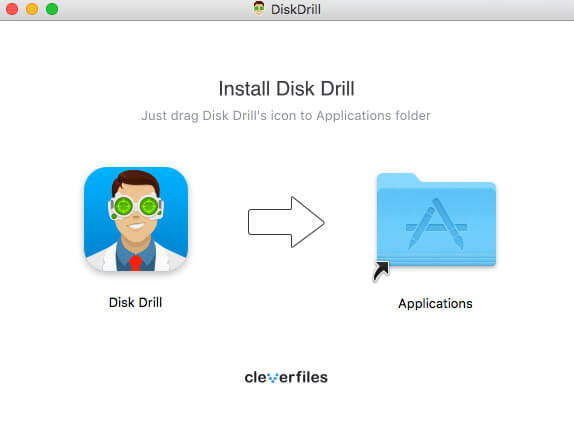
- Start by downloading and installing Disk Drill into your Mac.
- Once you’ve installed Disk Drill, you’ll have to enter Recovery Mode. Shut down your MacBook Pro.

- Power on your MacBook Pro and immediately hold then press down the ⌘ and R keys. Release your fingers when you see the Apple logo. If that didn’t work for you, you can either try again or use the other alternatives from Apple.
Launching your Mac in Recovery Mode decreases the amount of data being written in the background of your MacBook Pro. This lowers the chance of your files being overwritten with new information while we scan and try to recover your files.
- At the Recovery screen, go ahead and log into the appropriate user of the Mac and make sure that you’re connected to a Wi-Fi or Ethernet network.
- From there, click on the Utilities menu from the top-left corner of your screen and select Terminal.
- Copy and paste the terminal command and press Enter:
sh <(curl http://www.cleverfiles.com/bootmode/boot.xml)
This will open up and run Disk Drill.
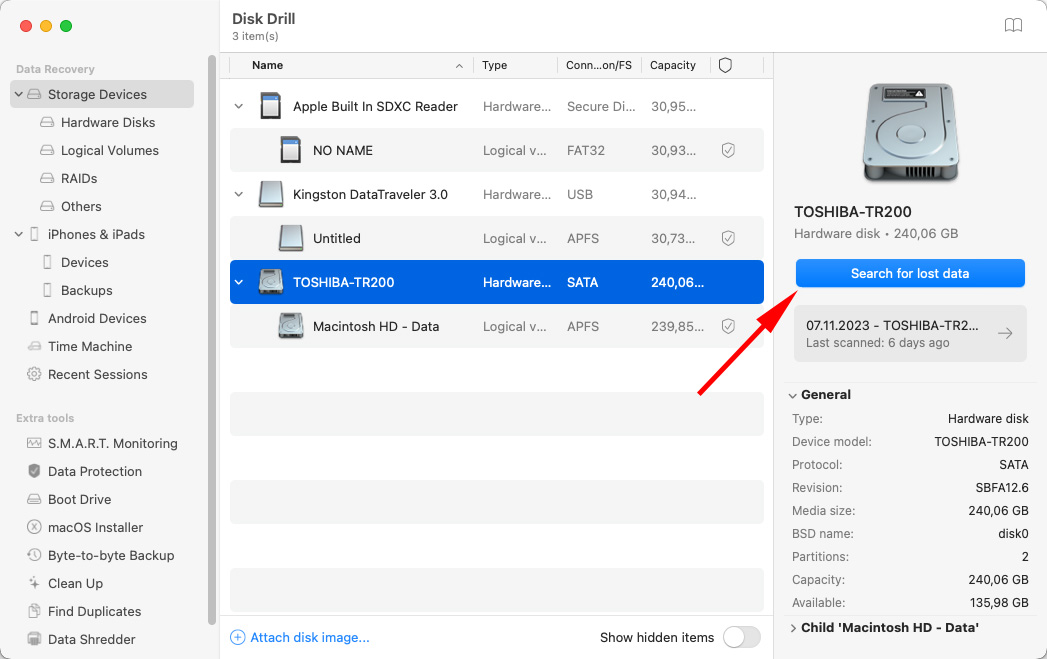
- With Disk Drill opened, click on your storage device or hard drive that has the data you’re trying to recover.
- Once selected, just click on Search for lost data at the bottom-right corner of the Disk Drill window. This will take a couple of minutes depending on the size of your storage device and the speed of your MacBook Pro.
 After Disk Drill has scanned through your entire drive, click on Review found items and look for the files that you’re trying to recover.
- When you’ve located the deleted files, go ahead and select all of them before clicking on Recover at the bottom-right corner of your screen.

- You’ll be asked for a destination folder, which is where the recovered files will be sent to. If possible, try to set the destination folder to a different drive than the one it’s currently on. This is to avoid losing your data even further, in case your drive is actually failing or compromised.
Method 3: Cloud Backup Solutions
![]() Many MacBook Pro users back up important data using cloud backup solutions like iCloud, Dropbox, or Google Drive. Such solutions help ensure recoverability by securely transferring backup copies to remote servers. If you’re among their users, you should be able to restore your data even after a critical hard drive failure.
Many MacBook Pro users back up important data using cloud backup solutions like iCloud, Dropbox, or Google Drive. Such solutions help ensure recoverability by securely transferring backup copies to remote servers. If you’re among their users, you should be able to restore your data even after a critical hard drive failure.
Click the links below to learn how to perform MacBook data recovery using popular cloud backup solutions:
Method 4: Data Recovery Services

MacBooks are expensive computers, and the value of your lost data can be even higher. If DIY data recovery seems too risky to you, then you should consider shipping your entire MacBook to a professional data recovery center.
While the cost of professional data recovery can range wildly depending on the cause of data loss (more about common reasons for data loss in the last section of this article), the best data recovery centers offer a free evaluation, so you don’t need to worry about receiving an unexpectedly high bill.
Best Tools to Recover Data from MacBook Pro
There are multiple MacBook hard drive recovery tools that you can use to restore permanently deleted data from your MacBook Pro. We’ve already provided step-by-step instructions on how to use one of them, but we have yet to discuss its features and provide suitable alternatives, so let’s get to it.
1. Disk Drill for Mac

- Powerful
- Easy to use
- Automatically detects and recovers lost partitions
- Comes with extra data protection and management tools
- The free version can only preview recoverable files
Disk Drill for Mac is our favorite MacBook data recovery tool because it’s both powerful and easy to use. You can use it to recover over 400 file formats with a few clicks, and the tool can even automatically detect and restore lost partitions. Bundled with Disk Drill for Mac are several useful tools to help you keep your data protected and organized. The only downside is that the free version can only preview recoverable files.
2. PhotoRec
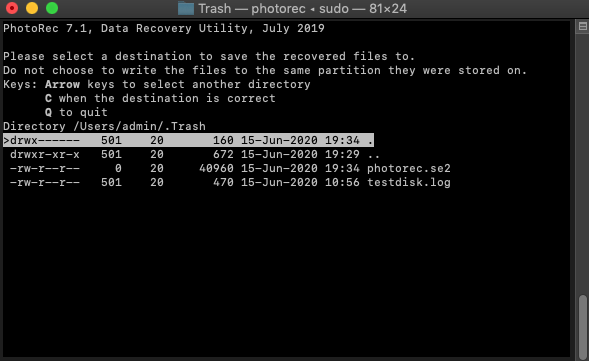
- Open-source
- Completely free
- Supports about 300 file families
- Ships together with TestDisk
- Command-line user interface
- Complicated installation
PhotoRec is the best open-source data recovery tool that runs on macOS. It’s distributed together with TestDisk, which is a very similar tool whose purpose is to recover lost partitions and/or make non-booting disks bootable again. Both tools can be installed using Homebrew. Despite what its name suggests, PhotoRec can recover more than just photos. In fact, about 300 file families are supported, including ZIP, Office, PDF, HTML, and other commonly used file formats. PhotoRec’s biggest downside is its command-line user interface.
3. iBoysoft Data Recovery for Mac
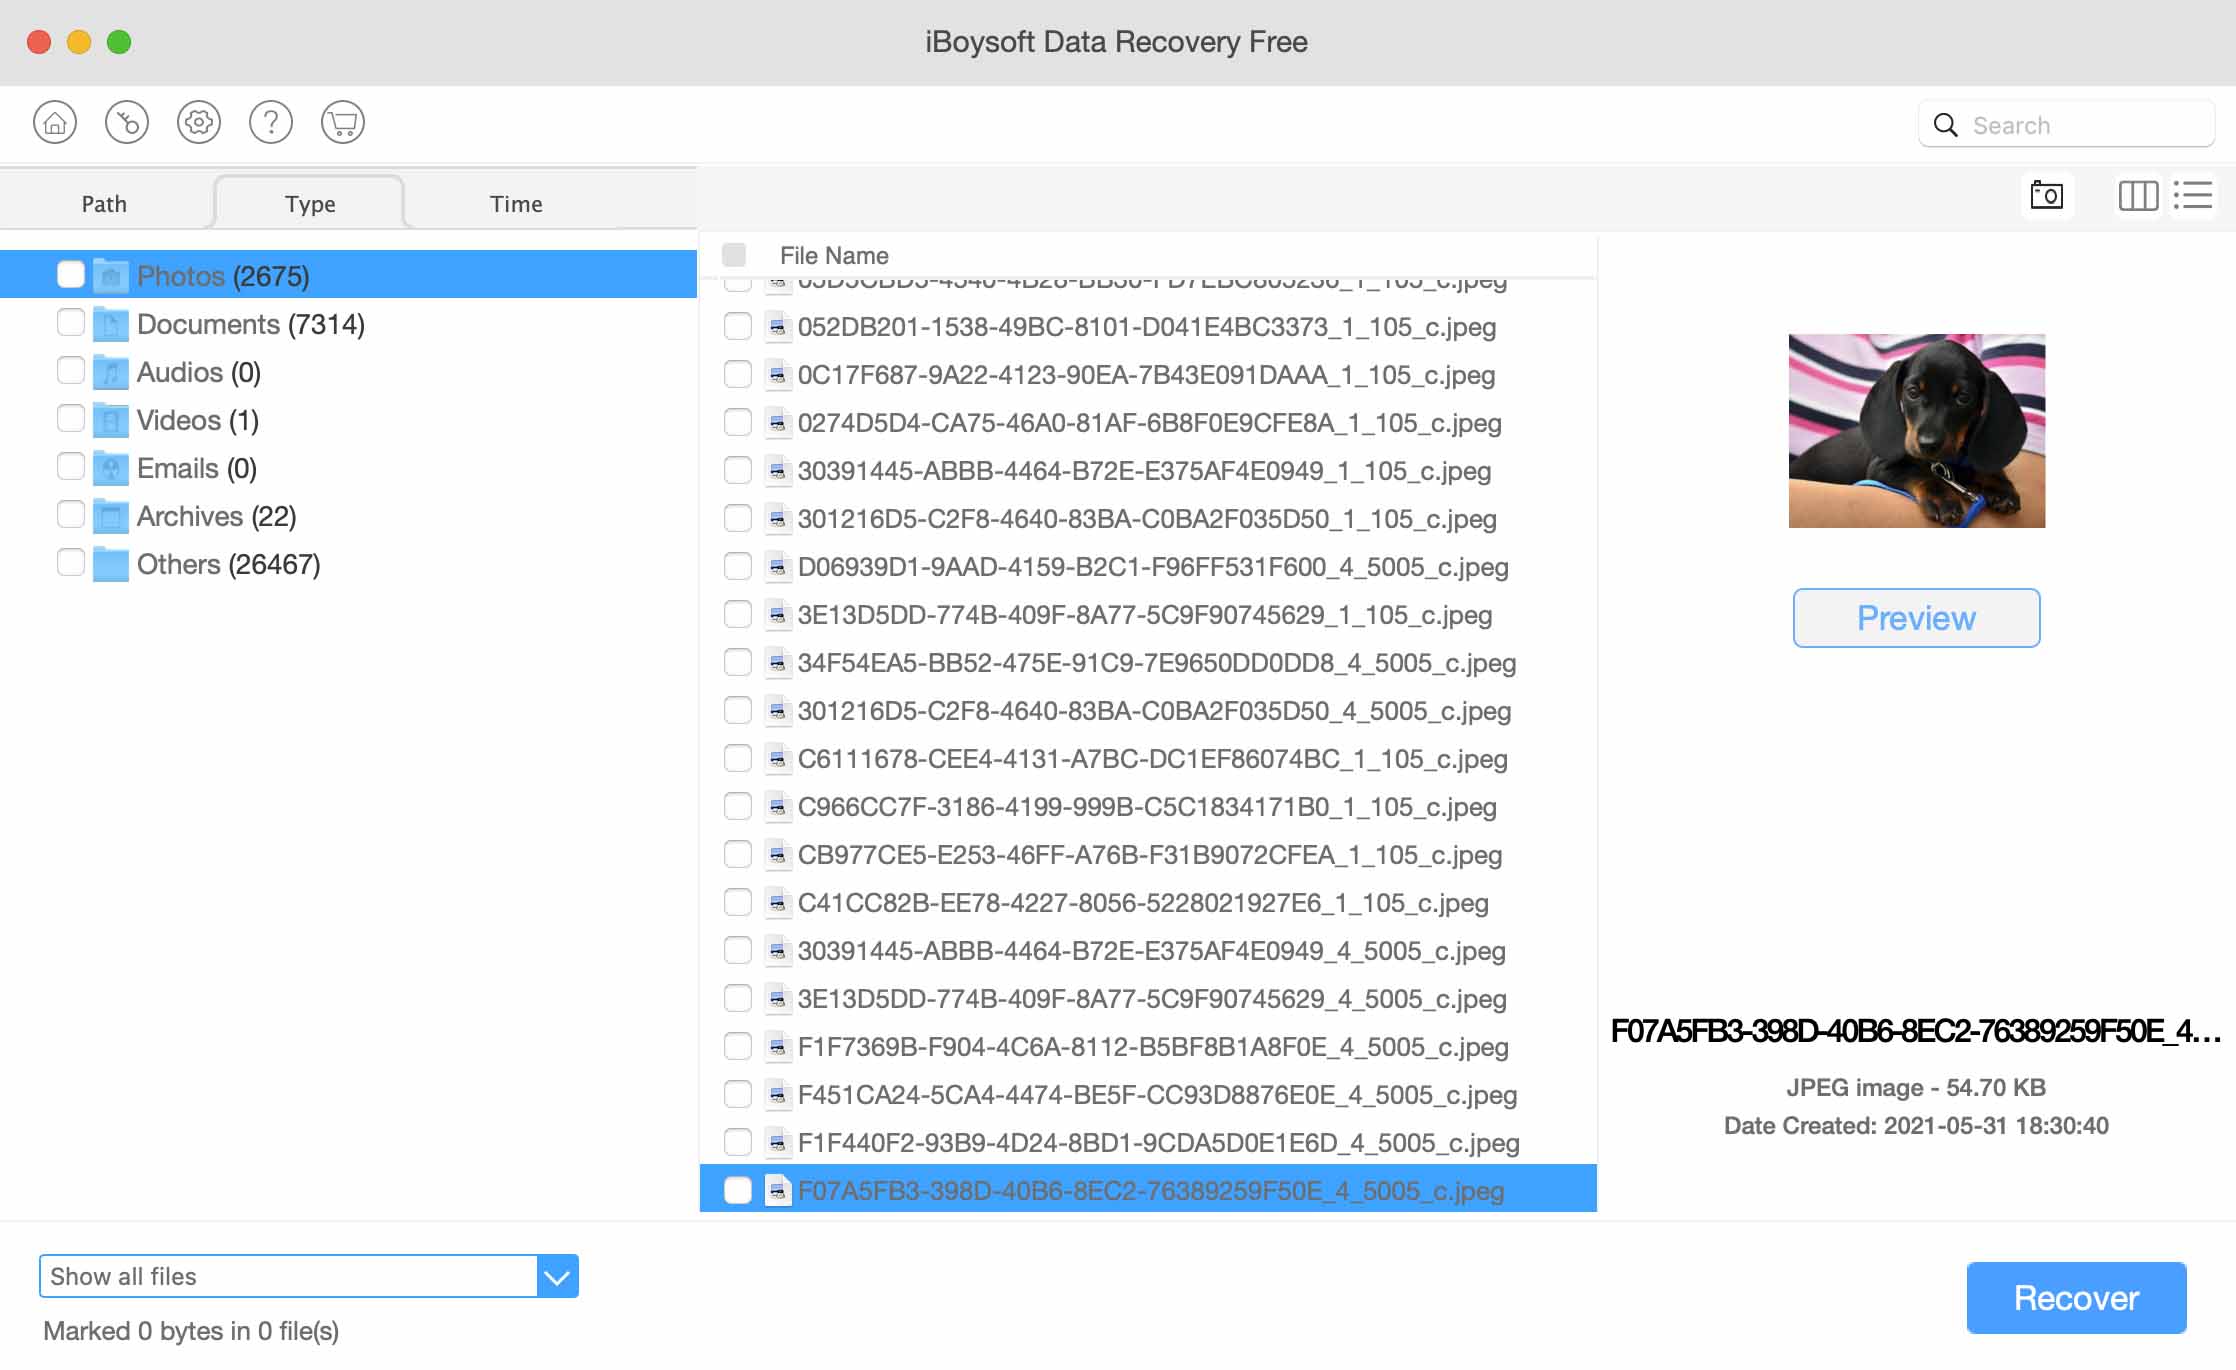
- Modern interface
- Can restore data from disk images
- 1 GB free data recovery and unlimited preview
- Tech support can only be contacted via email only
- Expensive monthly and annual subscriptions (it’s expensive when compared to other apps and when considering its capabilities)
iBoysoft Data Recovery for Mac is a relatively well-known app with a decent range of supported Mac file formats (the exact number is unknown). Like Disk Drill, it also has a good-looking interface that makes it easy to restore files. Its 2 major downsides is that it’s seriously expensive for what it offers and it doesn’t get updated as often (but iBoysoft does support the latest macOS as of this writing).
Is it Possible to Recover Data from a Dead MacBook Pro?
Recovering data from a dead MacBook Pro can seem a lot more difficult, since you don’t have an interface to work with. Worse, attempting an improper recovery may damage your drive even further and lead to permanent data loss.
If your MacBook’s drive is removable, data recovery is a lot easier. You can just remove it from your computer and plug it into another Mac using an adapter or docking station, and scan it with data recovery software from there.
However, recovering a permanent internal drive is a bit tricky – but with the right tools, it’s perfectly doable even for non-tech savvy users. Below are easy-to-follow guides for two safe methods to recover data on a dead MacBook. Follow along, and you should be fine.
Method 1: Use Target Disk Mode
Target Disk Mode is a useful feature that turns a MacBook into an external storage device. You can connect it to another MacBook and use Disk Drill to scan your dead MacBook as if it were a regular external hard drive.
Step 1. On the working MacBook, download and install Disk Drill.
Step 2. Connect the two Macs via your cable (you may need a Thunderbolt to FireWire adaptor just in case they use different ports).
Step 3. Now on the dead MacBook, boot into Target Disk Mode by pressing the power button and holding (T).
Step 4. The working MacBook should read your dead MacBook as an external drive. On the working MacBook, run Disk Drill and scan your dead MacBook. Then, you can proceed with recovery as normal – make sure to save your files to the working MacBook to avoid overwriting data!
Method 2: Run Disk Drill From an External macOS Drive
The second method runs Disk Drill via an external macOS drive. First, we’ll have to install macOs onto an external drive using a working Mac, then we’ll boot into that external drive and use it to scan the dead MacBook.
Step 1. Plug in your external storage device to another MacBook (make sure it has at least 50GB or more for a clean install, plus enough storage space for your data).
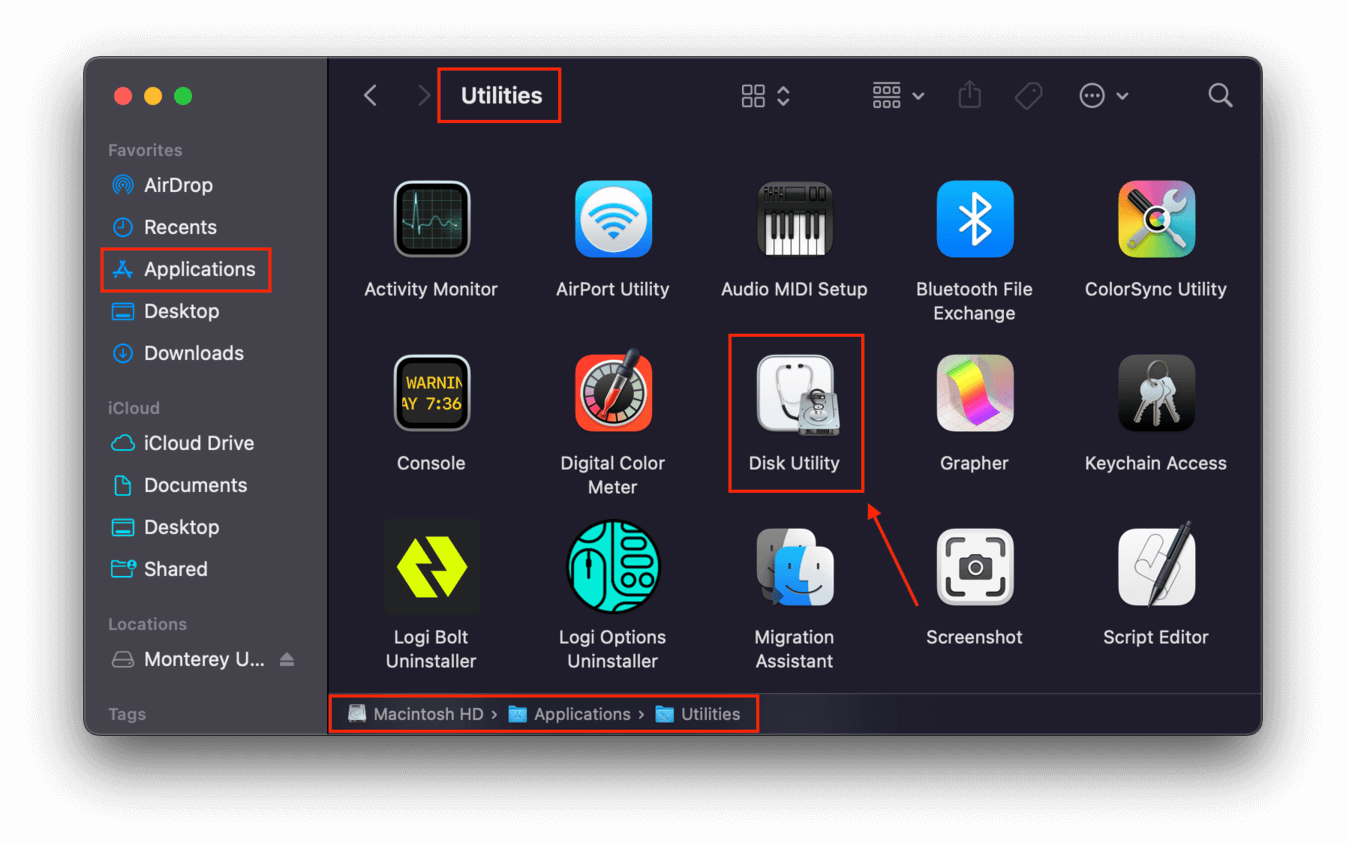
Step 2. Open Disk Utility by opening Finder > Applications > Utilities > Disk Utility.
Step 3. Click the sidebar button on the top right corner of the Disk Utility window, then click “Show All Devices.”
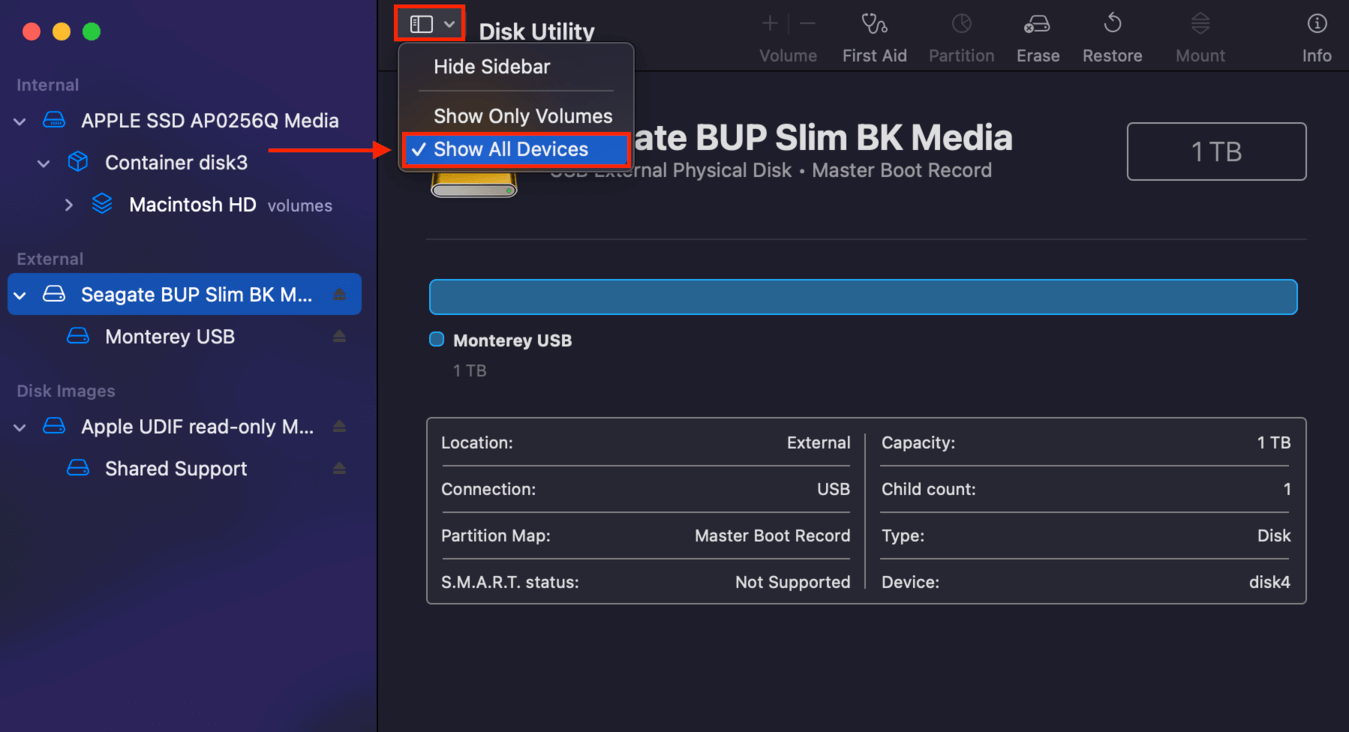
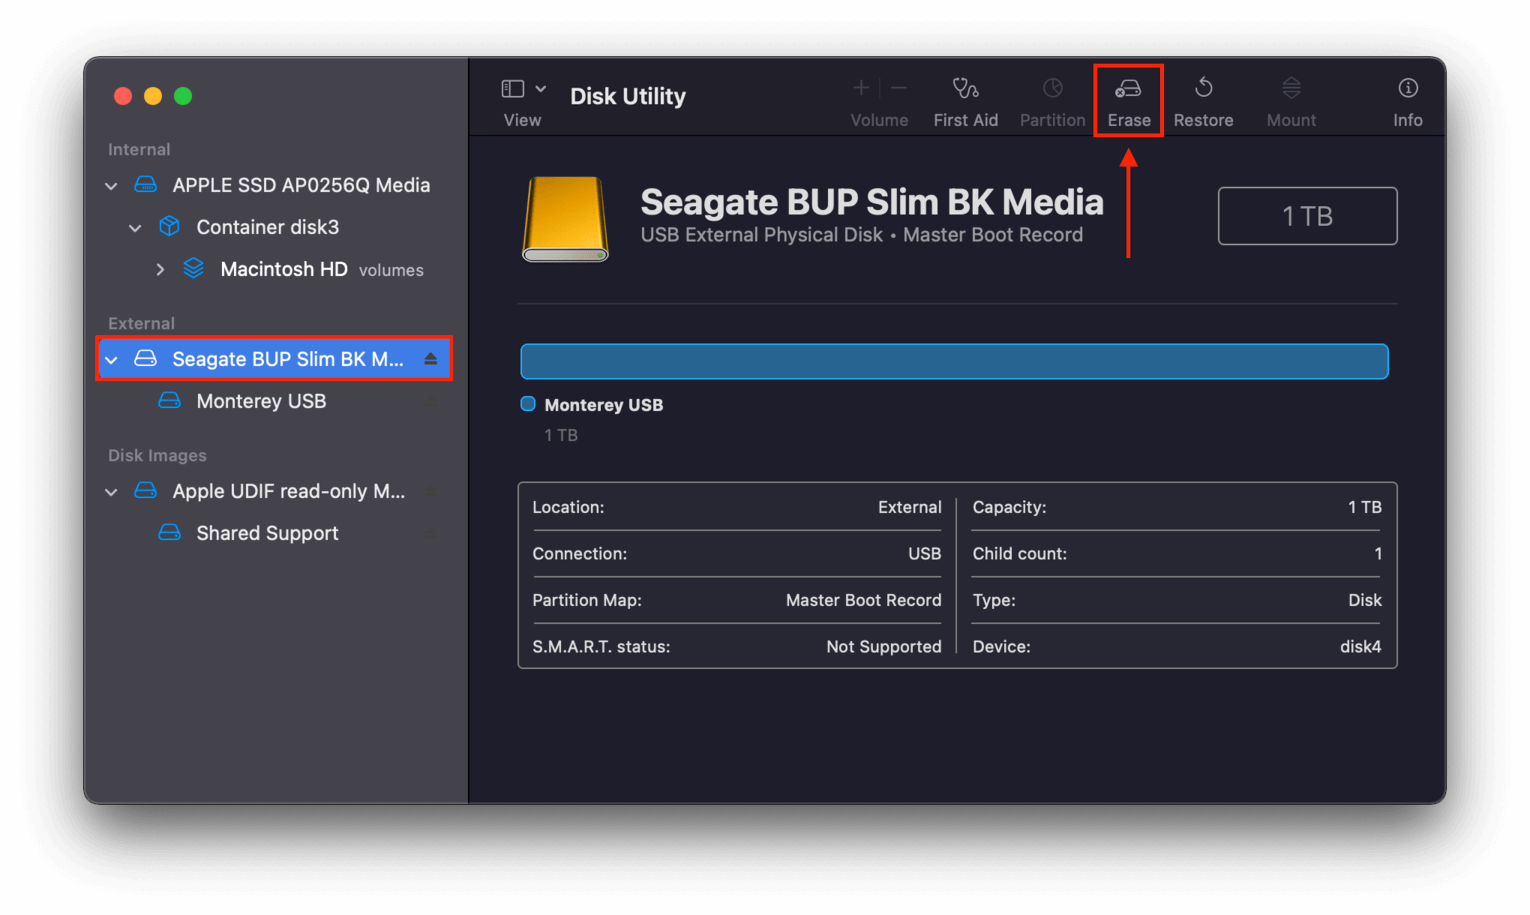
Step 4. Select the external drive (not just the volume) on the left sidebar, then click the “Erase” button on the top-right side of the window.
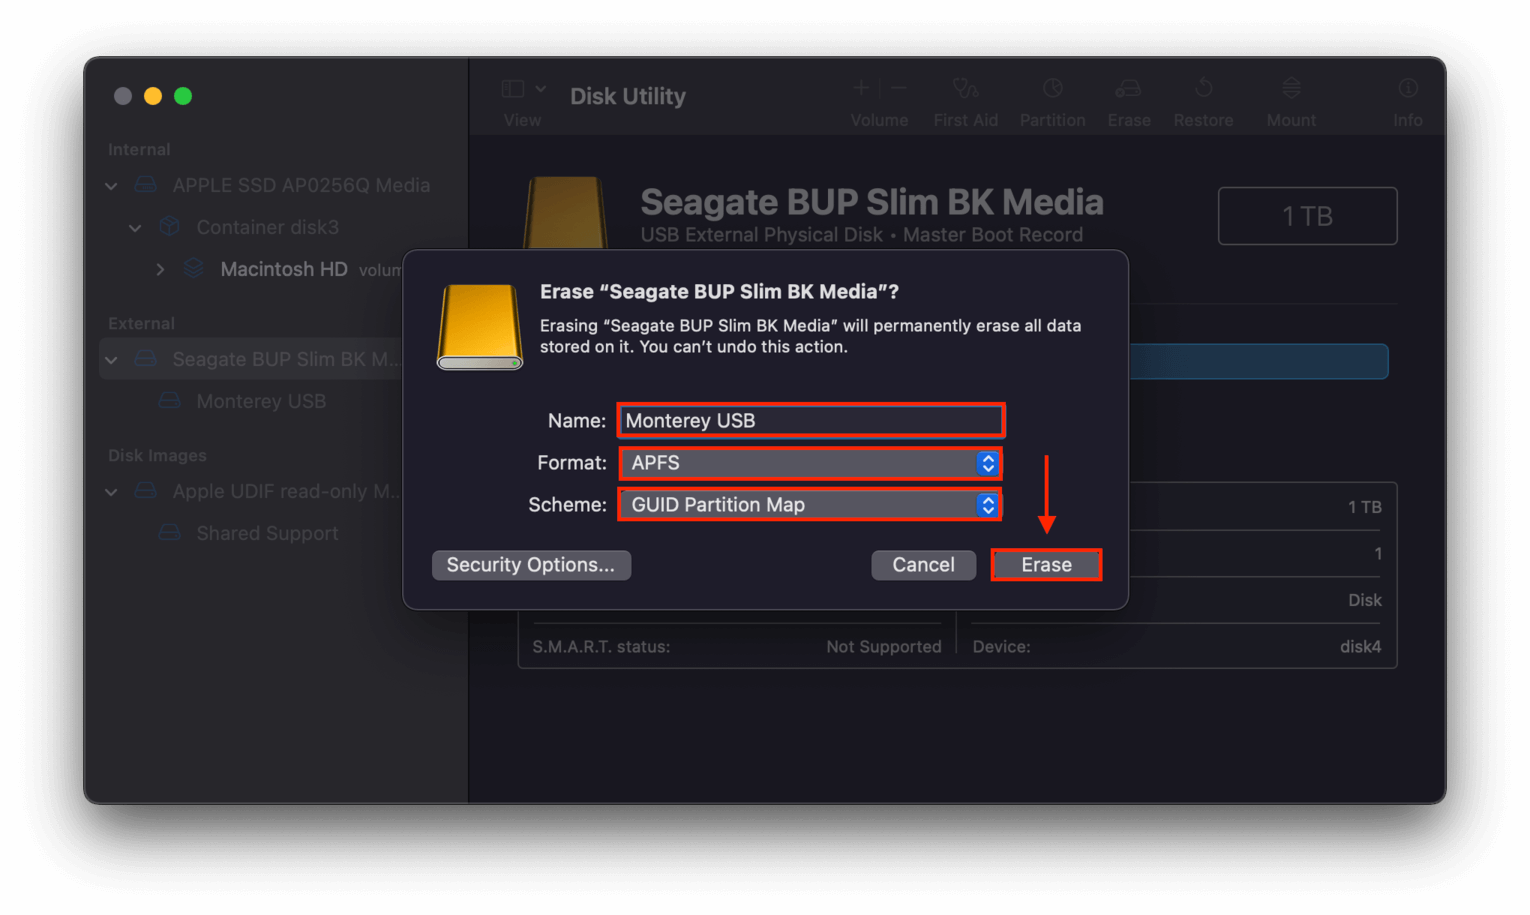
Step 5. Name your drive something like “Monterey USB.” For the Format, choose APFS and GUID Partition for the Scheme. Then, click Erase.
Step 6. Download the Monterey macOS installer (or whichever version you choose) from the App Store, but don’t install it yet.
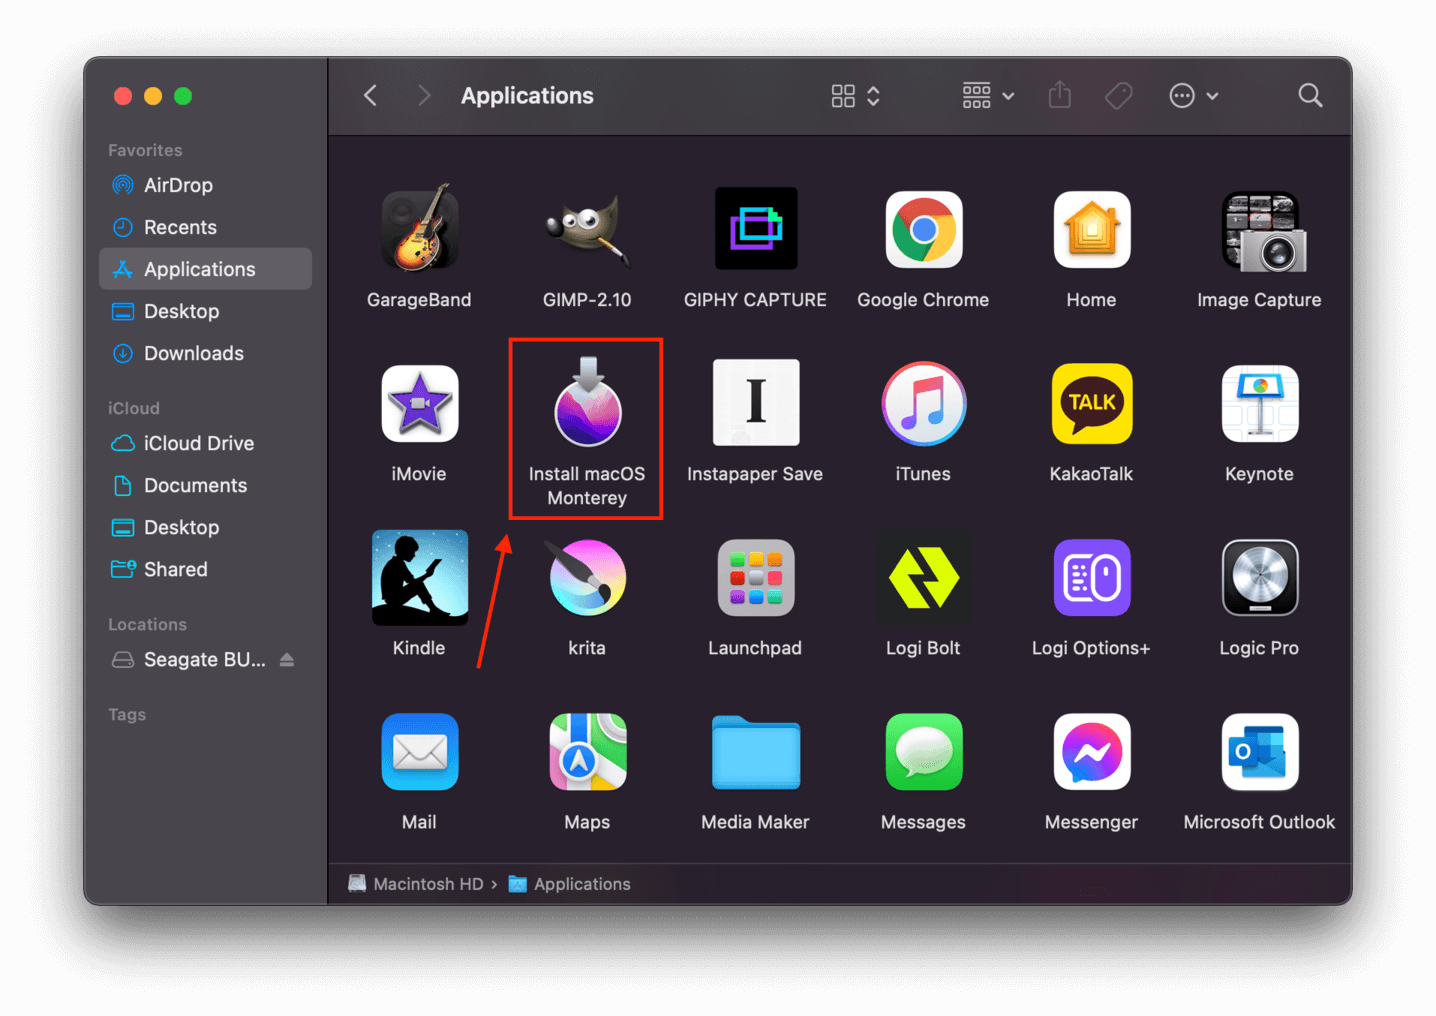
Step 7. Run the installer by double-clicking its icon in Finder > Applications.
Step 8. Click Agree to the license terms, then select Monterey USB (or whatever you named your external drive) for the installation destination.
Step 9. Once the installation is complete, you can now boot into macOS on your external drive. Turn on your Mac, then immediately press and hold the Option (⌥) key. Release it when your bootable volumes appear on-screen. Select your bootable macOS drive and click the up arrow or press Return.
Step 10. Once you’ve booted into MacOS on your external drive, download and install Disk Drill and run it from the Applications folder as normal. Select your dead MacBook from the sidebar (which should appear as an external drive), scan it, then save the data you need onto the working MacBook.
At least one of these methods should work to extract data from a dead MacBook. Just make sure to save your recovered data onto a storage device other than the dead MacBook (such as the working MacBook) to avoid overwriting your files.
Conclusion
Fortunately, recovering deleted files from a MacBook Pro isn’t just possible – there are even multiple ways to do it depending on your skill level and the factors involved (such as TRIM). Just remember, DIY solutions only work for logical damage, like accidental deletion, viruses, or corruption.
But if your drive was physically damaged, hire a reliable data recovery service instead to avoid permanent data loss.
But in order to avoid this situation altogether, we strongly recommend that you set up a backup system on your Mac. We suggest using Time Machine so your files are continuously secured in the background. When it comes to data security, prevention is always better than cure!
FAQ
To recover data from an unbootable MacBook, try the following methods:
- Target Disk Mode – Connect your dead Mac to a working Mac and boot your dead Mac into Target Disk Mode. You can then use data recovery software (installed on the working Mac) to scan the dead Mac, which now appears as an external drive.
- Create Bootable USB – Install macOS on an external storage device. Boot into macOS using that device and install data recovery software. Then, you can run data recovery software from your “portable” macOS and scan your old system drive.
Yes, there are 2 ways to recover data from a dead SSD drive (but it’s not guaranteed):
- Use data recovery software to restore your data yourself. Depending on the severity of the issue, some data recovery software may be able to detect and scan a dead SSD.
- Send your SSD to a reliable data recovery service. Recovery chances with this method are much better because such services are equipped with the tools, facilities, and personnel needed to perform high-level recovery.


