
Most of the time, we’re able to copy and move files from an external storage device to our Mac with no issue. However, there’s also a chance of encountering something called Error Code 50. This error code means that the operation couldn’t be completed due to an unexcepted error.
The good news is that there are several ways to fix Error Code 50, and that’s what we will cover in this article.
Table of Contents
What Is Error Code 50 on Mac?
If you receive Error Code 50 on your Mac, the entire message will display something like this “The operation can’t be completed because an unexpected error occurred (error code -50)”.
It’s essentially a pop-up message letting you know that what you were trying to do failed. This happens when you’re trying to copy, move, or delete data on your external storage device.
Why Is Error 50 Code on Mac Showing Up?
Let’s take a deeper look into some specific examples that can be causing Error Code 50 to show up.
| Reason for the error | Description |
| 🗄️ Incorrect file names/corrupt file metadata | If you’re trying to manipulate data and the file is damaged or it doesn’t have a proper name that macOS can work with. If the file metadata is corrupt, that could also cause the error. |
| 🚫 System Failure | Mac hard drives—both internal and external—can fail. Your external storage device might have a hard time communicating with your Mac which could indicate an NVRAM/PRAM error. |
| ⚙️ External hard drive settings | Within your System Settings, there are options that control how often your external storage device is put to sleep. Depending on the setting, this could cause the device to be put to sleep during operation and could give you an error. |
| 🗃️ Corrupt data NVRAM/PRAM | If either of these isn’t operating correctly on your Mac, this could lead to the Error 50 code displaying. NVRAM stores peripheral data such as volume, display resolution, and other system settings. PRAM stores core details about your Mac. |
Let’s take a look into how we can fix Error Code 50 on Mac.
How to Fix Error Code 50 on Mac
There are many ways that we can go about fixing Error Code 50 on our Mac. Below I will list several methods, and I would recommend that you follow them in order as it’s going to take us through a process of elimination.
Method 1: Unplug Your External Hard Drive/Storage Device and Reboot Your Mac
Believe it or not, turning it off and then turning it back on again fixes a lot of issues as it allows your Mac to reboot itself and set up again.
There aren’t many steps for this one, so it’s easy to do:
- Safely eject your external hard drive/storage device from your Mac. If you can’t get it to eject, follow the steps in this article.
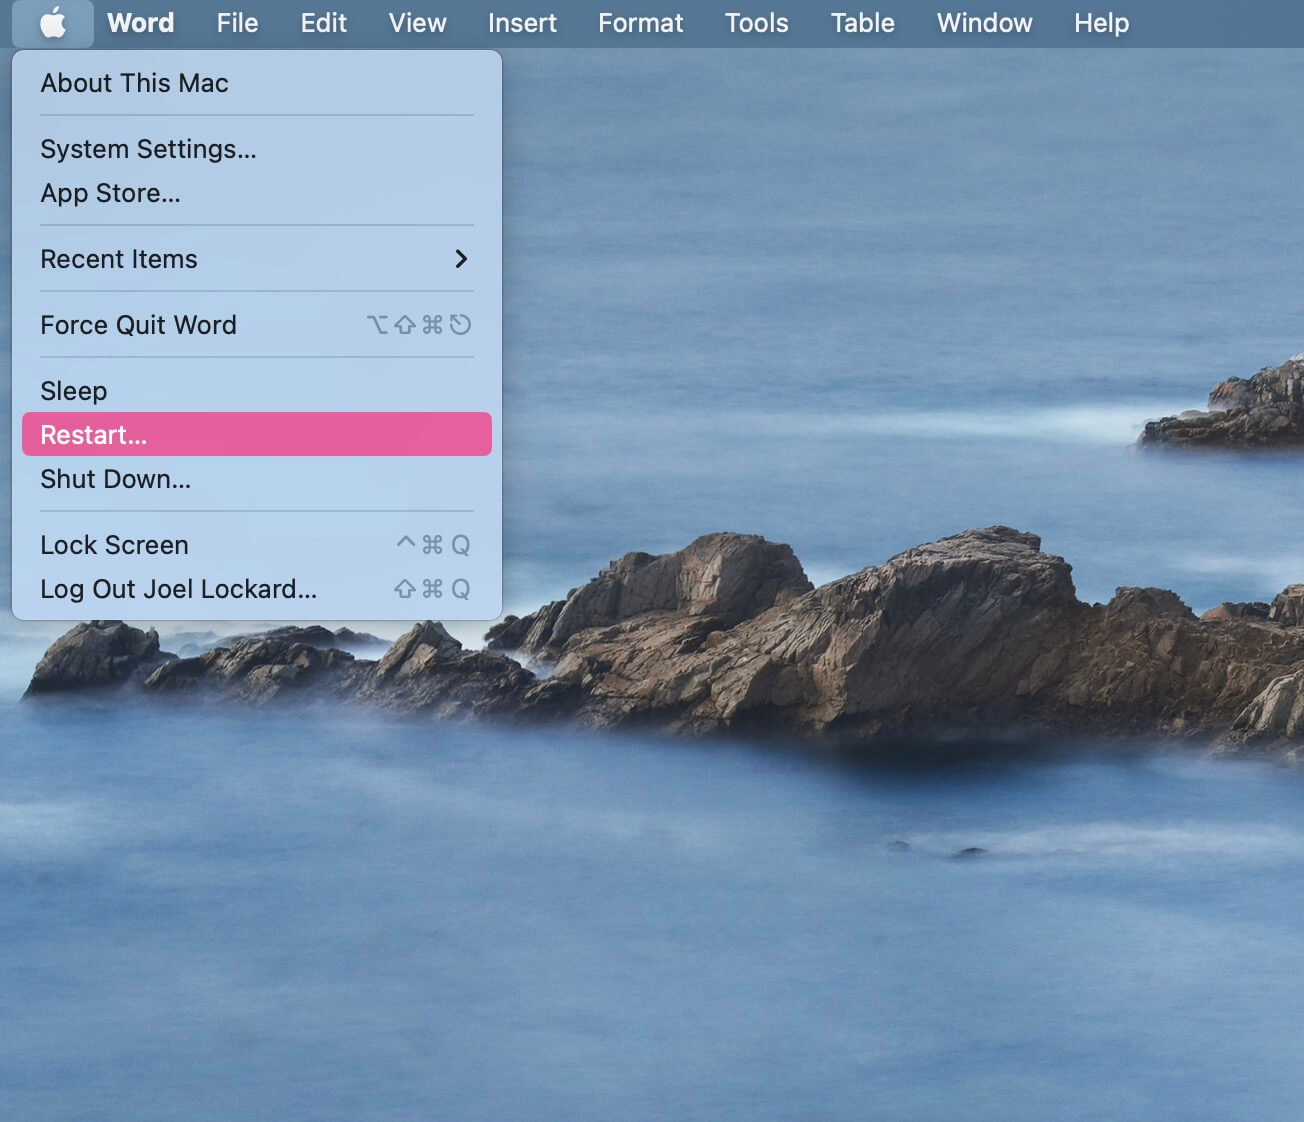
- Head up to the Apple logo in the upper left-hand corner and click on it.
- Choose the Restart… option and wait for your Mac to restart.
- Once your Mac has booted back up go ahead and log in.
- Plug in the external storage device and then try to accomplish the task that you were doing before.
Method 2: Reset NVRAM/PRAM
NVRAM, or Non-volatile random-access memory, is a small amount of memory on your Mac where macOS settings are stored.
PRAM or Parameter Random Access Memory stores information about the system settings on your Mac. This keeps settings saved for you even when you power down and turn off your Mac.
If you’re receiving the Error 50 code, then resetting your NVRAM/PRAM may help fix the issue and get rid of the error.
Note that when you follow the steps below you will reset both, so you don’t have to do another set of steps for the other. When you do reset them, you will not lose any data on your Mac.
- Shut down your Mac, then turn it on and immediately press and hold OPTION+COMMAND+P+R and hold these keys for about 20 seconds.
- Your Mac will then appear to restart. Let it boot up to the home screen and then log in.
- Plug your external storage device into your Mac and see if you’re able to accomplish your task from before.
If you’re using a newer Mac that has a T2 security chip, you can release the keys right after you see the Apple logo.
Method 3: Check and See if Your Mac Has a Software Update
Updating your Mac might help fix any issues relating to the Error Code 50 message displaying. macOS updates are free, and you can install them easily.
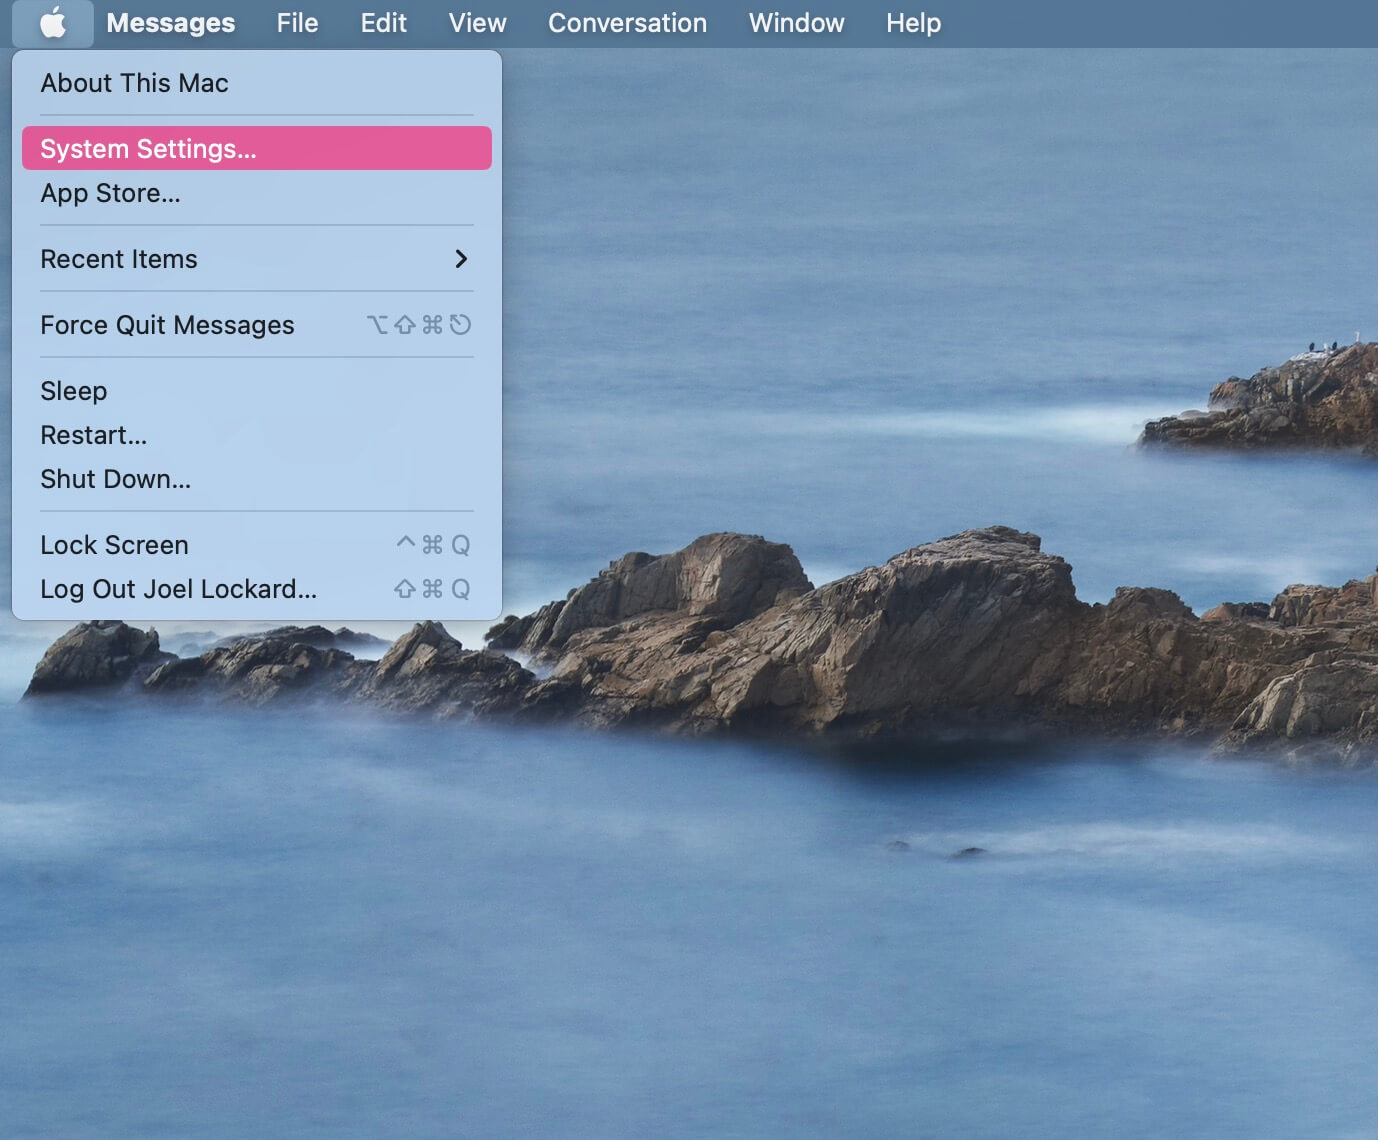
- Go up to the Apple logo in the upper left-hand corner and click on it.
- From within the dropdown menu, click on System Settings… and then a window will launch.
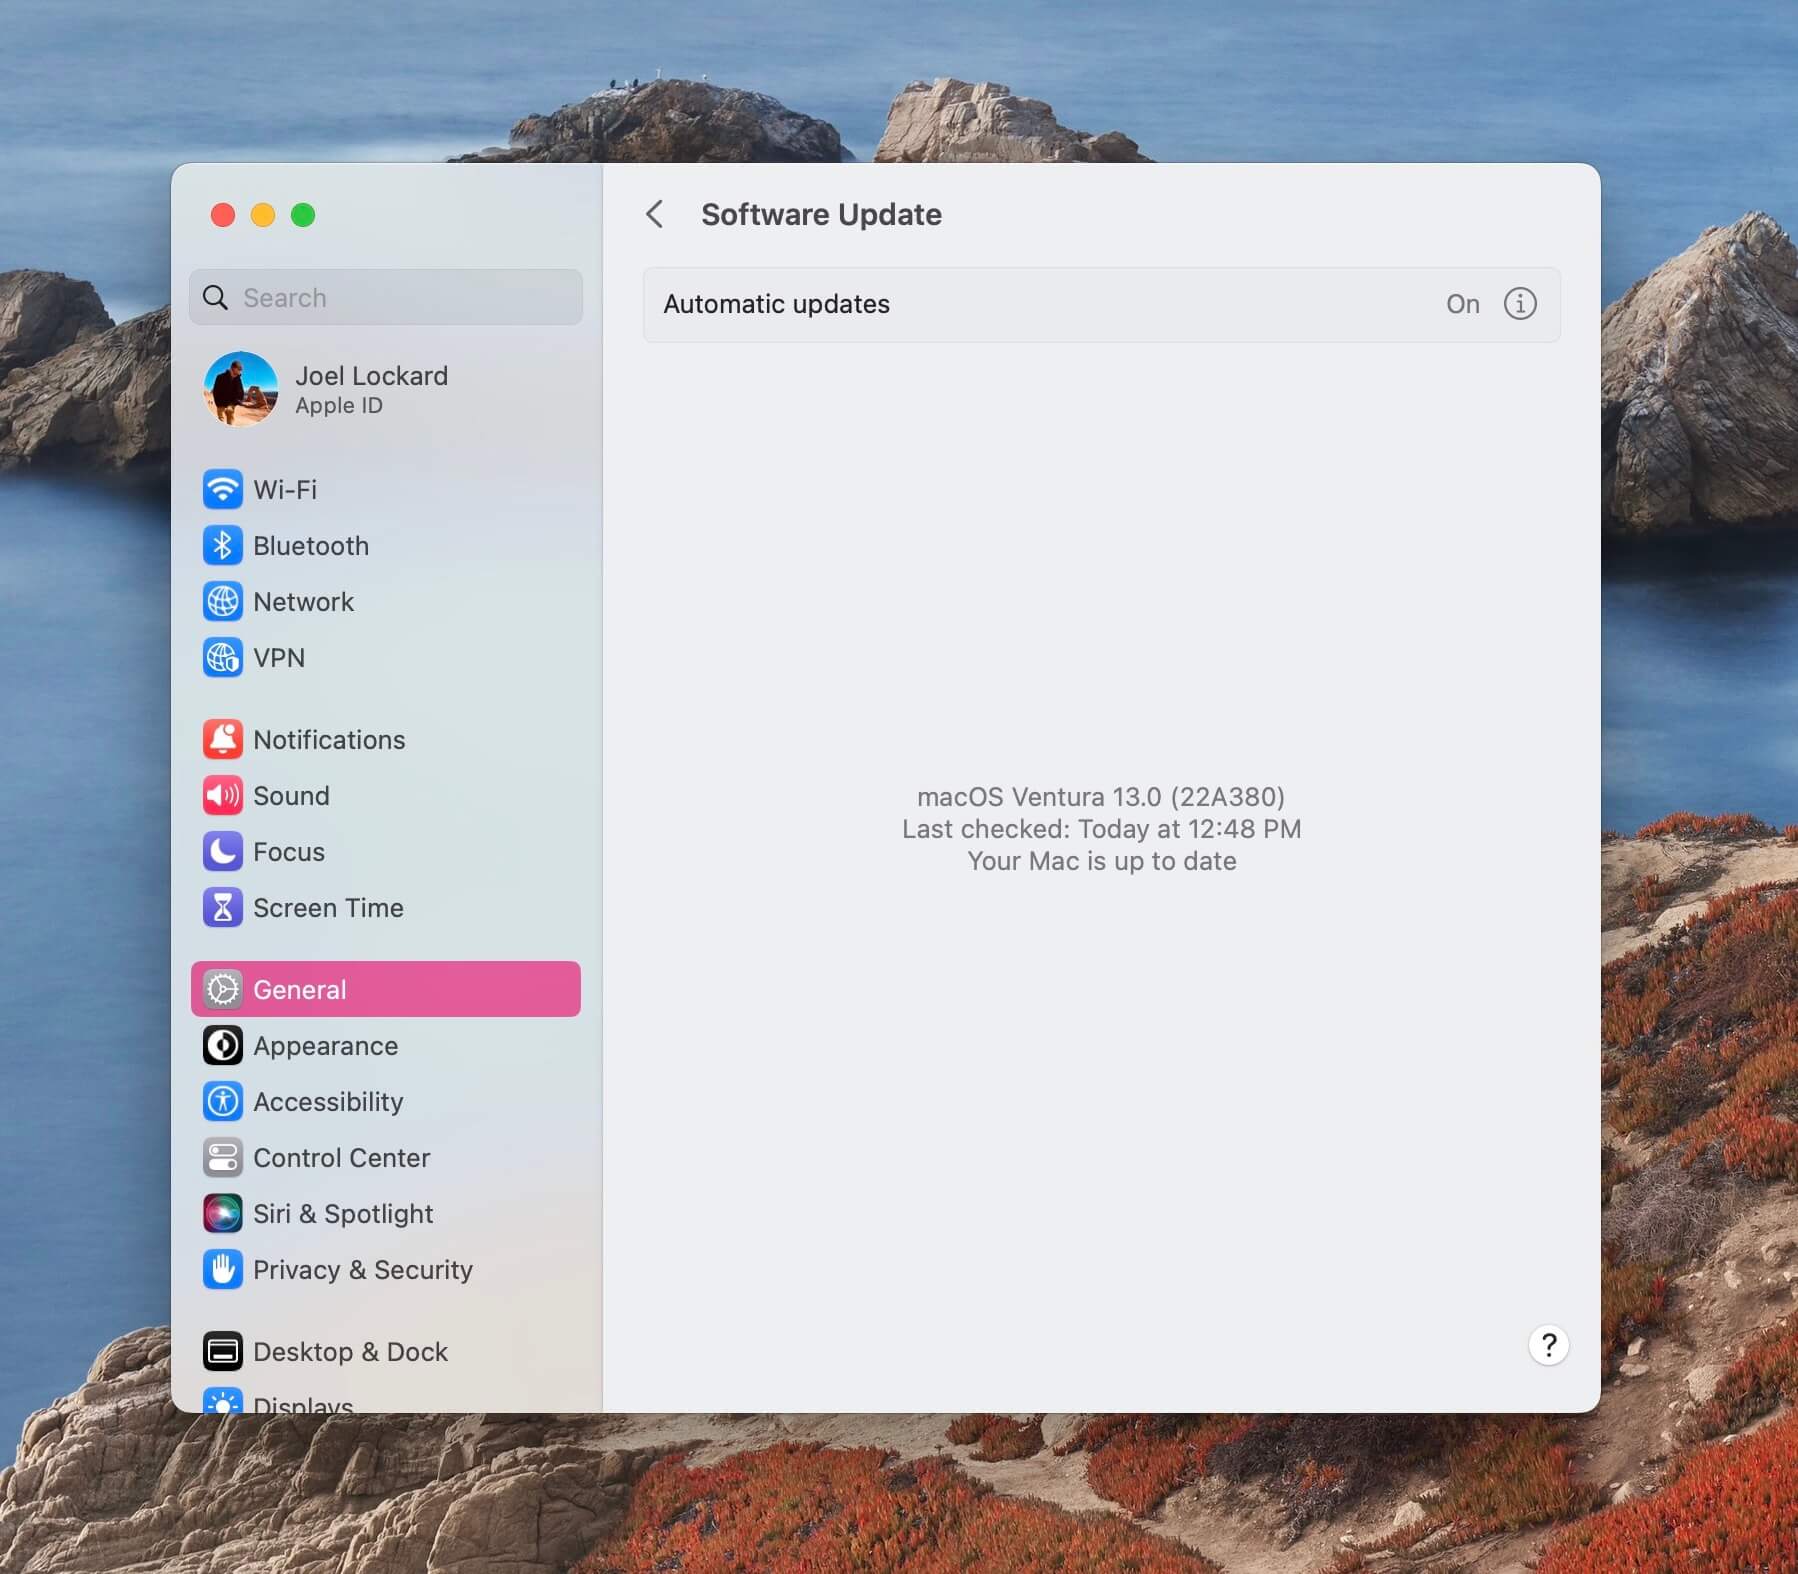
- Then navigate to General and choose Software Update.

- If there is an update available, then I would recommend that you download and install it. If there are none, we can move on to the next method.
Method 4: Run First Aid in Disk Utility
First Aid gives you the ability to repair and fix disk errors. If an application is crashing frequently, a file is corrupted, or an external hard drive isn’t working correctly, then this method might get us up and running again.
First Aid is part of Disk Utility, and this comes installed on your Mac for free.
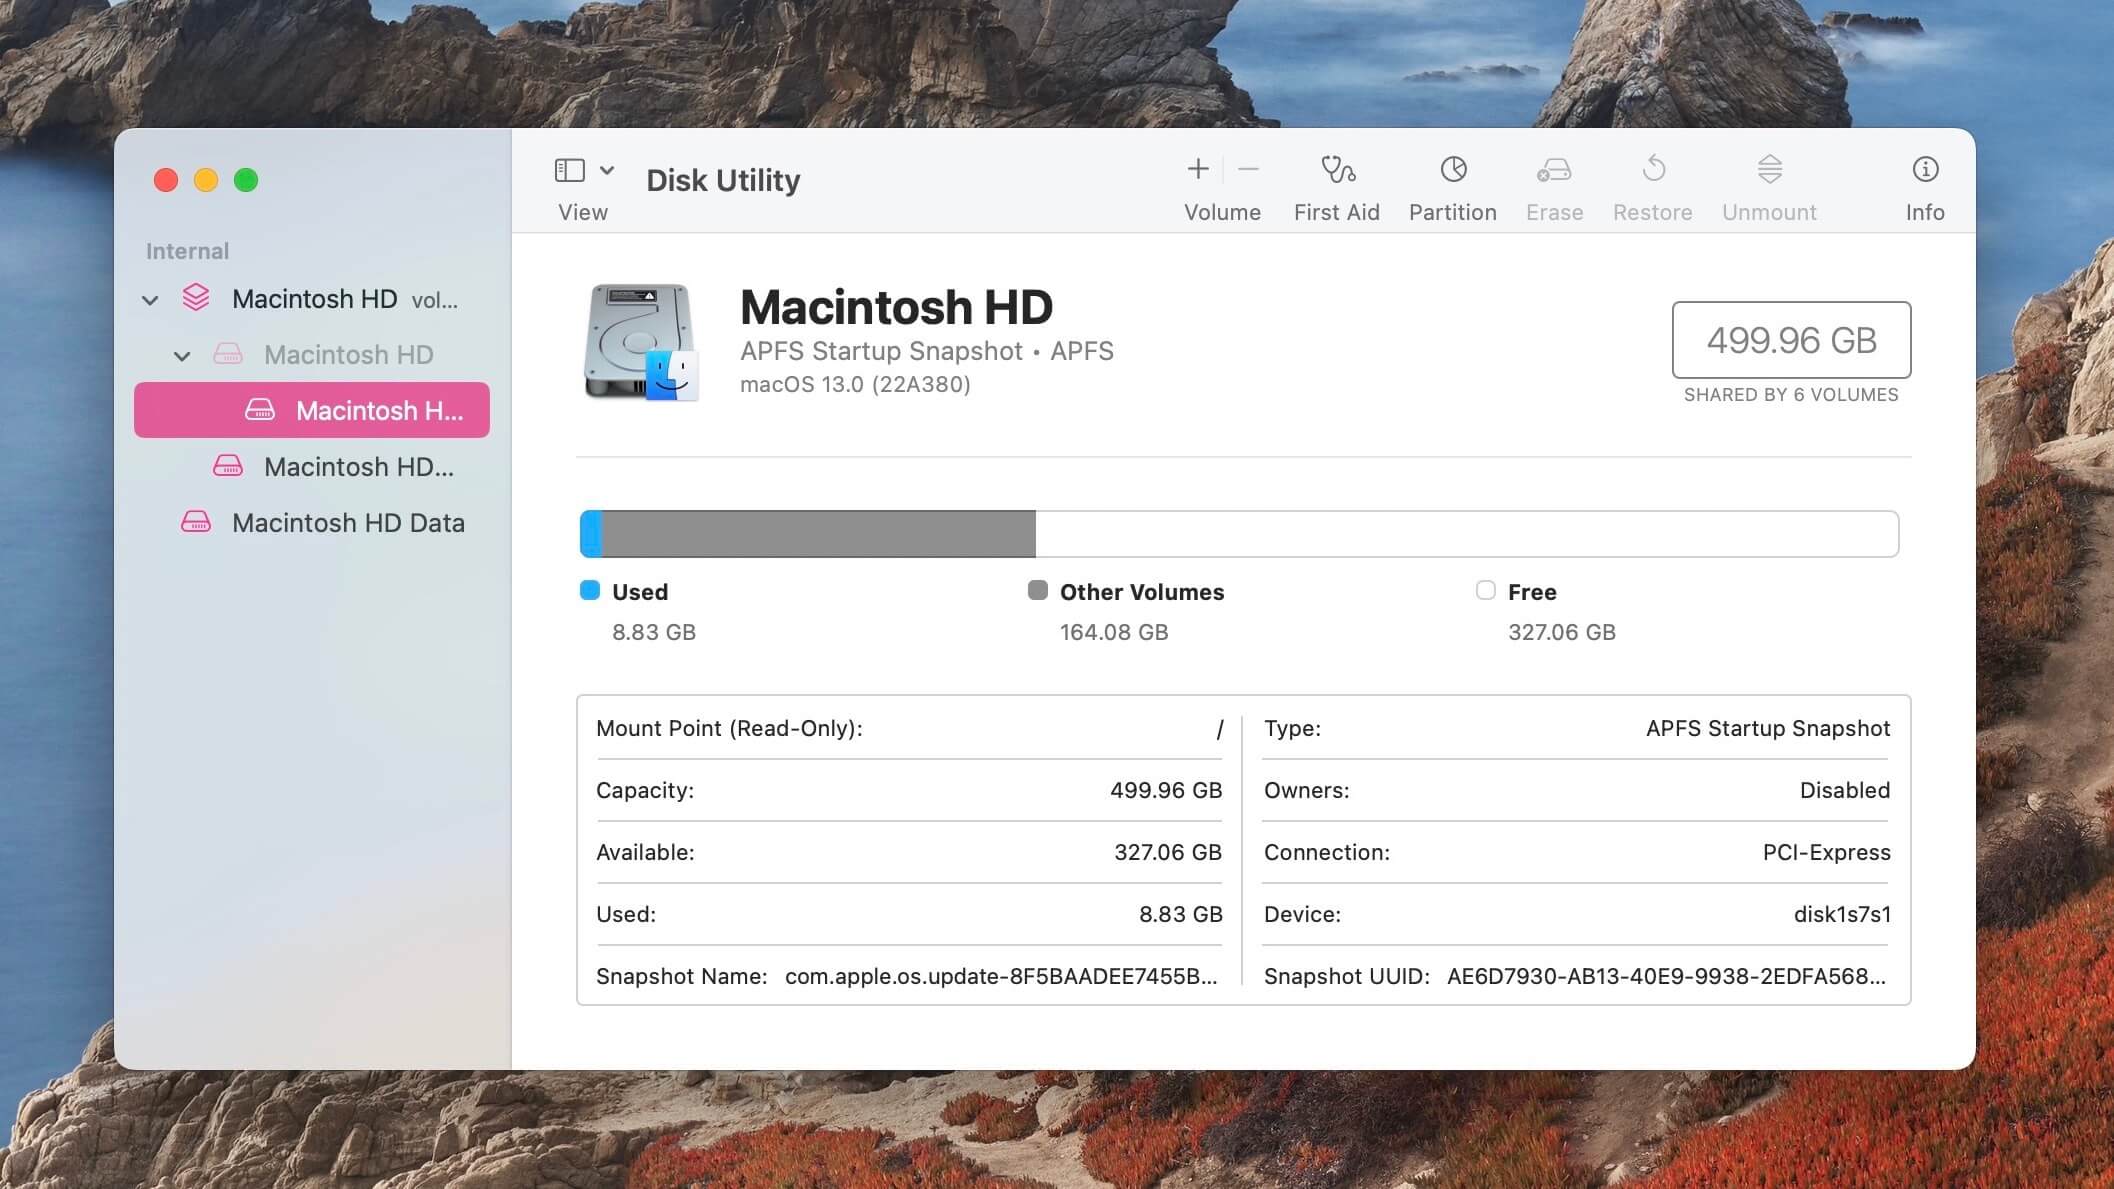
- Launch Disk Utility from your Applications folder: Launch Finder and then go to your Applications folder. From within the folder, look for Utilities and then select Disk Utility.
- Once within Disk Utility, select your external storage device.
- Click on First Aid once the hard drive is selected.
- Click Run and wait for the process to complete. First Aid can take some time to run depending on how large the hard drive is, and it can make your Mac unresponsive while fixing your hard drive. I would recommend doing it at a time when you aren’t trying to get any work done.
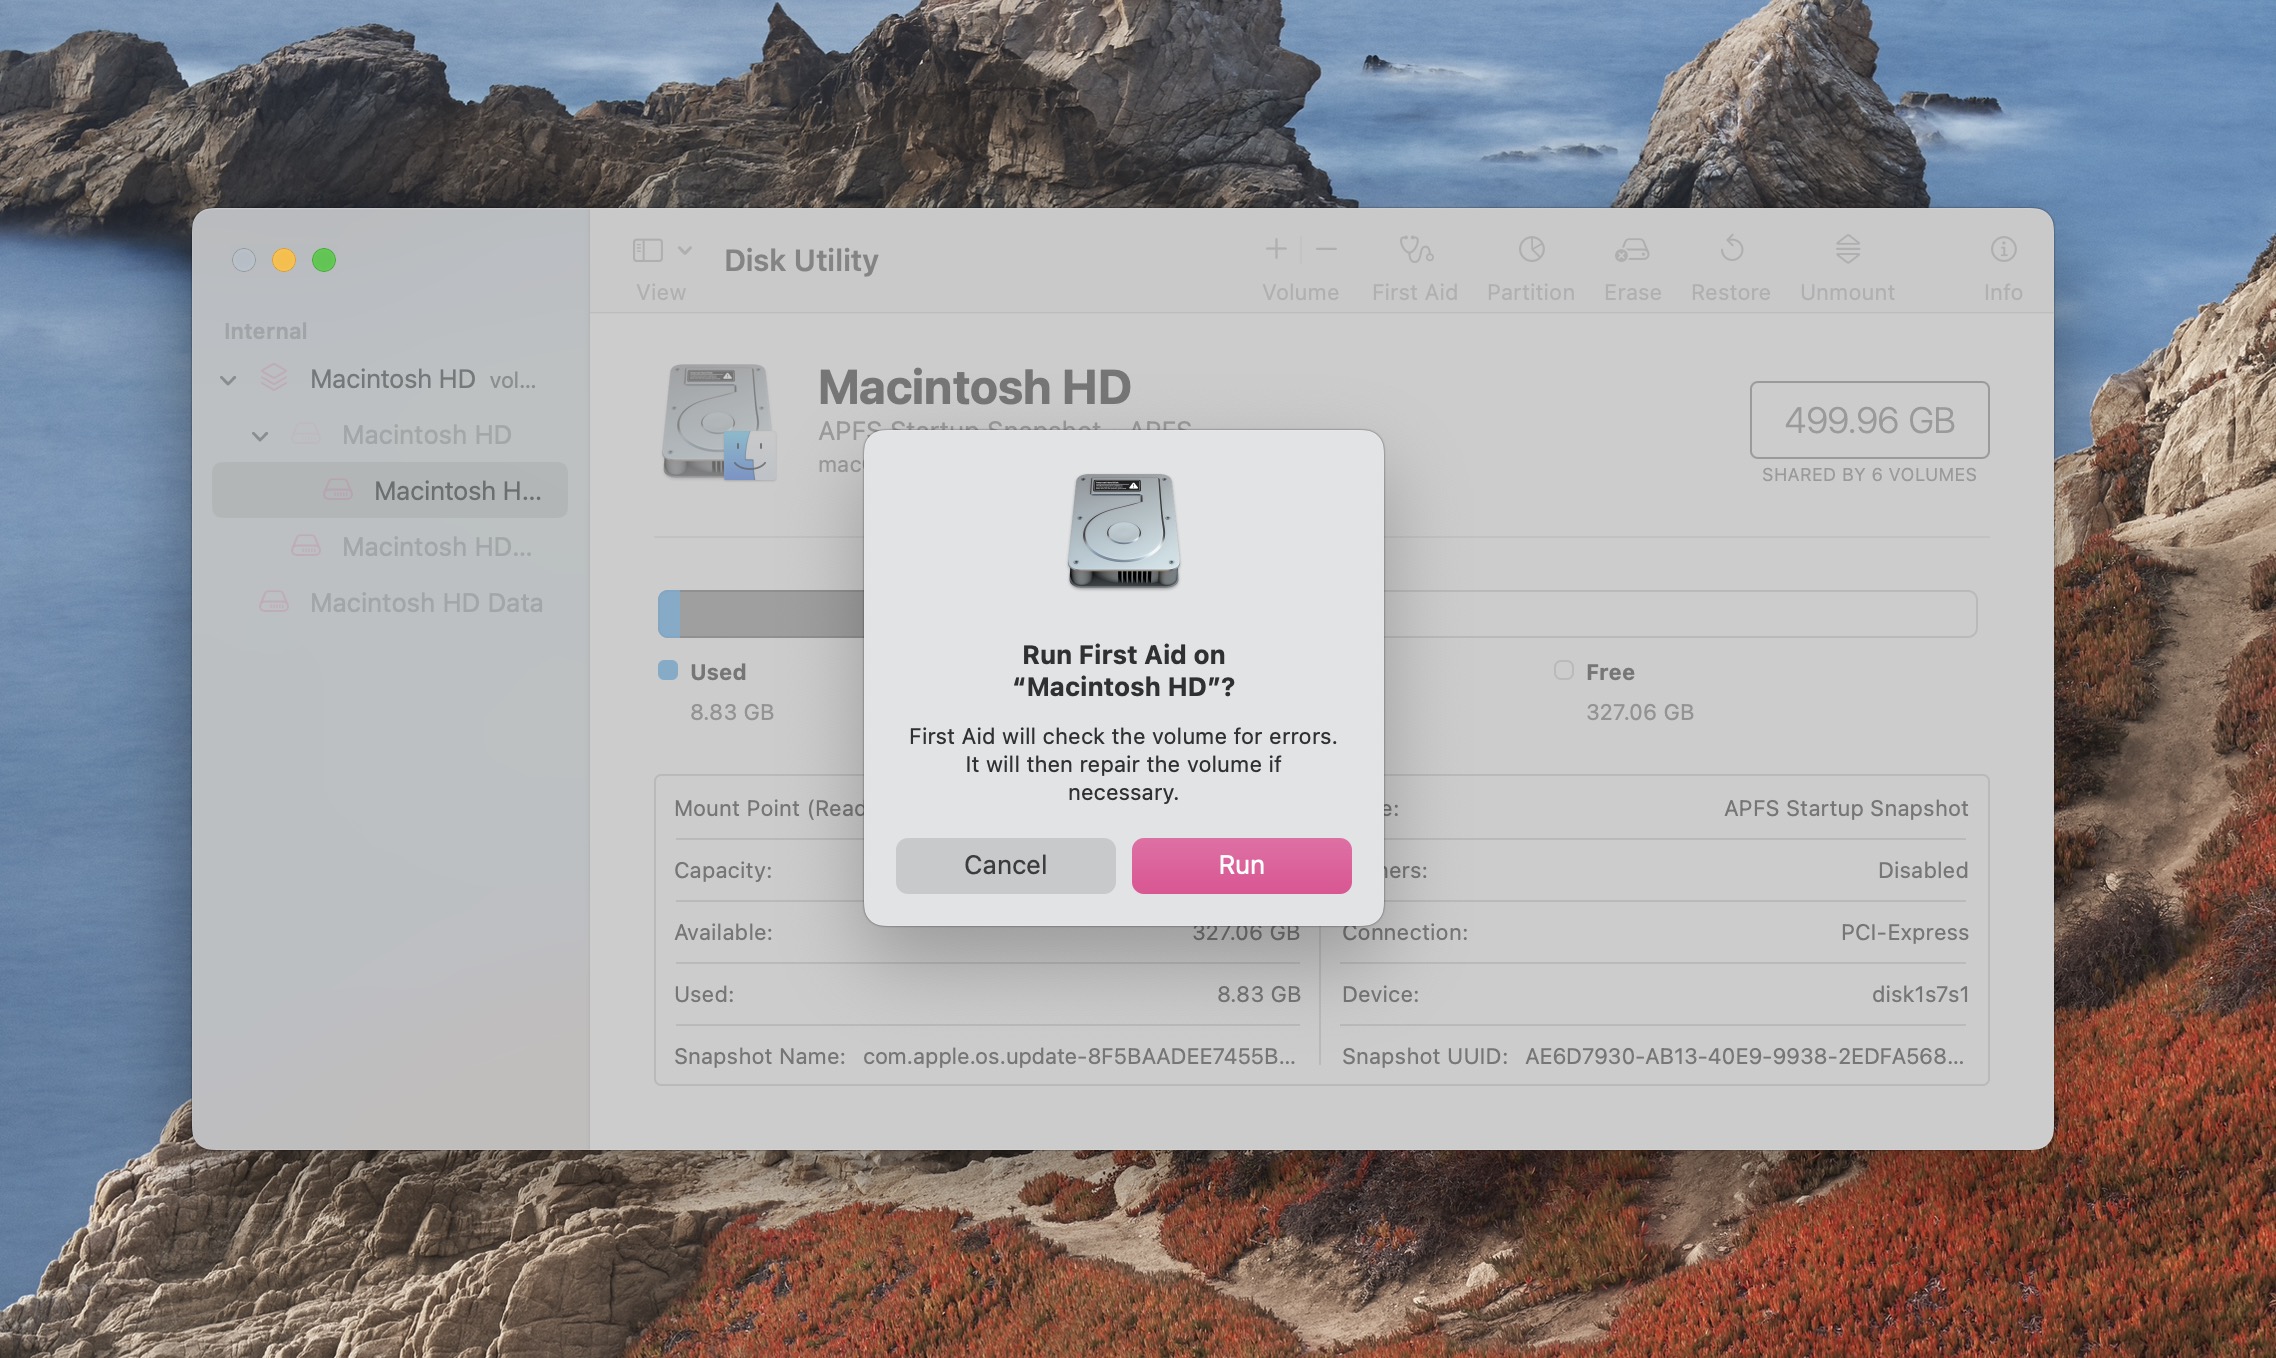
Once First Aid is done, attempt to accomplish the task that you were trying to do before and see if you can complete it without receiving the error.
Method 5: Check the Names of the Files on Mac
If you have one file that won’t transfer, try changing its name. Sometimes the name of a file can cause issues when transferring from one location to another. Symbols and other non-character symbols can cause issues as well.
- Right-click on the file that you want to rename.
- Select Rename and then type in the new name of the file.
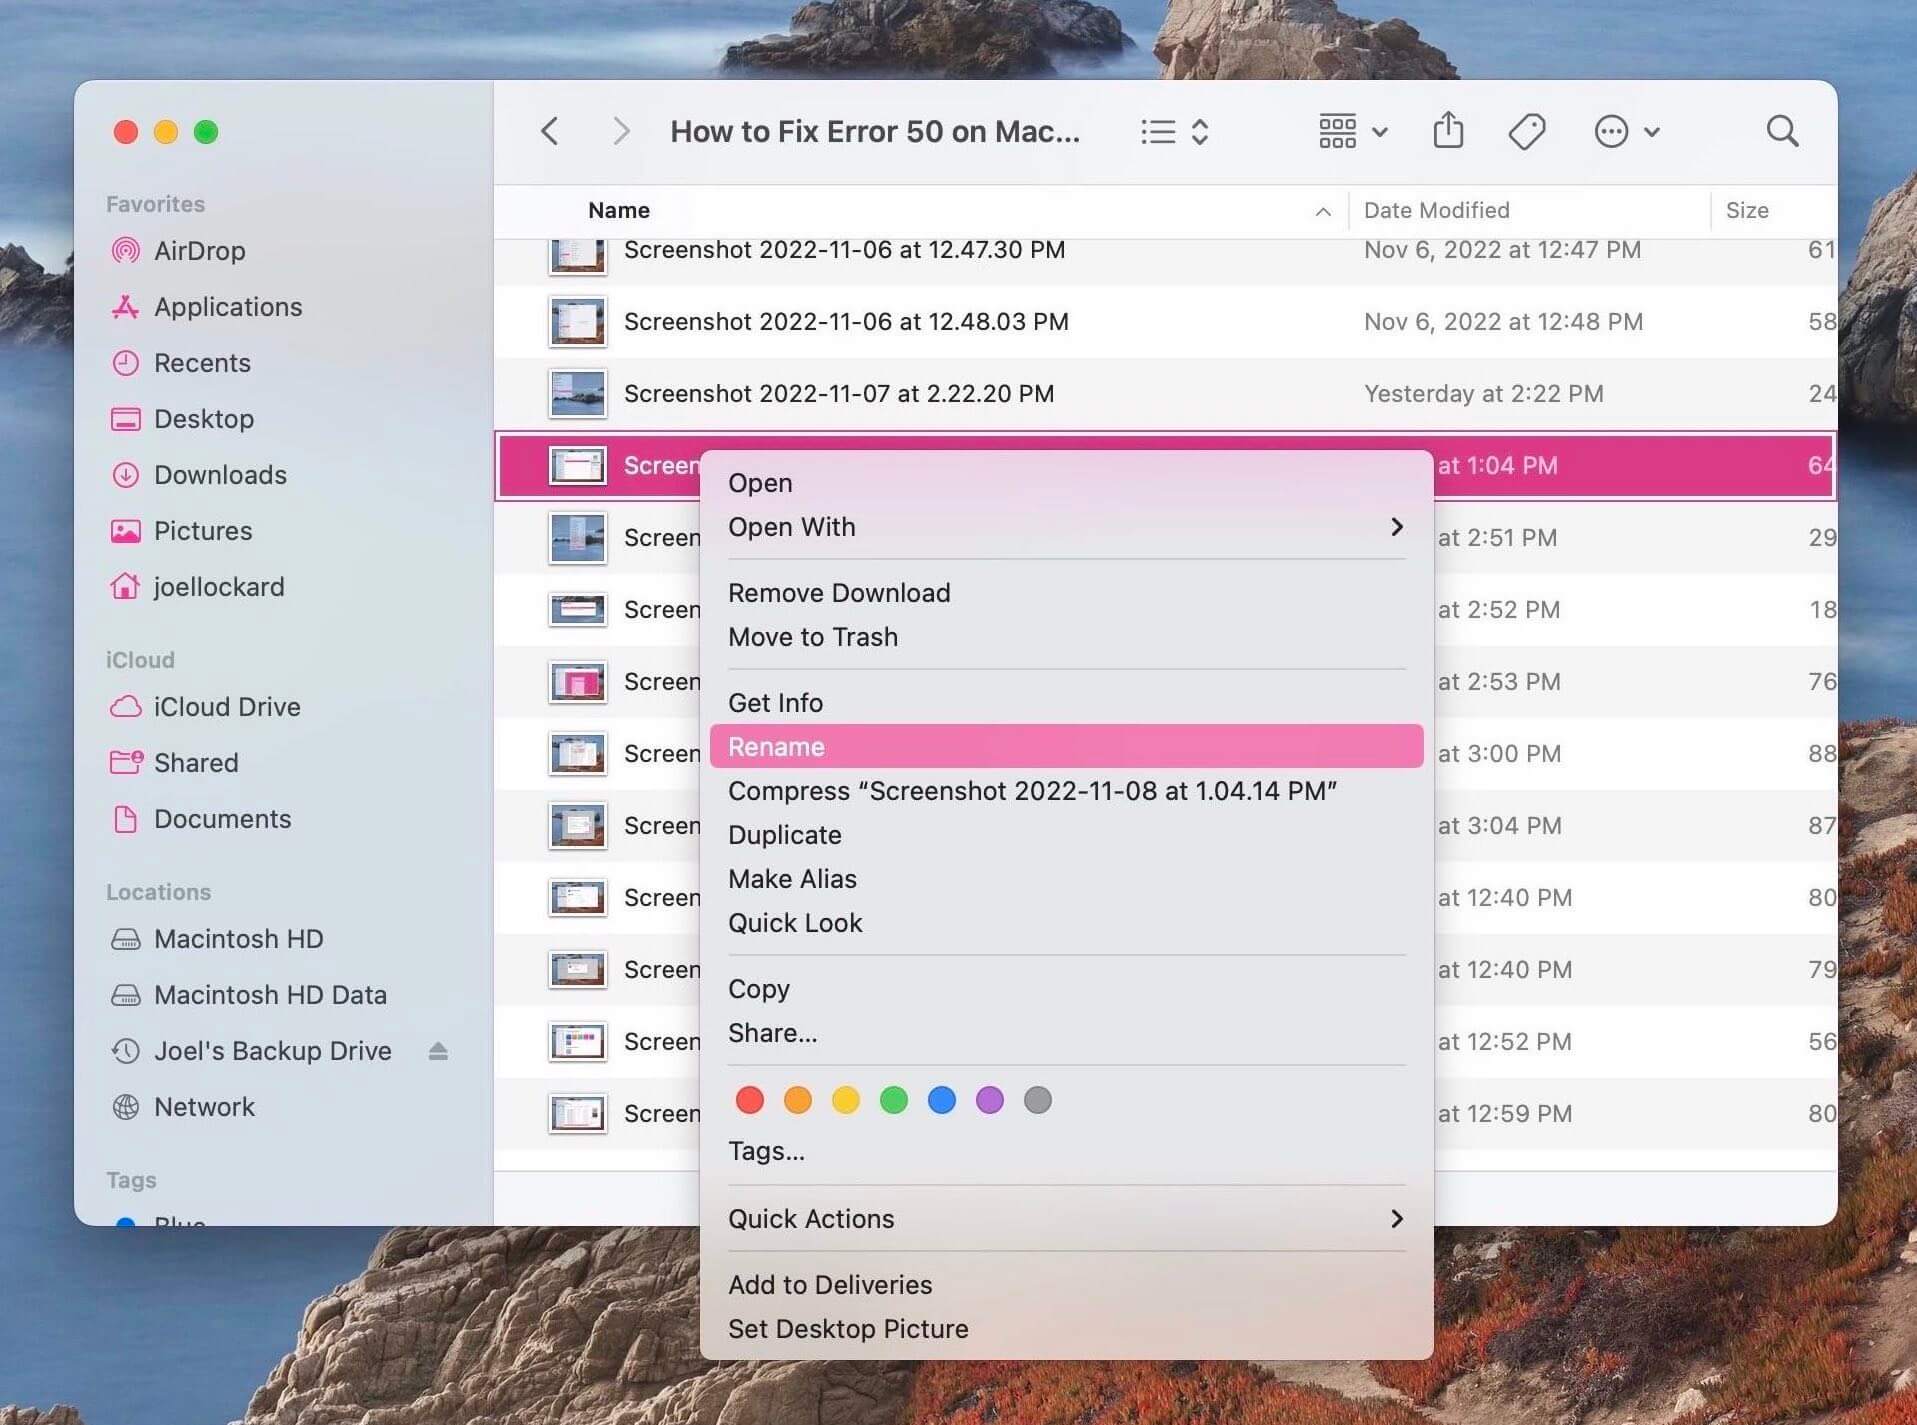
- Click return on your keyboard.
- Try moving the file now and see if it’s successful.
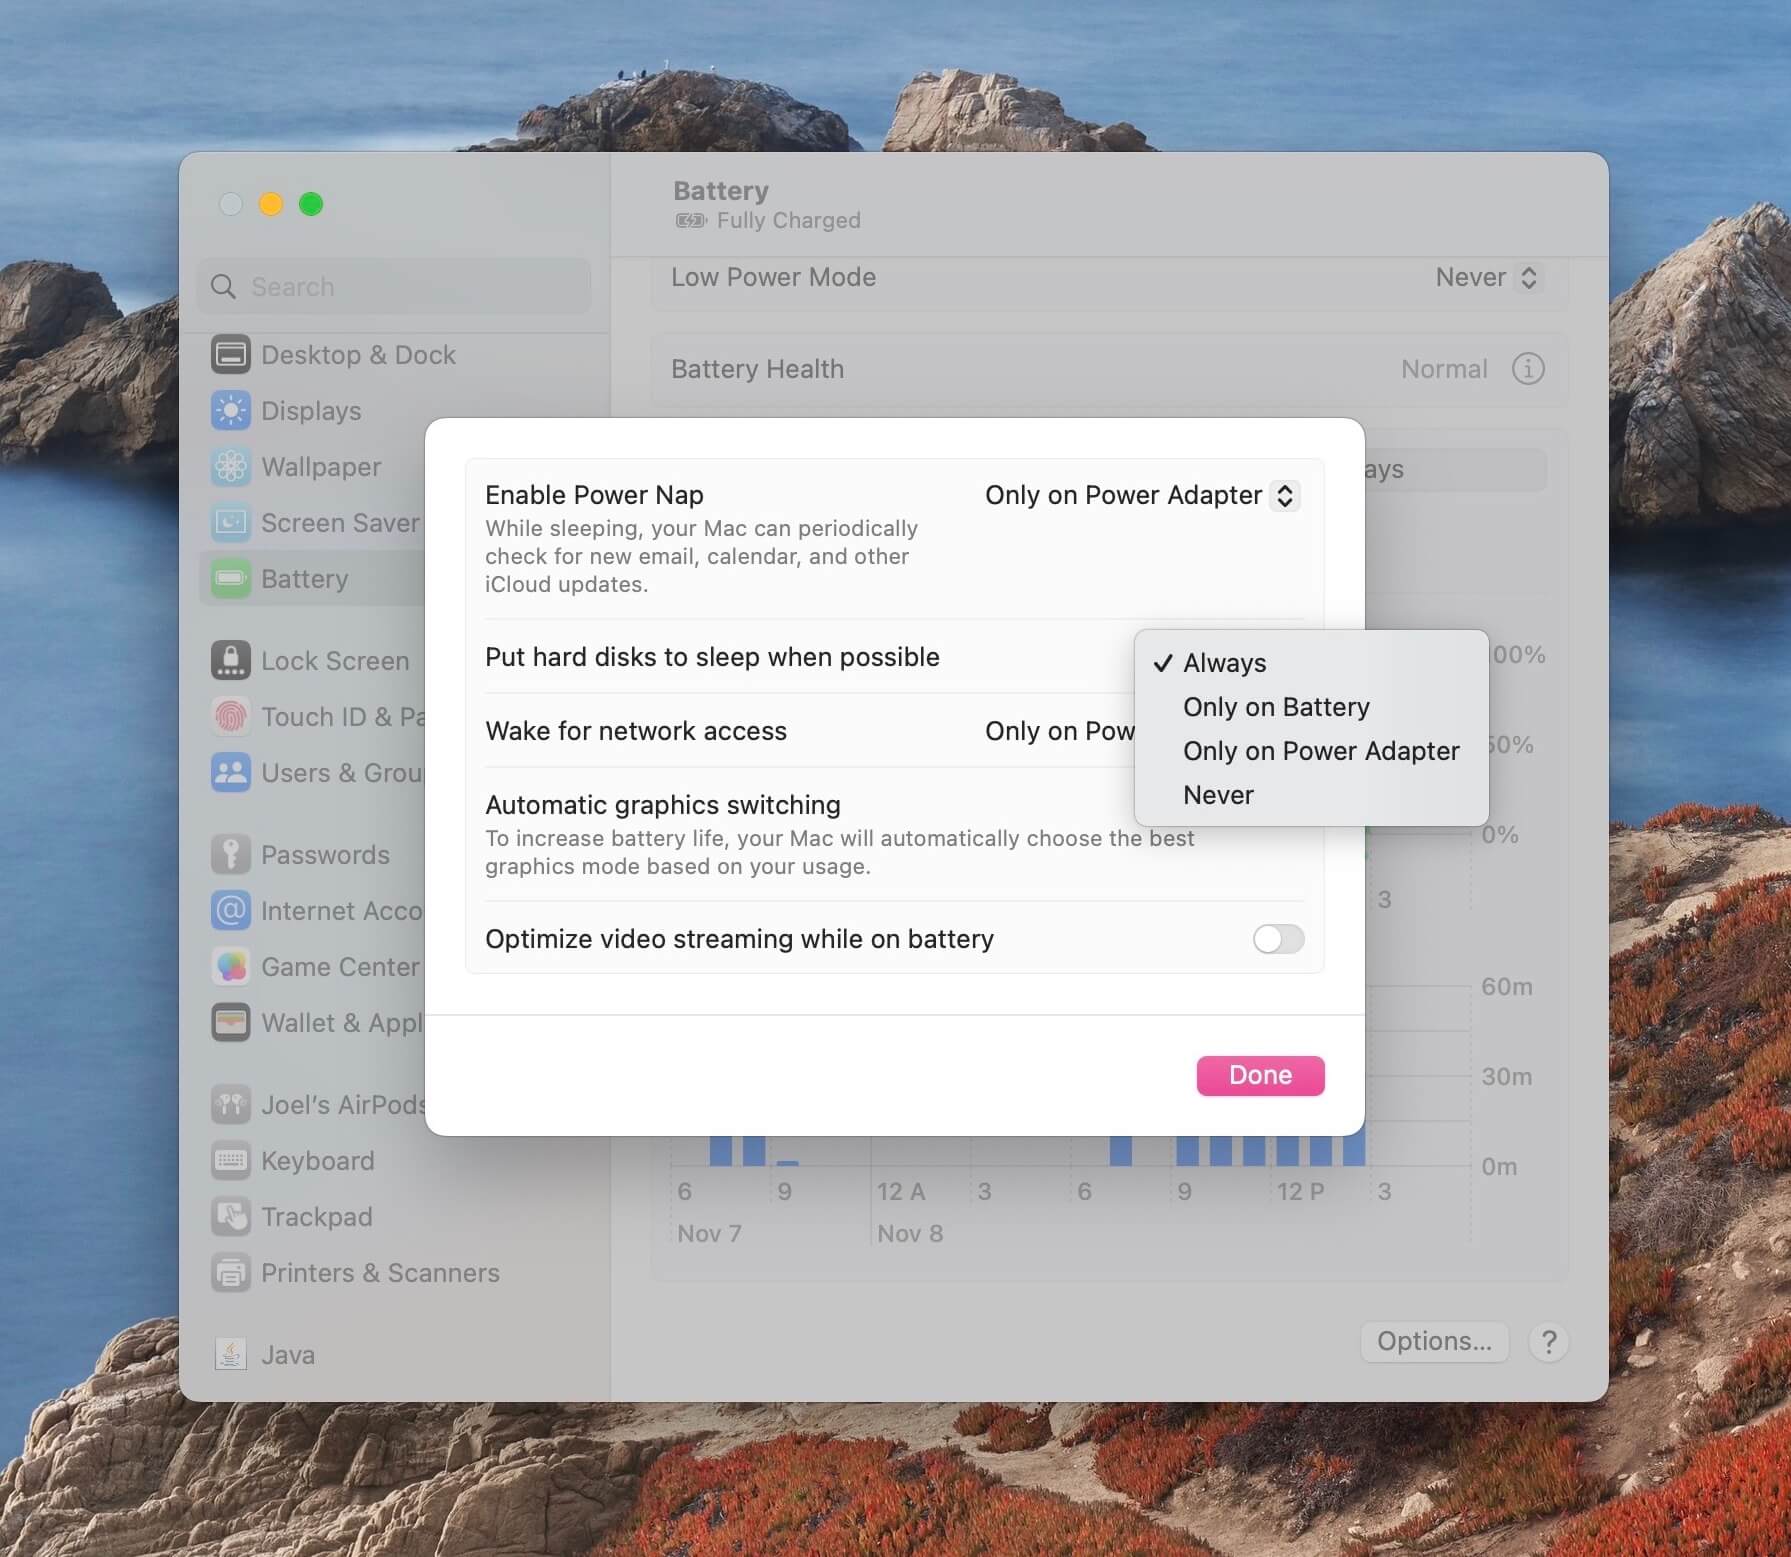
Method 6: Check Your External Hard Drive Settings
It is possible that your hard disk is being put to sleep and that is the reason that you’re receiving the error. We can turn off this setting and then try to accomplish our task and see if we can do it without getting the error.
- Launch System Settings.
- Navigate to Battery.
- Choose Options…at the bottom of the settings page.
- Change Put hard disks to sleep when possible to Never.
Method 7: Clean ~/Library/Caches
Caches are temporary files on your machine. Sometimes these can interfere with normal computer operations. Cleaning them could help resolve the issue and get rid of the error code.
- Launch Finder.
- Head up to the Nav bar and click on Go. Then, scroll down to Go to Folder….
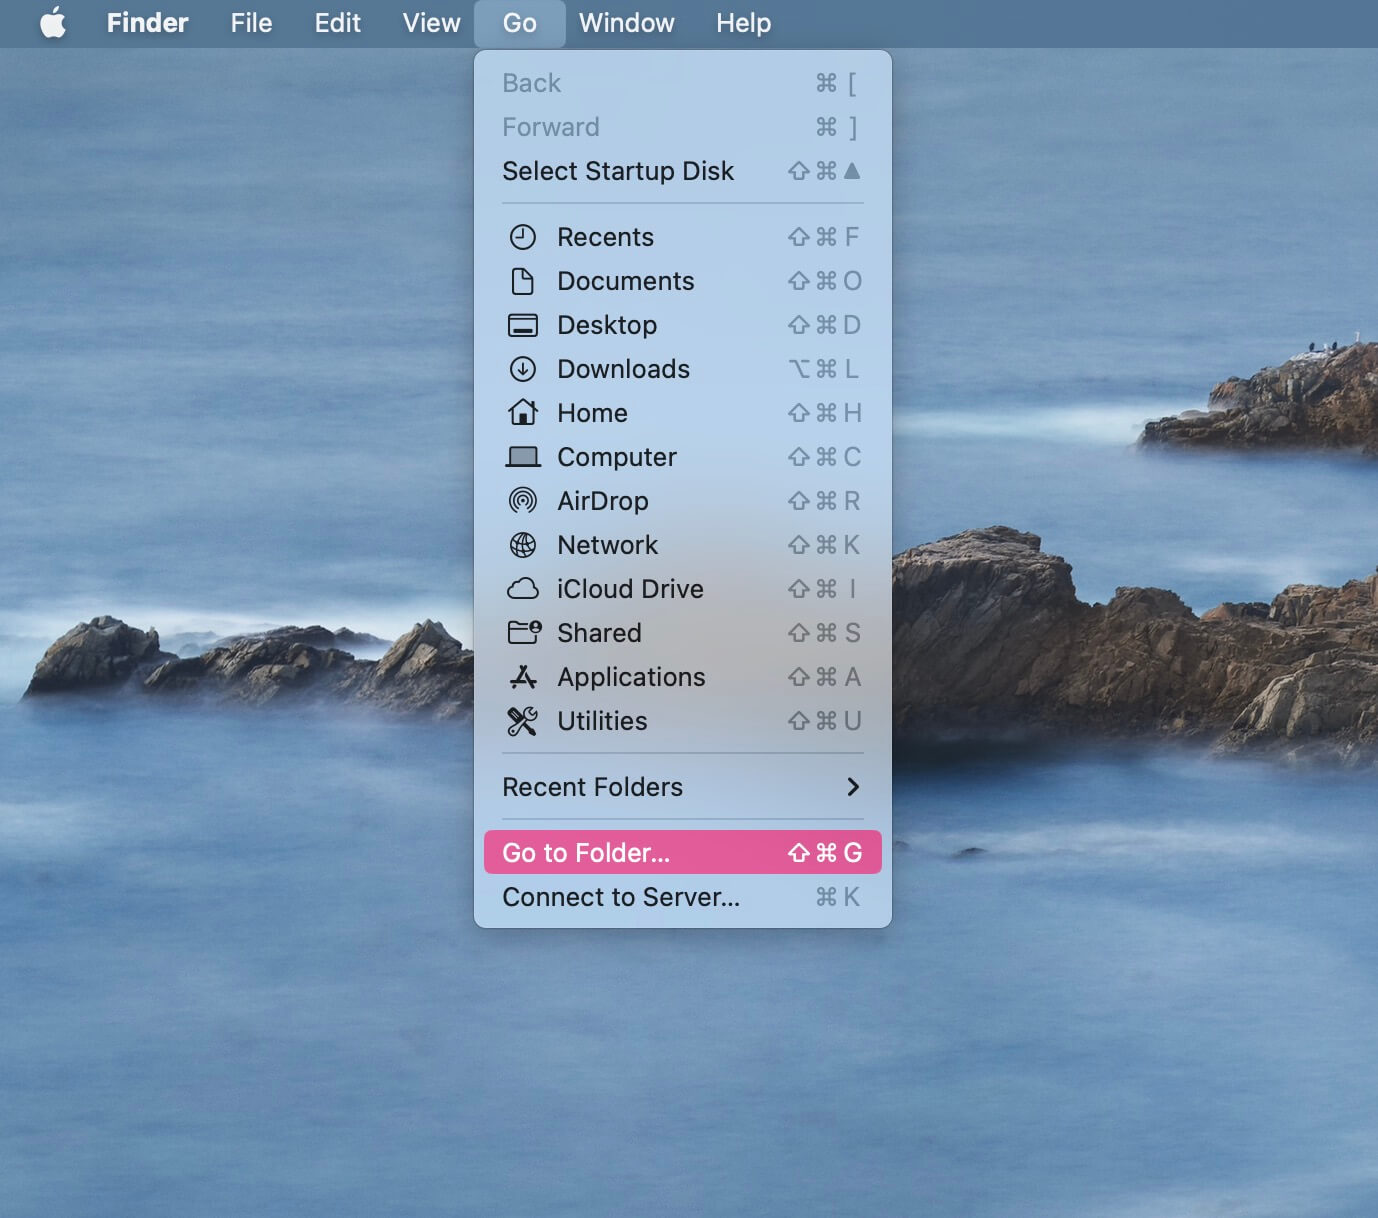
- Type in ~/Library/Caches and click return on your keyboard.
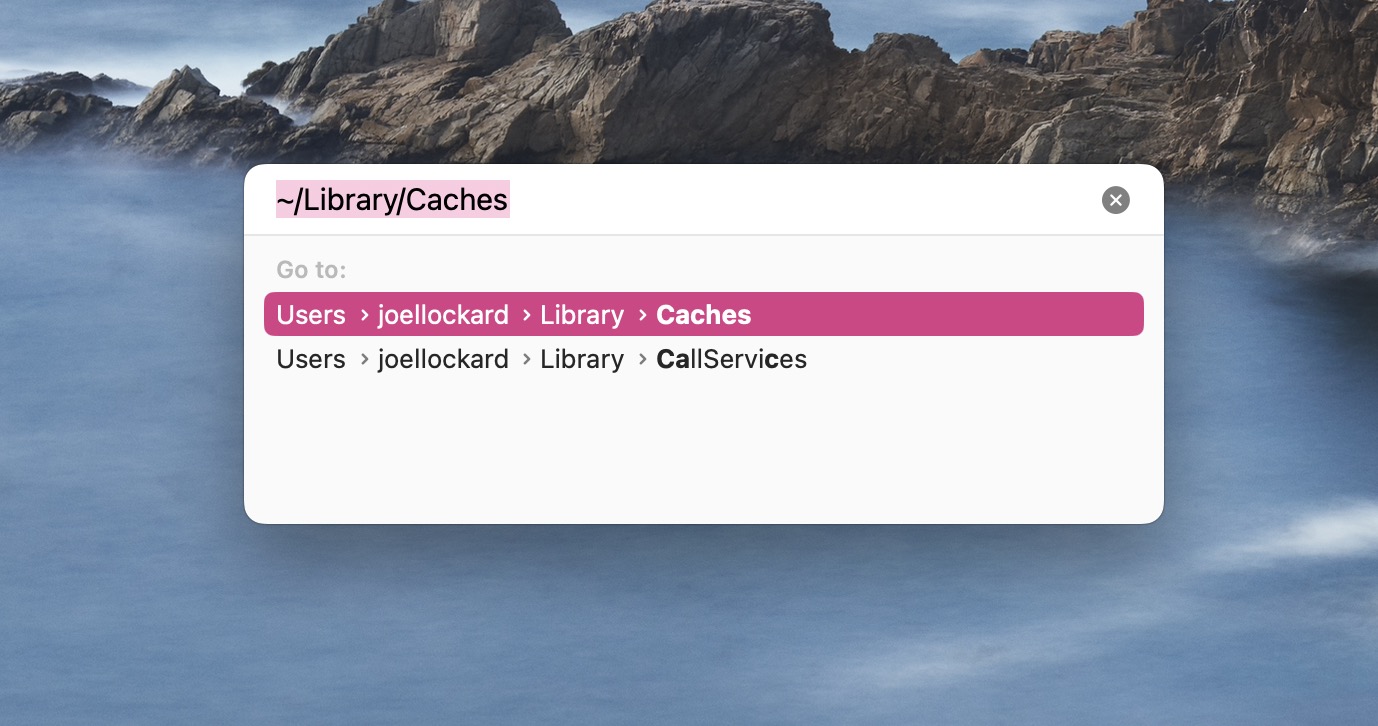
- Select all of the caches within this folder and move them to the Trash.

- Empty your Trash.
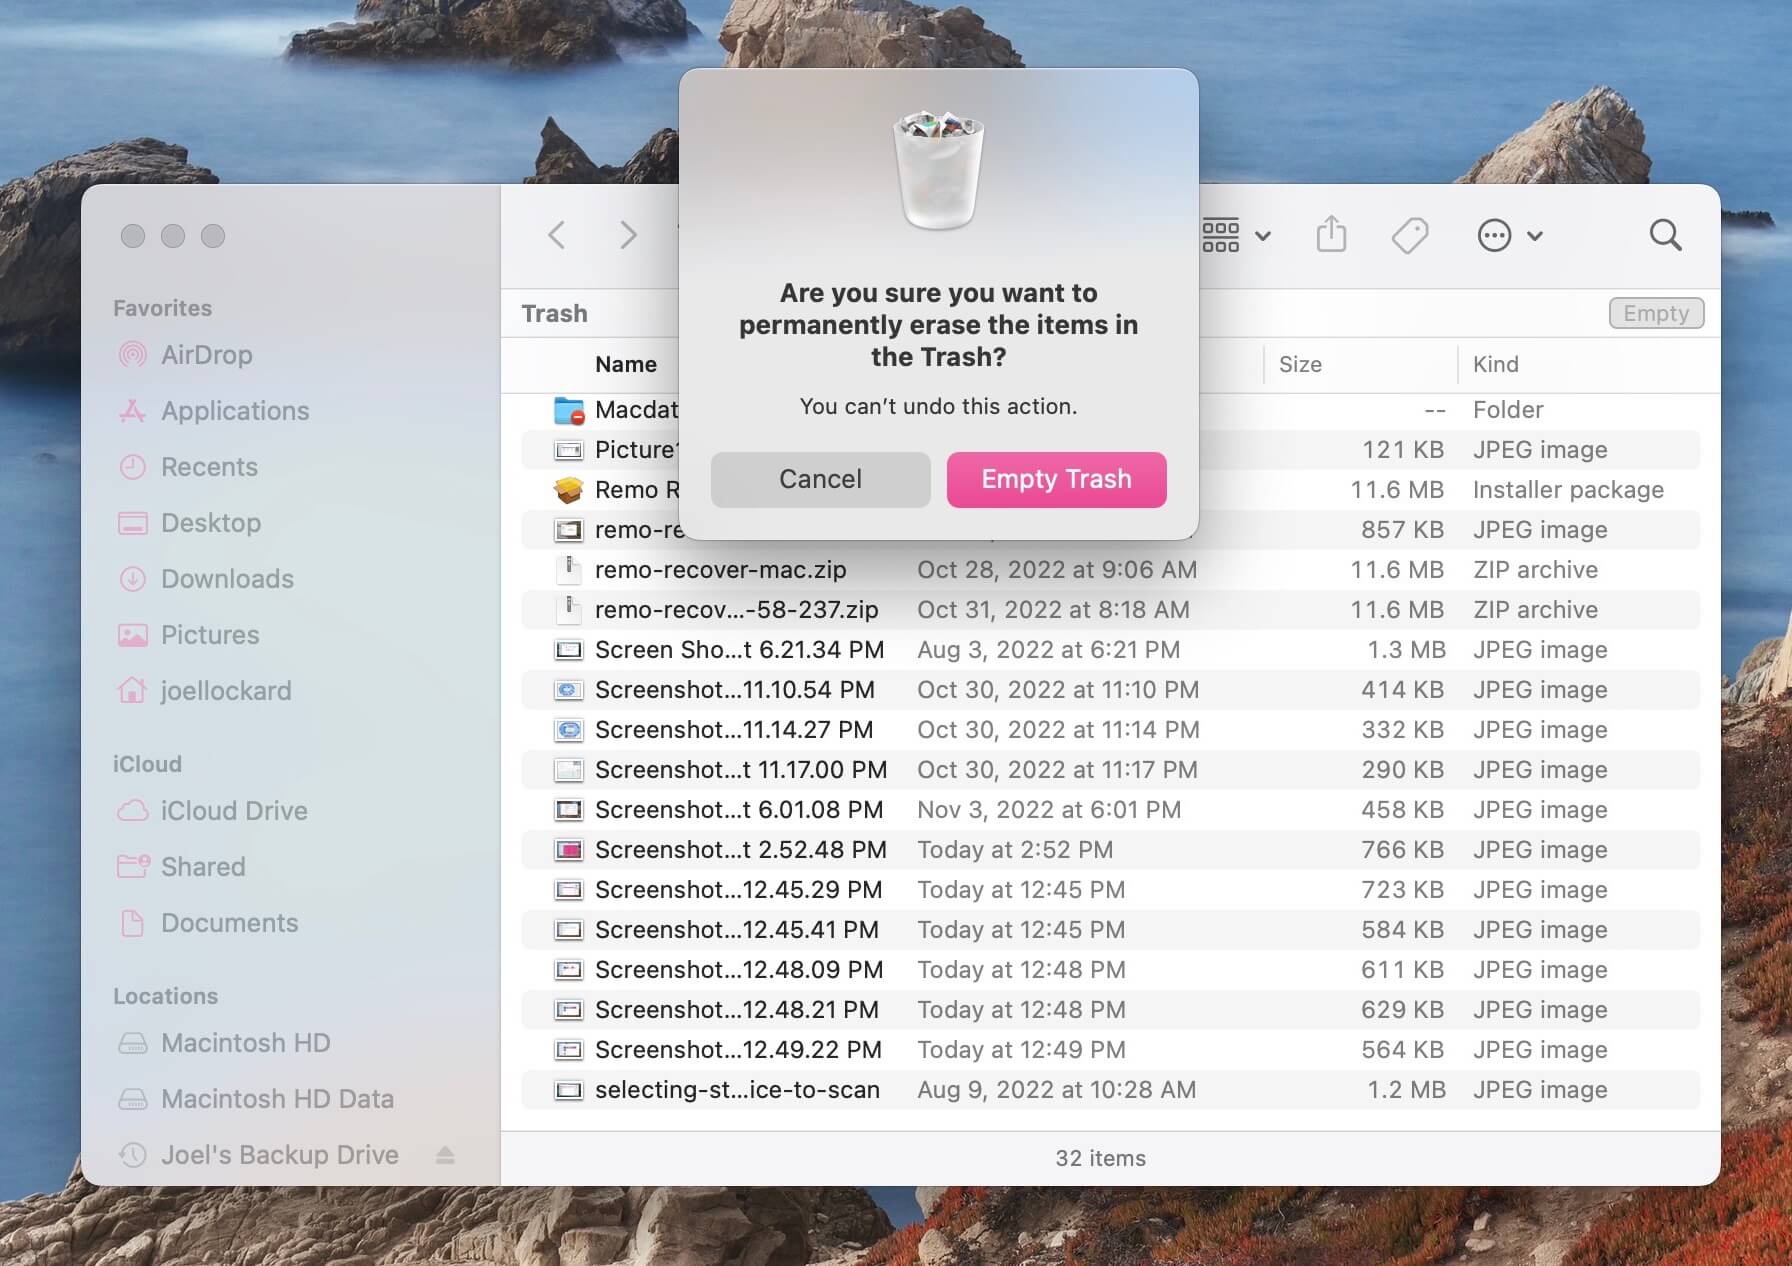
- Try accomplishing the task that you were doing before and see if you’re receiving an error code still.
Method 8: Format the Hard Drive
If none of the above options worked, then the last option would be to format the hard drive. This option is good if the hard drive simply isn’t working for you and won’t allow you to transfer any data from or onto it.
I wouldn’t recommend doing this step if you have one file causing an issue as the hard drive may be fine, it could be that just that one file is corrupted.
Formatting will completely erase the hard drive and set it up new again. If there are issues with the hard drive at a software level, this should fix them.
- Launch Disk Utility. Open a new Finder window and then navigate to your Applications folder. From within the folder, go to Utilities and then launch Disk Utility from the folder.
- Inside Disk Utility, select your external storage device from the list of devices on the left-hand side. Then, click on Erase.

- Choose the format that you would like to format the external storage device too. I would recommend that you choose APFS. Click Erase one more time and wait for the process to complete.
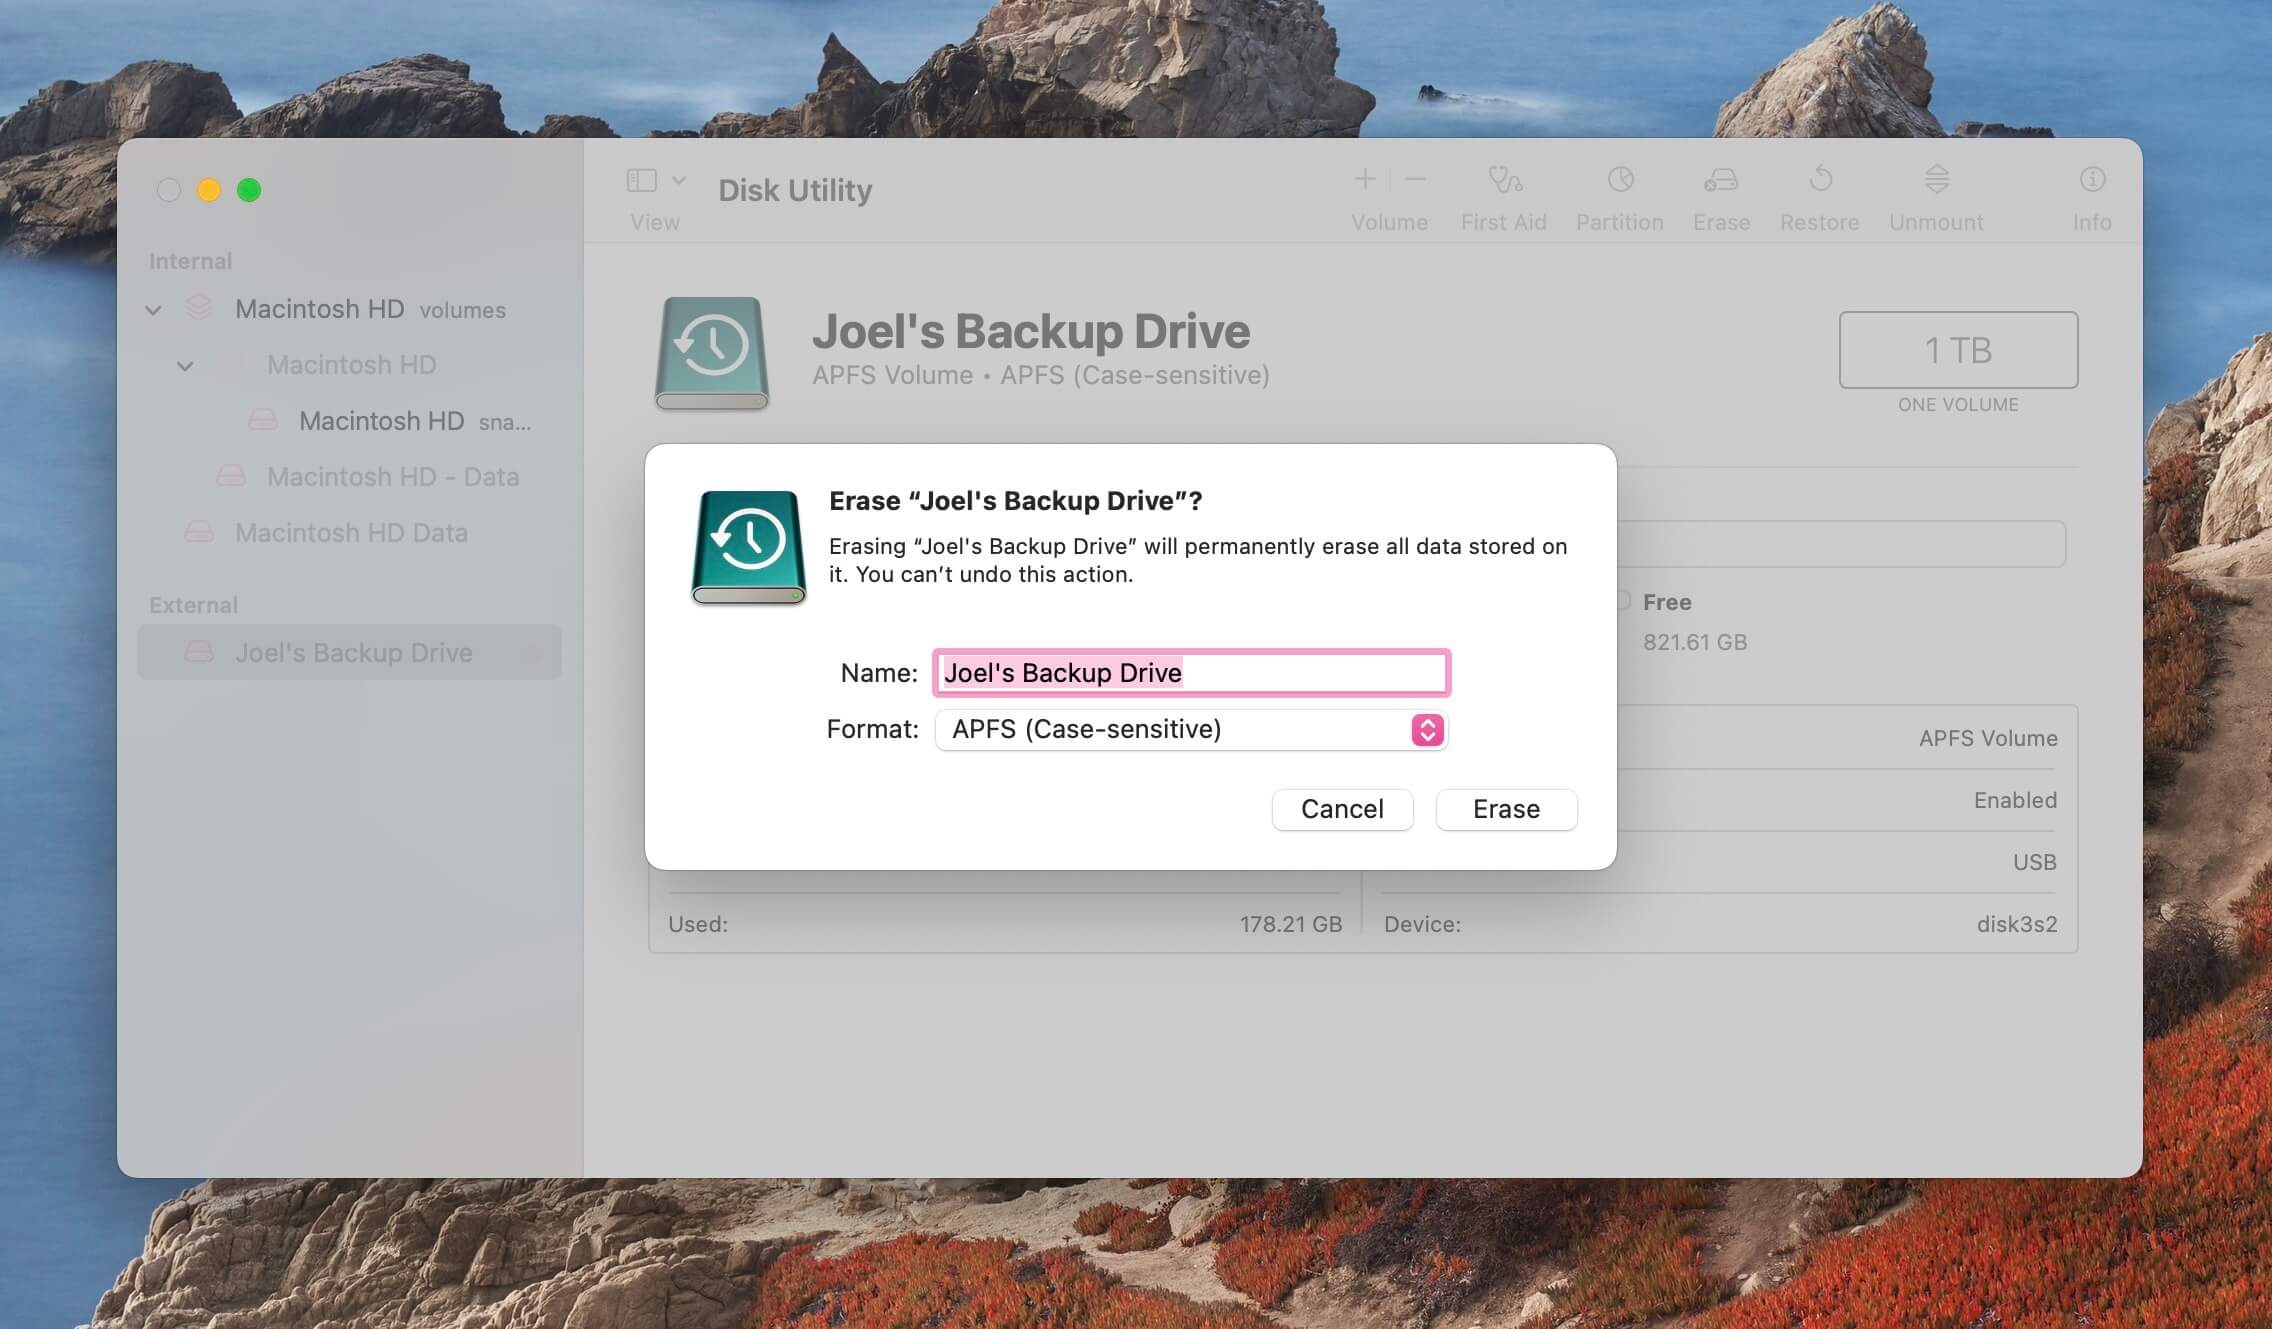
Try using the hard drive now and see if you can transfer data to and from it without any issues. If you’re still having issues, then there could be something wrong with either the hard drive, the cable, or your Mac at a hardware level, and bringing your Mac into an Apple store would be your next best option.
How to Recover Data from an External Storage Device with Error Code 50
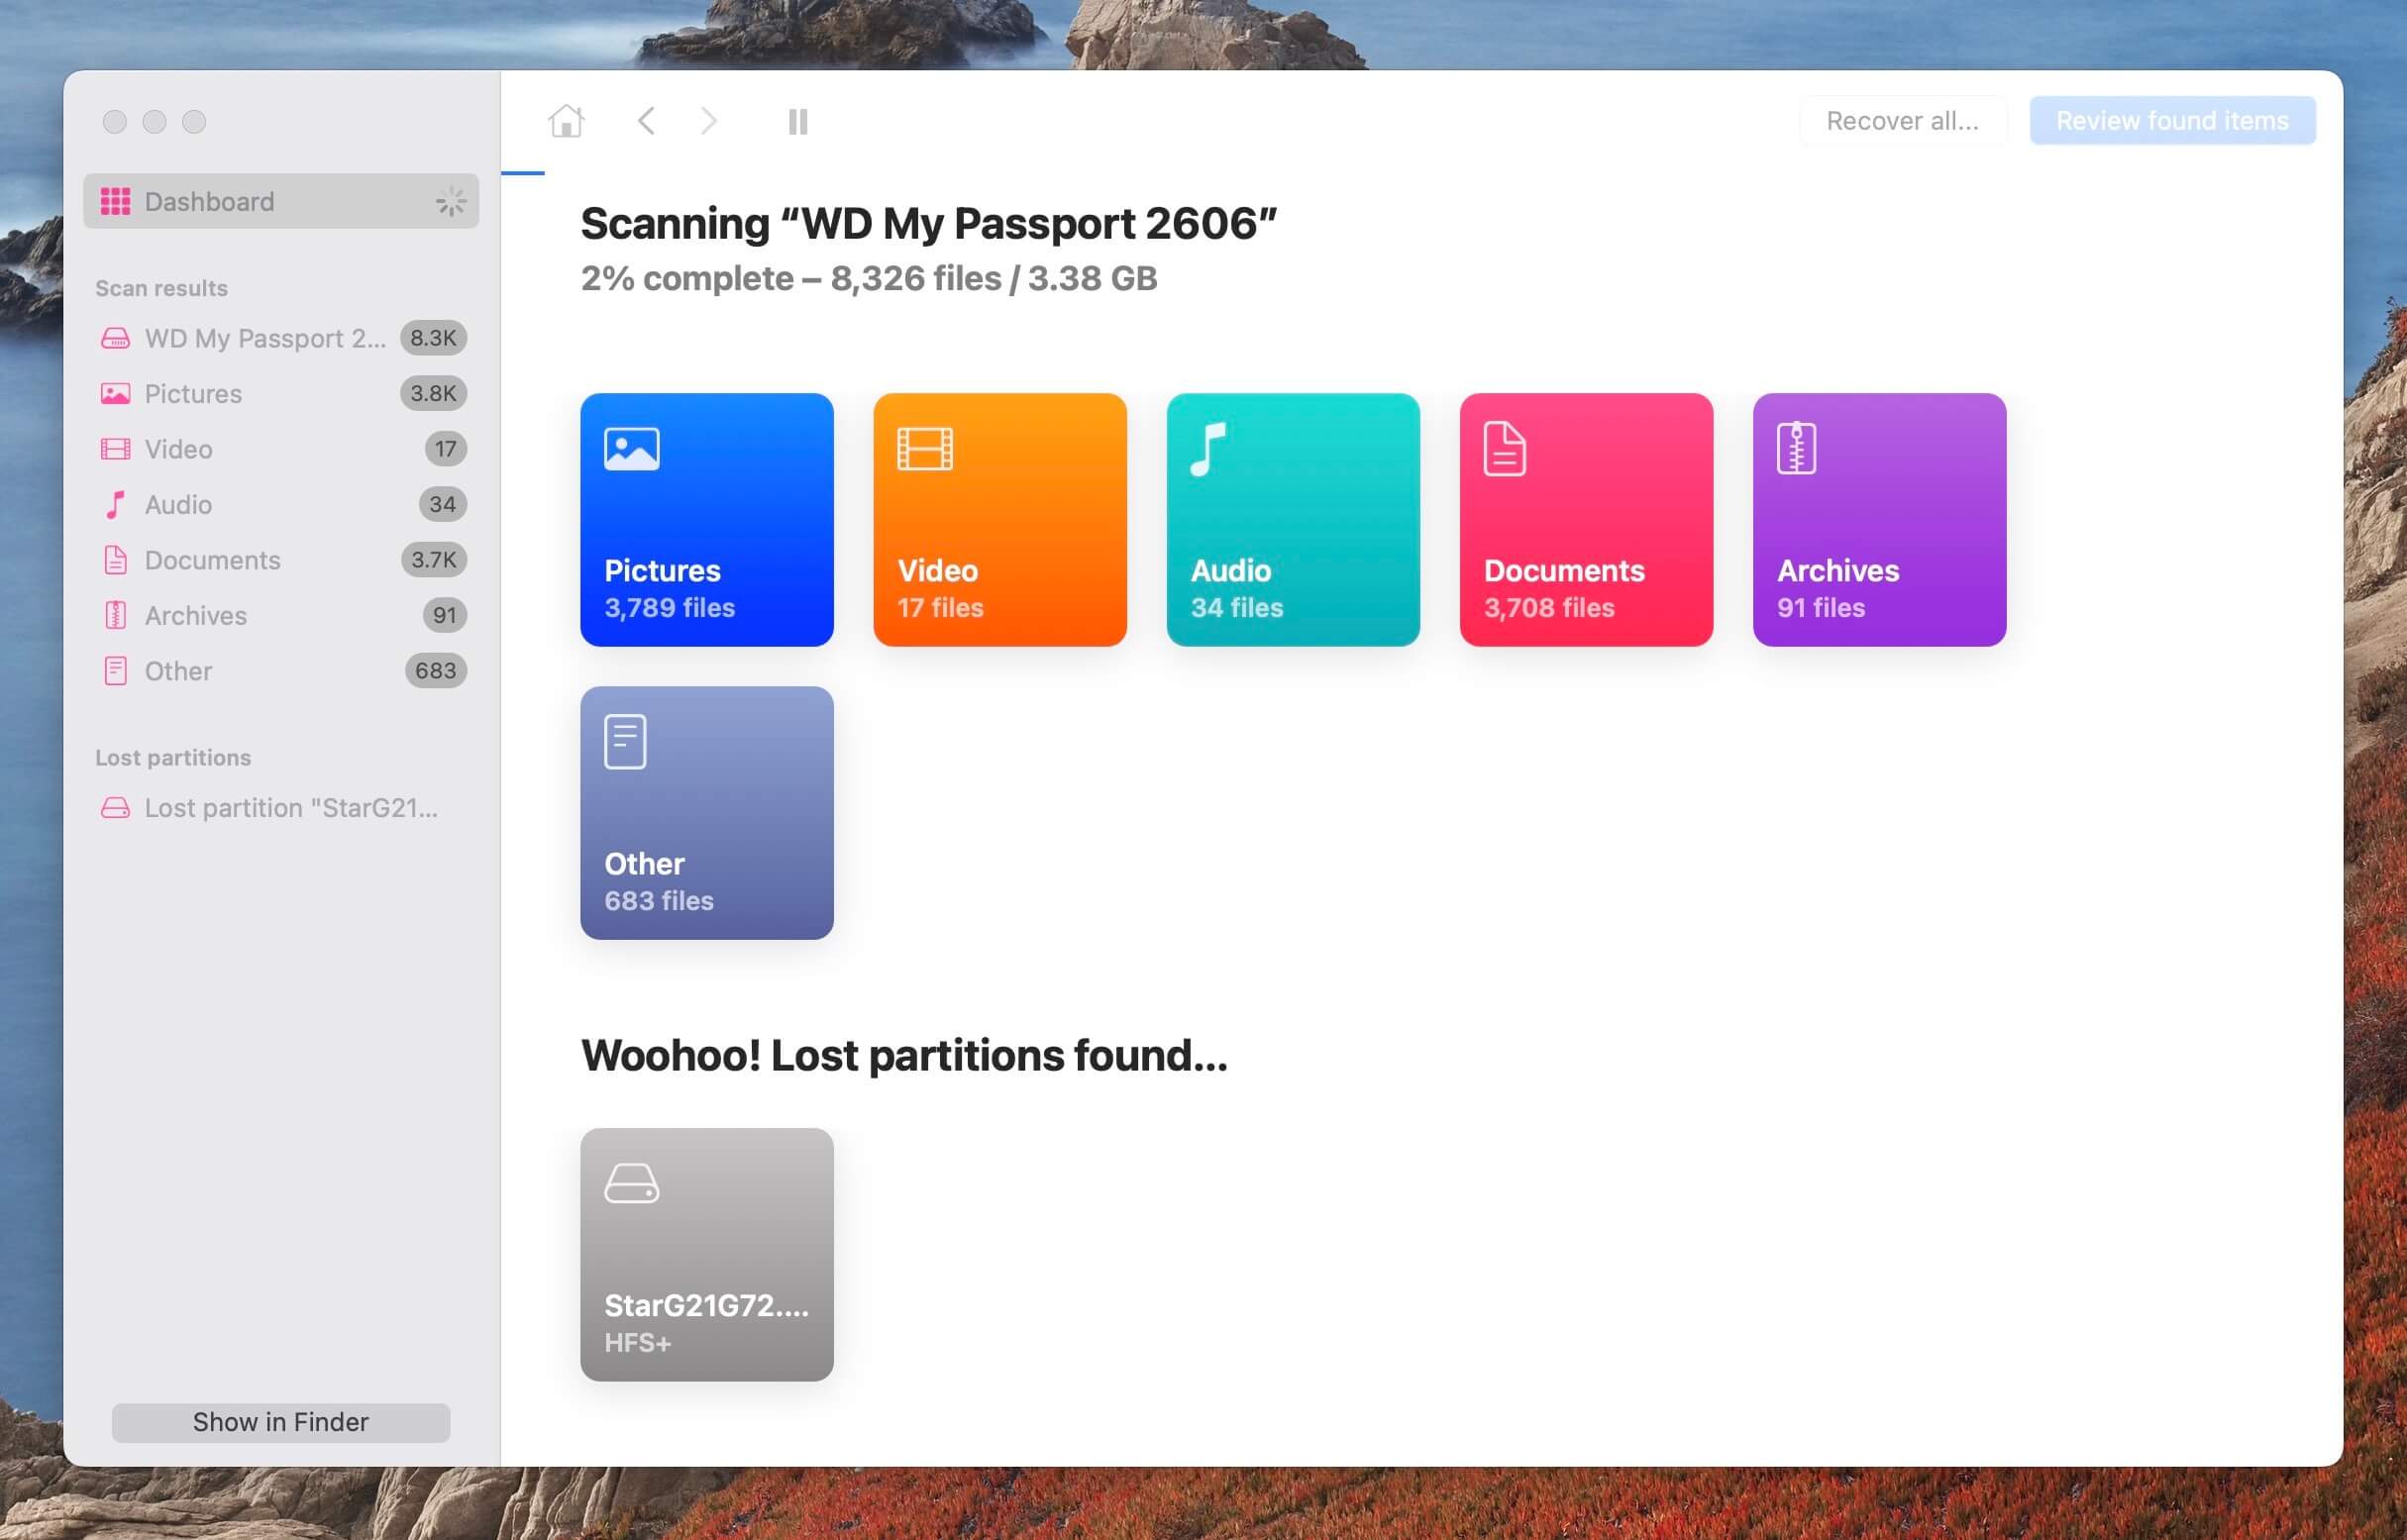
If you want to recover data from your external storage device in general or you’ve already formatted it and realized there was something that you wish you would have saved, we can use third-party data recovery software to scan the storage device for your data.
Disk Drill is one of the best data recovery apps that there is out there today. It works on the latest version of macOS and Disk Drill will run on all Apple Silicon Macs. Now, let’s walk through the steps of using Disk Drill to recover the data from our external storage device.
- Download and install Disk Drill onto your Mac.
- Launch Disk Drill and select your external storage device as the device to scan for lost files.
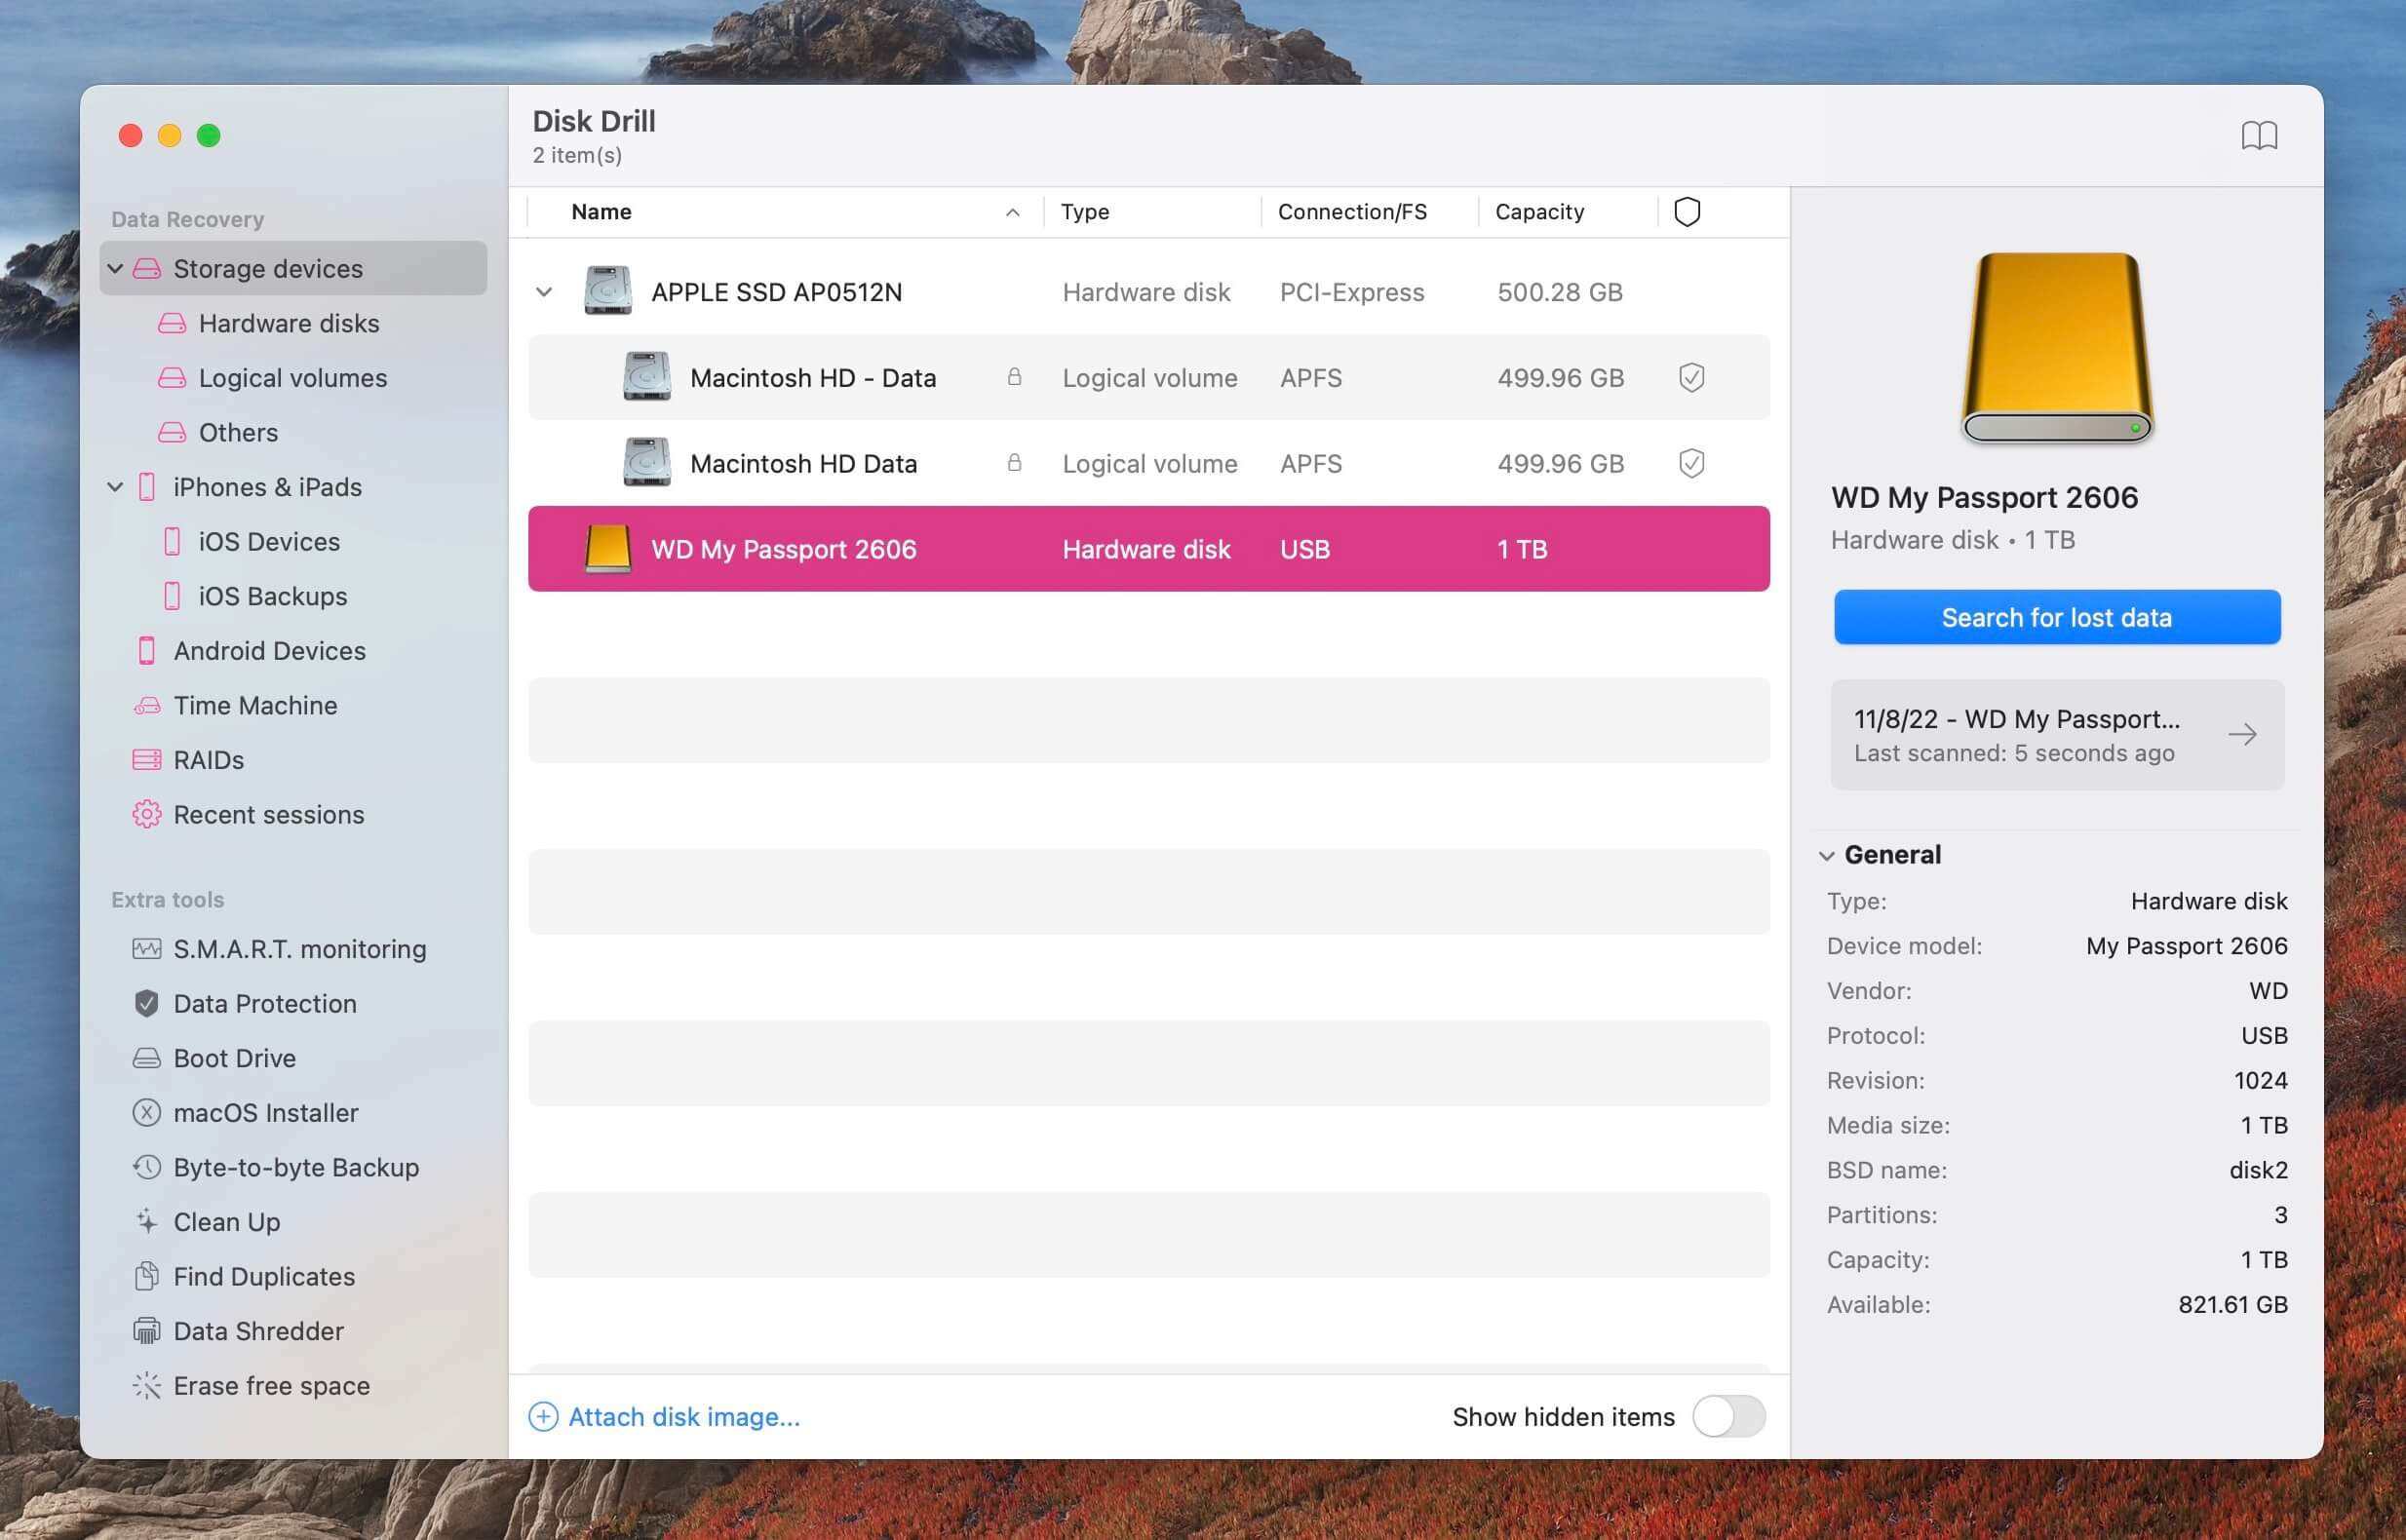
- Wait for the scan process to complete.
- Review what Disk Drill was able to recover. You can use the Preview feature to see the entire contents of the file before recovering it.
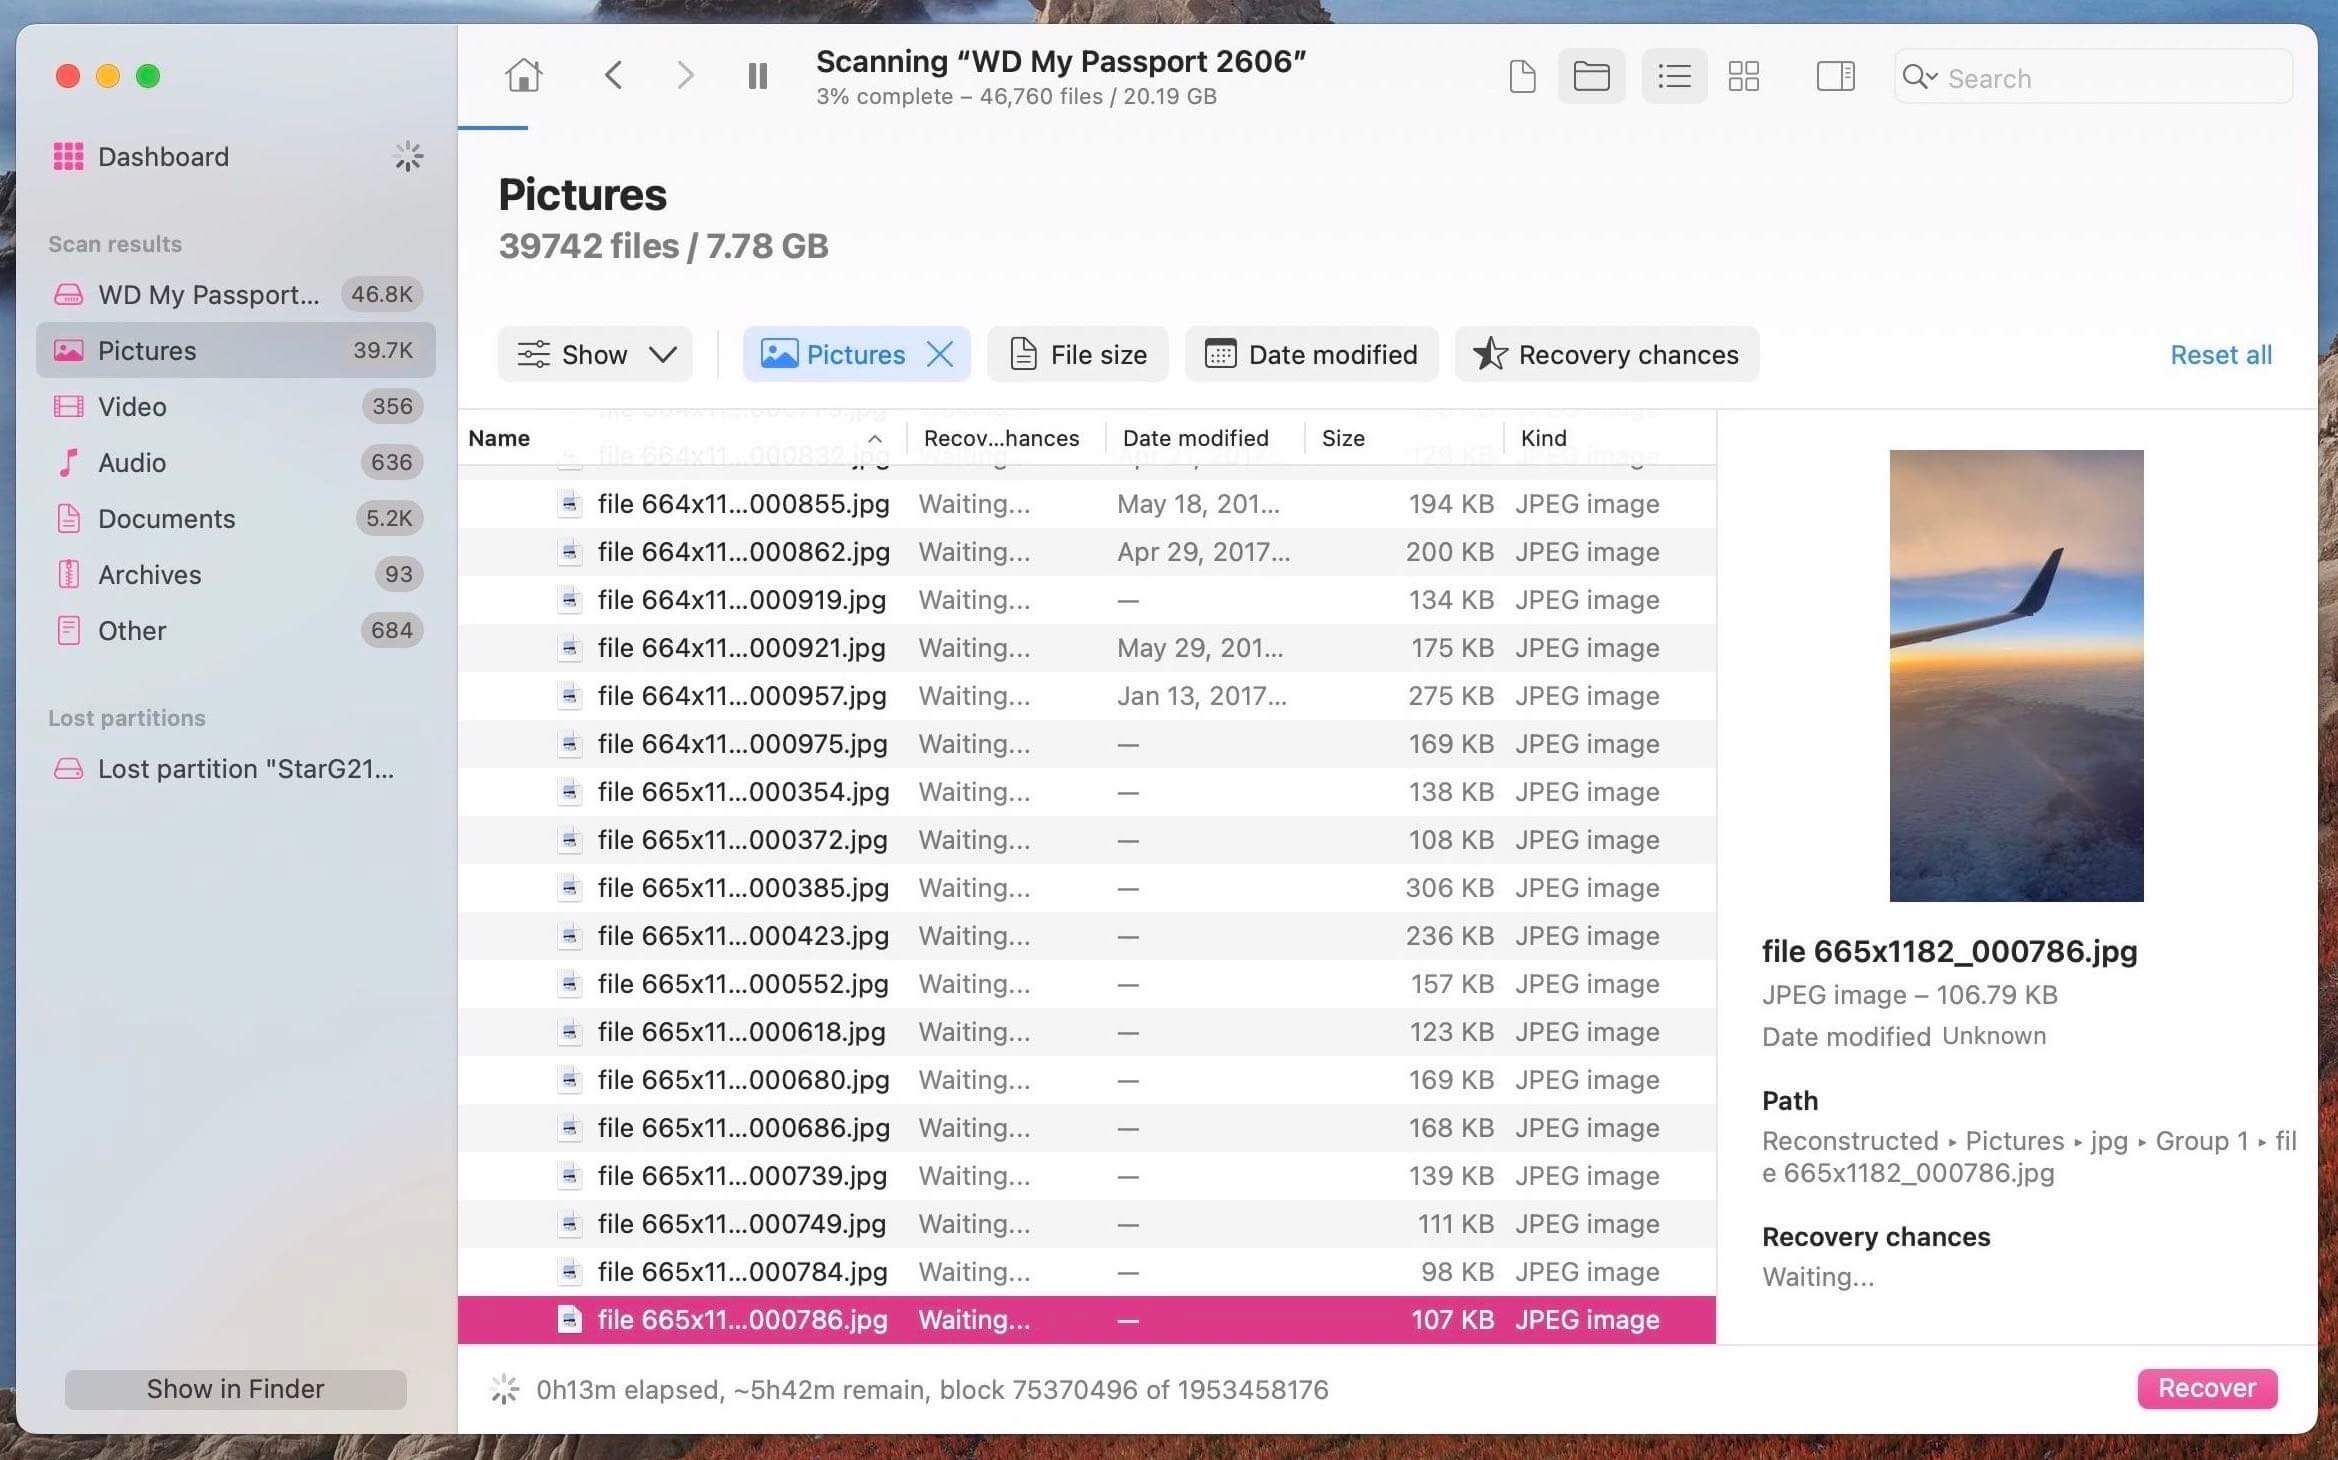
- Select the files that you would like to recover from your external storage device
- Click on the Recover button to recover the files.
That’s all that there is to it! Quite simple and easy to do.
Conclusion
Most of the time, we can use our Mac with no issues. Sometimes, though, we can have issues with a file, or external storage device, or maybe the software on our Mac simply needs an update.
No matter what the case, now you’re prepared to handle an issue like that, and, more importantly, you know how to recover and keep your data safe as you can’t replace that.


