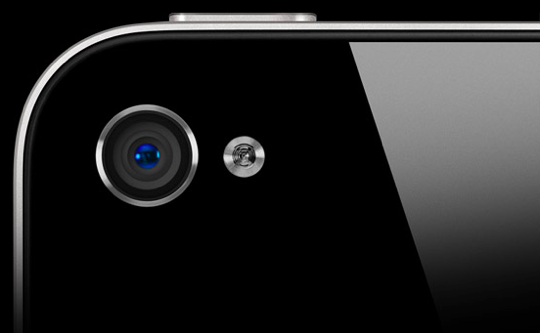
 I’m a nit-picky little punk. Ask any of the truly wonderful creative people with whom I’ve had the pleasure to work (who will no longer work with me). Also, I love taking photos, and I love punching them up to make them look interesting. So it stands to reason that I’d be persnickety about how I go about that as well.
The popularity of filter-rich digital photos has shaped our cultural aesthetics. For people that view photography as more than just a break in the work day, I’ve decided to put together a sort of iPhone Photo Theory 101, detailing the processes I use nearly every day and the apps that make it possible. This page contains just shy of a bazillion photos, so… warnings for those of you on dial-up.
And I promise to go into more details than Marco Arment’s famous how-to.
Acquire
Camera.app
 iOS 5 has made access to the built-in Camera.app quick and easy. Often, this is a fine enough place to capture images quickly. The built-in HDR functionality gives you a little better image to work with (sometimes). Usually, though, I have the time to take a controlled image. When possible, I use other apps to acquire my image.
An aside about RAW
Most DSLRs on the market offer the ability to shoot in a RAW format. By “raw”, the manufacturer means that all data collected by the photosensor is saved into the file.
![]() Most digital photos go through two steps before they are committed to storage — processing and compression. Processing is typically determined by your camera’s settings (like white balance, exposure, etc.). Your camera may have different compression level settings, but most cameras use JPEG-type compression. The resulting image is much smaller with often little discernible difference in quality.
Most digital photos go through two steps before they are committed to storage — processing and compression. Processing is typically determined by your camera’s settings (like white balance, exposure, etc.). Your camera may have different compression level settings, but most cameras use JPEG-type compression. The resulting image is much smaller with often little discernible difference in quality.
You can achieve a great large, lightly compressed JPEG image with most digital cameras. So why use RAW? Raw images are especially helpful when you plan on really manipulating the colors and light values in an image. It gives you the most data possible, comparable to what the film world (literal celluloid film, darkroom processing, Ansel Adams types) might refer to as a “thick” negative.
While you can certainly take RAW images with your DSLR and import them with the affordable iPad/iPhone camera connection kit (and process using an app such as PhotoRaw for iOS), there’s no way to get raw data from the iPhone camera, nor would you probably want to.
But there are ways to cheat, ways to get a rich image with which to begin.
![]()
ProHDR
ProHDR is without a doubt the camera app that I use most. It allows me to take a manually controlled couple of photos, which the app then aligns, merges, and tonemaps based on its built-in algorithm. It often gives me a great image straight out of the box, but being the control freak that I am, I will usually mess with the controls a little bit to get what I feel is the best starting point.
A good “thick” image may actually not look like a great photo. It will be milky and low contrast, though it might be fairly saturated color-wise. The aim is to make sure not to push or pull anything too far so you have plenty of room to play later down the path.
![]()
Camera+
The downfall of ProHDR is that while I can have manual control over where I expose my two photos, it still uses the built-in camera in all its automatic, untamed glory.
Occasionally, I will incorporate Camera+ into the mix. This gives me the control to focus on one spot while using another area of the image for exposure. The added ability to lock white balance is a feature critical for photos outdoors or in mixed lighting scenarios.
With focus and white balance locked, I take two photos of differing exposure levels to get the widest range possible of image data.
often due to insufficient overlapping data from the two source images.
Some options
Owle Bubo + Canon lens adapter
![]() If you want to get super fancy, you can get the Owle Bubo to snap onto your iPhone. An optional lens connector (for Canon or Nikon lenses) from EnCinema gives you near-DSLR power. The combo, however, approaches the price of a low-level Canon or Nikon, so unless you plan on shooting some movies with your iPhone, your money may be better spent on a DSLR body with a kit lens.
If you want to get super fancy, you can get the Owle Bubo to snap onto your iPhone. An optional lens connector (for Canon or Nikon lenses) from EnCinema gives you near-DSLR power. The combo, however, approaches the price of a low-level Canon or Nikon, so unless you plan on shooting some movies with your iPhone, your money may be better spent on a DSLR body with a kit lens.
AutoStitch Panorama
You can make some great panoramas out of your images by using AutoStitch. I’ve found it’s better to AutoStitch your unfiltered bright and dark images before importing the resulting panoramas into ProHDR, but it’s tough work. The photos need to be the same size (resolution) and should end up with roughly identical fields of view. But if you have the time to play with it and get it right, the results can be really great.
Editing your photos
Once you’ve acquired a beautiful image with which to start, the real work begins. While there are a number of photo editing apps available for iOS, the one I have fallen in love with is Photoforge2 from GhostBird Software. (I’ve written about it before, here.)
Photoforge2
Aspect ratio
The shape of your photo may seem like a simple thing, but it can often have a subtle psychological effect on the viewer. Usually, my photos end up the same size as they were acquired. But every now and then, I’ll crop it for one reason or another.
A common reason is to crop out unwanted areas of the image. But among the cropping options in Photoforge2 are various locked-in aspect ratios. The two I use most commonly are 16:9 and 1:1.
![]() The 1:1 or square aspect has obviously been part of photography for ages, but it has recently been re-popularized by Instagram. Of course, it first came to pop culture through the Polaroid camera, and the retrophile culture loves to throw back their photos with this simple adjustment. The square shape intimates a moment frozen in time for posterity, something from the past worth holding on to.
The 1:1 or square aspect has obviously been part of photography for ages, but it has recently been re-popularized by Instagram. Of course, it first came to pop culture through the Polaroid camera, and the retrophile culture loves to throw back their photos with this simple adjustment. The square shape intimates a moment frozen in time for posterity, something from the past worth holding on to.
Because most photos we see all day are rectangles, the square look also instantly brings a retro-hip neo-tech air to your photo. In my opinion, getting a good composition in a square aspect is very difficult, but if achieved, it can be very powerful.
The 16:9 ratio has, of course, been established by widescreen digital television. And though 16:9 (or 1.78:1) is a relatively new widescreen format for motion pictures, using this preset is a quick way to bring a cinematic feel to your shot. Many compositions fit nicely in the 16:9 cropping, and with the right treatment, your photo can feel like a still from some movie we’d all like to see. This subtle adjustment can give your viewer the sense of a captured moment from a larger scene.
(…maybe I’m thinking too much about this.)
![]()
Layers
One of the most powerful aspects of any photo-editing application is the ability to use layers as a non-destructive way to edit your photos. Photoforge2’s layer support is surprisingly robust.
With masking, blend modes, and opacity controls, most of the things for which you’d use layers in a pro-app like Photoshop are available to you in Photoforge2. I’ll share some practical uses of layers along the way.
Curves and other controls
I prefer the look of older film stocks (which these days would be ALL film stocks, I guess). From studying old photos that have been digitized and from the guidance of much more talented colorists than I, I’ve learned a bit about the way the old stocks (negative and print) took light. I use this knowledge a lot for my films, but I bring the same sensibilities to my personal photos.
While there have been great advancements in digital photo technology, no one has really captured the filmic curve. So no matter how the image is acquired (even with an expensive DSLR), my first adjustment is to take my thickened negative and give it a filmic coloring.
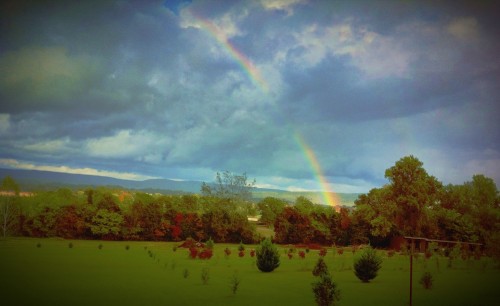
Sometimes this is just a subtle adjustment, but often I want to bring some nostalgia and timelessness to the photo. The other day, my mother remarked that a photo I sent her “looks like something from an old calendar”. I considered this a high complement. Just looking at the photo immediately took her mind to something from the past — timelessness achieved!
Vignettes and other effects
Apart from the various image controls, Photoforge2 offers up some built-in effects, most of which I don’t use.
![]() I do make a lot of use of the vignette feature, though. I often layer multiple, very light vignettes as a way of highlighting a focal point. Even greater control may be achieved by using layers and masking, but painting a mask with Photoforge2 is kinda clunky, especially on the iPhone. (If GhostBird Software ever adds in a Gradient painter, the layer mask would be the better way to go.)
I do make a lot of use of the vignette feature, though. I often layer multiple, very light vignettes as a way of highlighting a focal point. Even greater control may be achieved by using layers and masking, but painting a mask with Photoforge2 is kinda clunky, especially on the iPhone. (If GhostBird Software ever adds in a Gradient painter, the layer mask would be the better way to go.)
Layers and masks are pretty useful for blurring vignettes. I don’t use them often, but it’s really the only way to make that happen. Dupe the layer, add a Gaussian blur, add a mask, and fingerpaint with concentric shapes from black to white (transparent to opaque) to get close to what you want.
Textures
One interesting feature of the PopCam! FX is the ability to add textures to your photos. Especially if you’re going for an old photo look, this can be a neat way to color, stain, or grunge up your photo. But the developers have given you even more control over this functionality in the Photo Properties pop-up. Choose a built-in texture and choose a blend mode and opacity level.
Curation
Cleaning up your Camera Roll
Having your photo go through multiple stages is great for your photo, but makes a mess out of your Camera Roll. iOS 5 gives you the ability to create photo albums so you can quickly locate your selects. When you go to clean up your camera roll, Photos.app will let you know if one of the images you’ve selected for deletion has been put into an album.
Note that Photoforge2 projects are BIG. I’ve filled up my 32GB iPhone with them more than once. Once I’ve created my final image, I will usually delete the Photoforge2 project. The only reason for keeping the project is if I think I might tweak the photo some more or if I particularly like the overlays and textures. I can open the project, create a new layer above the base layer by importing another image to give it the same treatment as the original.
Photo Stream could be another way to back up the photos in your camera roll. While these methods make for a messy camera roll (and therefore a messy, un-editable Photo Stream), it’s good for snapping pictures on your iPhone, then using your iPad for Photoforge2.
Catalog and Share
![]() While you can catalog your photos on your Mac using iPhoto or Aperture, Photoforge2 allows you to export to a number of online options such as Twitter, Facebook albums, flickr, Picasa, tumblr, and Dropbox.
While you can catalog your photos on your Mac using iPhoto or Aperture, Photoforge2 allows you to export to a number of online options such as Twitter, Facebook albums, flickr, Picasa, tumblr, and Dropbox.
![]() I use Photo365 to remind me to take a picture every day. Even though I’ve missed a few days, it’s made a nice visual journal, reminding me of where I was and what I was doing on a given date. It also exports to Twitter, Facebook, and flickr.
I use Photo365 to remind me to take a picture every day. Even though I’ve missed a few days, it’s made a nice visual journal, reminding me of where I was and what I was doing on a given date. It also exports to Twitter, Facebook, and flickr.
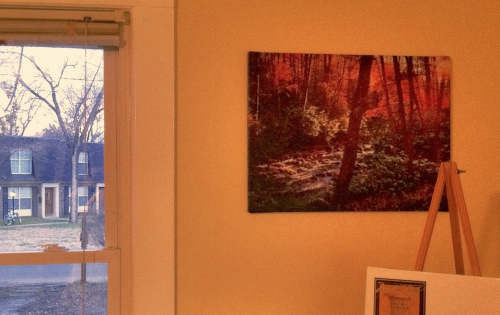
If you’ve amassed some really great photos, a cool way to share them with family or friends is as a gift. iPhoto allows you to create coffee table books of your photos. A number of online sites, such as CanvasPeople, will put your photos on canvas for a reasonable price, turning your pocket hobby into a gallery masterpiece.
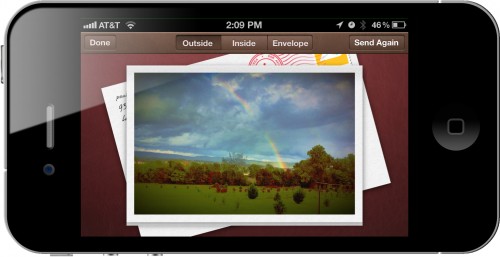
The new iOS Cards.app allows you to send custom greeting cards using photos from your iPhone’s Camera Album. While I initially rolled my eyes at the Cards app when it was announced, I’ve used it several times. It’s a great way for a hi-tech geek who doesn’t even use pen and paper any more (like me) to connect with someone who still has an appreciation for a personal paper card in the mailbox (like my mom).
Conclusion
This is a ton of info about what should be a simple process of snapping a camera phone pic and showing it to people. While I’ve gone into a great bit of detail, realize that I rarely spend more than a few minutes doctoring these pictures. Sometimes I do it on the spot, sometimes I do it while conversing with my travel companions, and sometimes I’ll use it as a way to wind down in the evening before bed.
The key is to find out what resources are available to you, use them often, and do not fear adding to the complexity of your process.
And what’s more? The total current cost of every iOS app I’ve mentioned in this article is $19.94 (and over half of that is just for PhotoRAW). Head to the links below to learn more.
Your story
What apps do you use? Is there something you use that’s indispensable that I’ve failed to mention? Do you have quick tips or tricks that might be valuable to our readers? Leave it in the comments.
Photo Credits: App Advice, The iPhone Nerd, The iOS Post, Studio Nemo, James Boyd, Anandtech

