OmniOutliner ($19.99) by OmniGroup is a self-standing outlining application for the iPad. Like all of OmniGroup’s apps, OmniOutliner is well-designed, highly customizable, and a pleasure to use. It’s also expensive and has a bit of a learning curve.
When you first open OmniOutliner, you are presented with a document that introduces the main elements of the application in (of course) outline form. Reading through this outline teaches you the basics of how to use the application. Other documents are also provided as examples of the various types of outlines you can produce in OmniOutliner, including a book list, notes, and a budget report.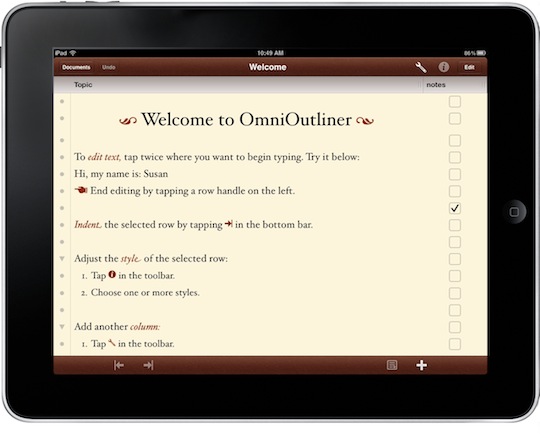 To open a blank new document, go to the documents interface and click the plus button. You can create a new document or choose to duplicate a document. This feature allows you to use old outlines as templates for new ones. The new document appears on a clean, minimalist screen. To begin, simply type on the line where the cursor is. Hit return and you get a new line. You can also use the plus button above the keyboard.
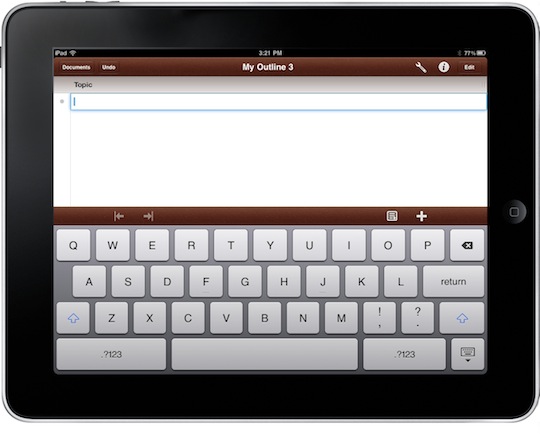 To create subtopics, press the right arrow above the keyboard. It would be nice to have the option to use the tab key for this purpose, since the arrow key requires you to take your hand off the keyboard. Unfortunately, the OmniOutliner keyboard lacks a tab key. If you need to unindent a line, you can use the left arrow key or delete. Again, I wish OmniGroup had provided the standard keyboard keys so you could use shift-tab to unindent. In addition to outline levels, you can also create notes underneath any line using the button that looks like a page of notes. For creating basic outlines, these commands are all you need.
But OmniOutliner offers extensive customizable features for making your outlines as complex as you like. Tapping the wrench icon at the top of your screen opens up the formatting tools.
 Columns
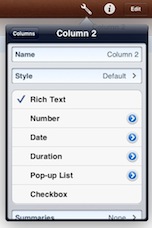
The first tab is labeled columns, and here you can add as many columns as you wish to your outline. Simply tap “new column” and the pop up screen opens, giving you the option of titling the column, choosing a style for the column (see below), identifying the type of column (text, number, date, duration, pop-up list or checkbox), and choosing whether or not to include column summaries. Once you’ve added all the columns you want, you can go back to the main column dialog and rearrange them using the edit button.
 Styles
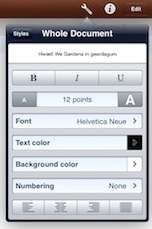
Styles is the heart of OmniOutliner, because customization is really what sets OmniOutliner apart from other outlining apps. The first style button is for formatting the entire document. When you tap on it, a formatting page appears. You can choose font styles and size, text color, background color, numbering, and justification. These changes affect the outline levels of the entire document, so, if you choose a numbering style, all levels of your outline will have the same numbering style. And here’s where things get confusing. In order to create a traditional style outline, for example, you can’t set things up in the Whole Document dialog like you might expect. Instead, you have to go back to Styles and either use the already-created levels (title, subtitle, heading 1, etc.) or create your own. So, if I want an outline that has four levels with different styles and numbering for each level, here’s what I must do to create it:
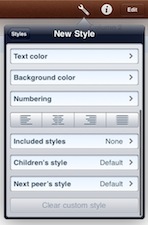 First, I must create a style for each level in my outline, so I tap “New Style” in the Style dialog.
Second, I have to create a name for the style, choose a font, text color, and background color, then create the numbering method I want. I have to do this for each level in the outline, so I must go through this process four times.
Third, in order for a parent level in the outline to interact properly with a child, I must go back to each parent style, scroll down to “children’s style” and insert the appropriate style for that child. None of this is automatic. You have to go in and insert the style for each child in the outline. It’s taken me over an hour to figure out how to explain this in a simple fashion, and I still can’t do it! That’s how complicated this process is — at least it was for me.
Thus, in order to get a reasonably simple outline format, you have to go through an awful lot of steps. And once you’ve done all this, if you accidentally hit “clear custom style,” it’s all gone and you have to start over (yes, this comes from experience). Another negative is that any custom styling you’ve done doesn’t transfer over to new documents. In other words, styles are not system wide, they’re unique only to each document. If you want to re-use the styling you’ve painstakingly created, you must use your document as a template. In sum, styling documents in OmniOutliner seems unnecessarily complicated and tedious.
View
The view button (also under the wrench icon) allows you to choose a font size for viewing, a background color, and alternate row color to make the document easier to read. These viewing options do not affect the formatting of the actual document.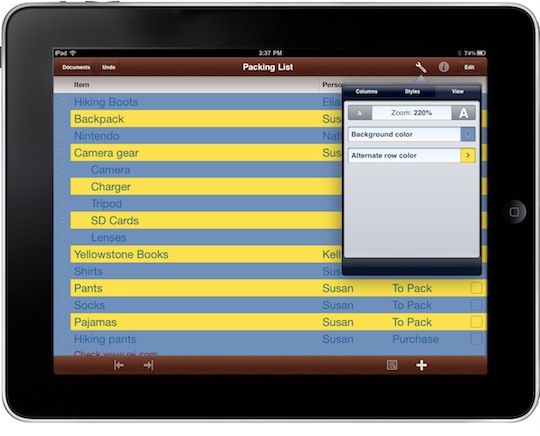
Quick Style Button
One handy feature in OmniOutliner is the quick style button (the circle icon with the “i” at the top of the screen). If you want to restyle just one line in your document, you can use this button to do so.
Outline Edit Button
Once your outline is complete, you might want to rearrange, move, group, or delete topics. The edit button (at the top right of your screen) gives you all those options.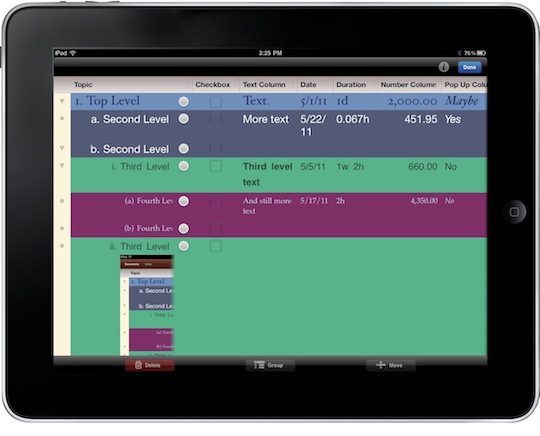
Import and Export
OmniOutliner is capable of importing documents in OmniOutliner 3 for Mac and OPML formats. You can also export your iPad-created outlines in OmniOutliner 3, OPML, HTML, or plain text formats. Import and Export currently must be done via WebDAV, iDisk, or email, though Dropbox support is planned for the future.
Links and Attachments
Web addresses automatically become links in OmniOutliner. Plus, you can insert images into your outlines. However, image insertion must be done via copy and paste which makes this feature rather cumbersome. In order to insert an image, you must exit OmniOutliner, copy the image, open OmniOutliner again, find your insertion point, and paste the image. And I discovered that most images are way too big to fit neatly in the outline, and you can’t resize them in OmniOutliner using handy drag arrows. Instead, you must resize the image in an external photo application and make it fit by trial and error. OmniGroup needs to make this process much easier for it to be useful.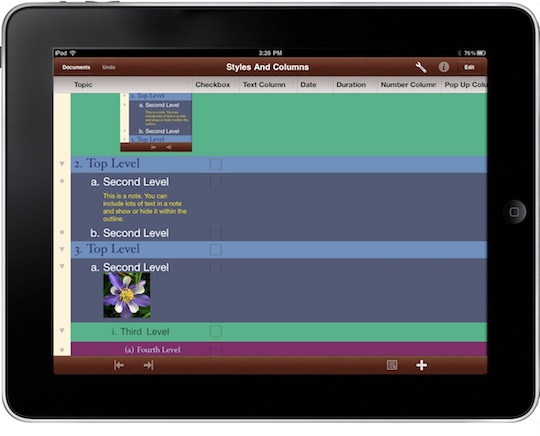
What’s Macgasmic
OmniOutliner offers tons of customization options, a beautiful interface, and the ability to import and export documents, including OPML docs. It allows you to create complex, multi-column outlines with text, numbers, and pop-up options, and you can even insert photos into your outlines. Viewing outlines on the iPad is a terrific experience since you can hide columns underneath the main column with the swipe of a finger, and you can hoist subtopics underneath main topics using the arrows along the left side. When it comes to creating beautiful, intricate outlines, OmniOutliner is the app to choose.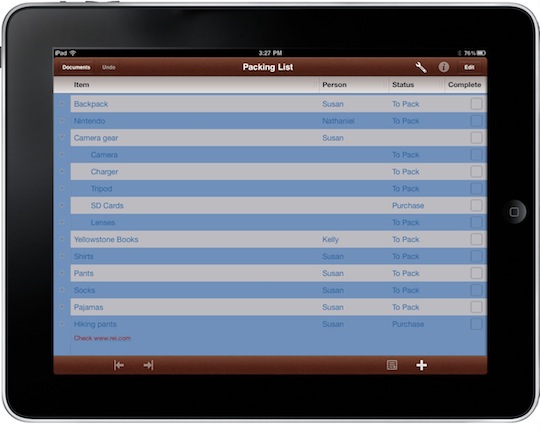
What’s Not
The biggest strength of OmniOutliner, its customizability, is also its greatest weakness. This app is not easy to use. Styling an outline requires numerous steps and the options are almost overwhelming. Plus, styles created in one document do not appear as options in other documents. In order to use a previously created style, you have to duplicate the document and use it as a template. If OmniGroup created some basic outline styles, such as legal style, basic number/letter style, etc. that could be applied to a document quickly, this app would be much more user-friendly. Currently, the only way to export and import documents is via WebDAV, iDisk, or iTunes. Fortunately, Dropbox integration is apparently on the docket. Although you can insert photos into outlines, it’s a pain because the only method is copy and paste. OmniGroup should include some sort of “import from Photos” option into the app and make it possible to resize photos easily.
Summary
OmniOutliner is certainly another excellent application from OmniGroup. Its customizability, beautiful interface, and OPML import make it a great addition to the writing and organization apps for the iPad. However, it suffers from an unintuitive interface that makes creating even simple outlines unnecessarily difficult. Plus, adding pictures is cumbersome, and there’s no integration with Text Expander or Dropbox. At $19.99, OmniOutliner is considerably more expensive than other outlining apps [such as CarbinFin’s excellent Outliner ($4.99)], so if you don’t need all the customization that OmniOutliner offers, you can probably find a simpler, much less expensive app to meet your needs.

